13 Rental Friendly Room Decor Craft Ideas for Apartments That Spark Attention
Welcome, crafty roommates and apartment explorers! If you’re itching to deck out your space without putting holes in the walls or breaking the lease, you’re in the right place. These ideas are fun, portable, and totally renter-friendly—trust me, your walls won’t know what hit them.
You’ll love these projects for their punchy style, easy execution, and share-worthy vibes. Grab a coffee, pick a favorite, and start imagining the compliments you’ll receive from guests. Let’s get crafting!
1. Floating Shelf Gallery That Stays Put (Emphasis on Wall-Cling Frames)
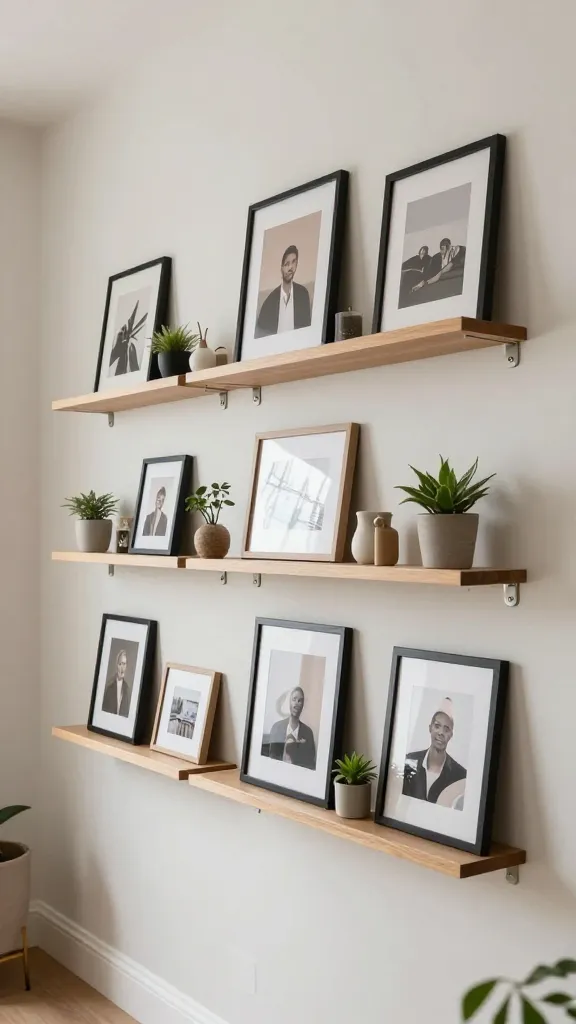
Picture a chic wall of art that looks gallery-ready but won’t mar paint or drywall. This floating shelf gallery uses freestanding shelves and removable frames to create a layered, modern look. It feels custom without the commitment.
Materials
- 3–5 small, lightweight floating shelves (adhesive or tension-mounted if allowed)
- Removable picture frames or printable art
- Double-sided mounting strips or adhesive hooks (no-drill option)
- Assorted small plants or trinkets
How to Make It
- Arrange shelves in a loose grid on the wall, planning height differences for visual interest.
- Pop removable frames with your favorite printable art or photos.
- Layer with small plants or decor items for texture and freshness.
Pro tips: Start with a color palette to keep the look cohesive. Use textured frames or mats to add depth. This is perfect for a living room or hallway—easy to rearrange when you rotate art.
Who’ll love it: Minimalists and design lovers who crave a polished display without paint damage. Seriously, you’ll love how fuss-free it is.
2. Tassel Garland Wall Accent

Brighten a blank wall with a playful tassel garland that’s ultra cozy. The tassels catch light and movement, turning any dull nook into a focal point.
Materials
- Twine or jute string
- Colorful embroidery floss or yarn
- Scissors
- Wooden dowel (optional) or command hooks
How to Make It
- Cut many strands of floss in 6–8 inch lengths.
- Fold in half, loop onto twine, and tie tight knots to create tassels.
- Space tassels evenly and hang along a doorway, window, or above a bed.
Pro tips: Mix matte and metallic threads for an updated vibe. Leave a little space at the ends so the garland reads airy and not bulky.
Who’ll love it: Boho dreamers and anyone who wants a quick mood boost from color and texture. FYI, it packs small and ships easy if you’re moving soon.
3. Removable Peel-and-Stick Garden Murals
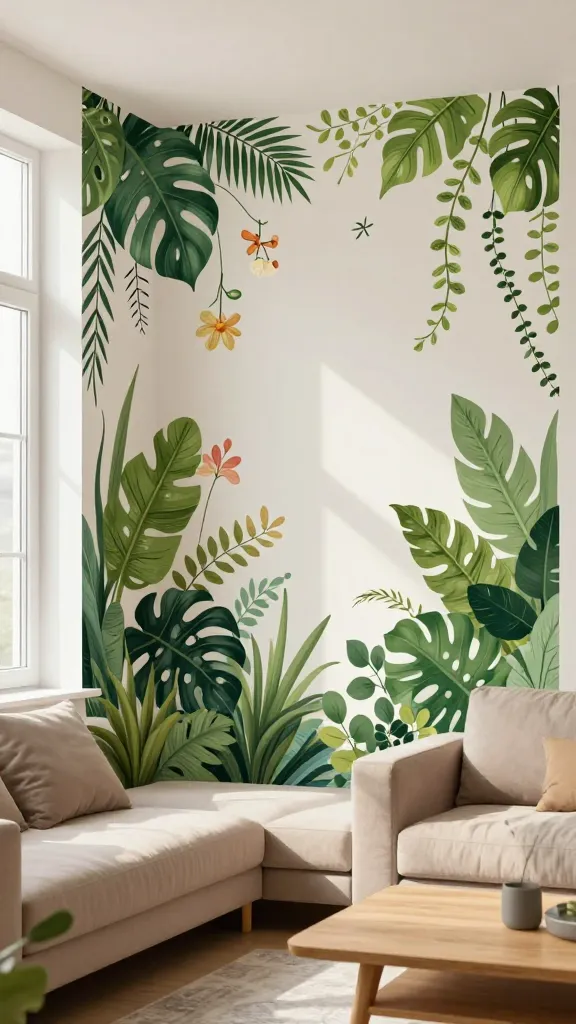
Turn a plain wall into a whimsical garden with removable wall decals that feel like a mini jungle. No nails, no paint, just big impact.
Materials
- Removable wall decals in chosen garden motifs
- Measuring tape and level (optional)
- Soft microfiber cloth for smoothing edges
How to Make It
- Plan a layout on the floor first to ensure balance.
- Peel and press decals from largest to smallest, smoothing with a cloth to avoid air bubbles.
- Step back and adjust as needed for a lush, cohesive scene.
Pro tips: Use decals at eye level for the strongest impact. Mix different shades of greens for depth. Gift-ready for plant lovers who want a green room without real plants.
Who’ll love it: Apartment-dwellers who crave nature-inspired vibes and renters who want a showpiece wall without committing to color or texture changes. You’ll love the clean removal at move-out.
4. Upcycled Magazine Tray Wall Organizer
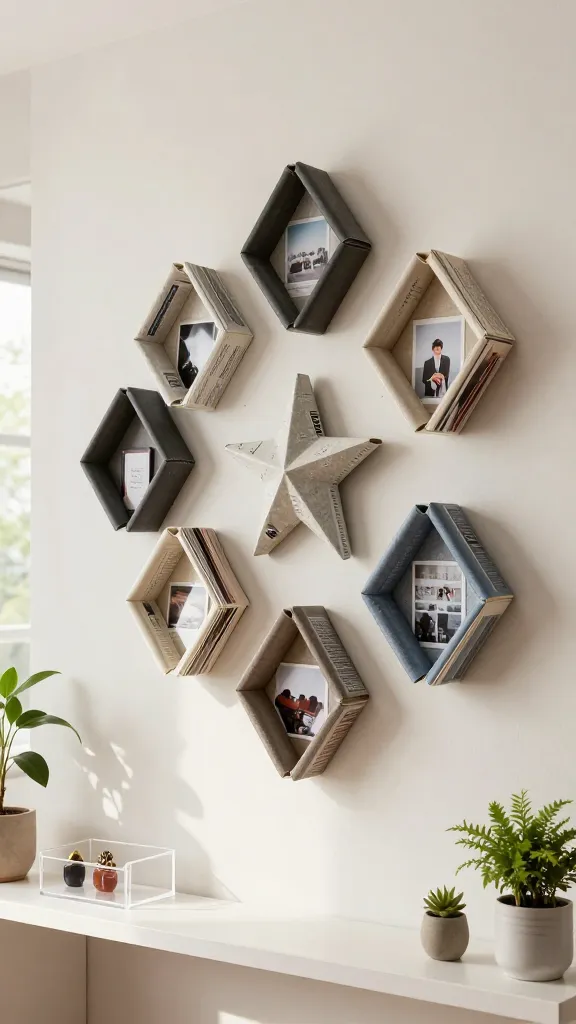
Turn forgotten magazines into a textured wall scene that actually looks intentional. This is a clever way to display small decor, photos, or keepsakes while saving space.
Materials
- Old magazines or thin cardboard
- Craft glue or hot glue gun (cool-tip if needed)
- Adhesive mounting strips
- Clear acrylic tray or decorative box (optional)
How to Make It
- Roll magazines into tight tubes and glue them into geometric shapes on a backing board.
- Mount the finished piece to the wall using adhesive strips.
- Option: place a shallow tray on the bottom for keys or small jewelry.
Pro tips: Choose a color story and stick with it—grays, blush tones, or bold primary colors all work. It’s a conversation starter and a great way to rescue forgotten mags.
Who’ll love it: Creative recyclers and folks who want a tactile, wall-mounted art piece without heavy lifting or drilling.
5. Velvet Cushion Covers on No-Sew Pillow Forms
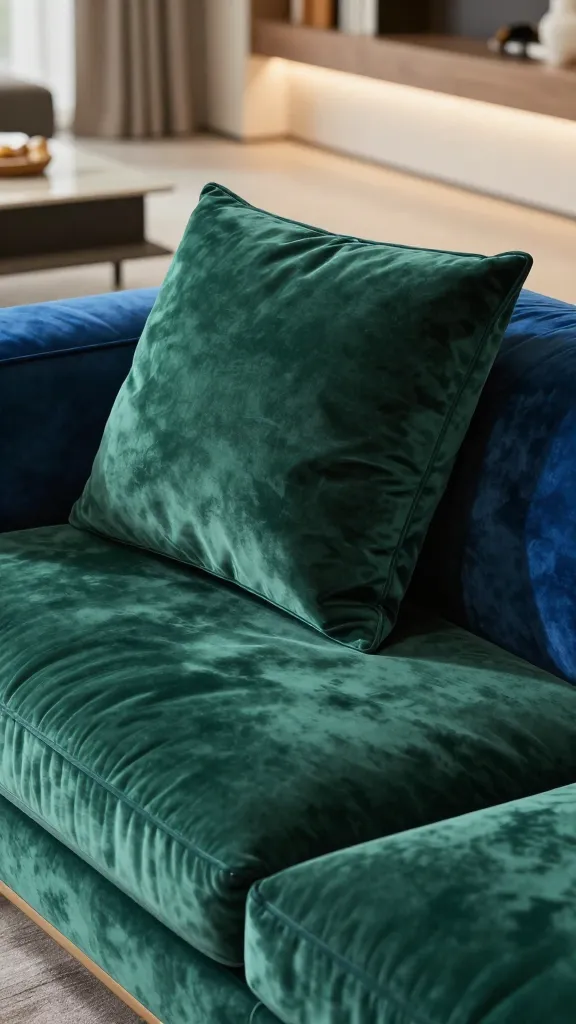
A luxe update for any sofa—without sewing, nails, or renting a sewing machine. Plush velvet covers slip onto store-bought cushions to instantly upgrade texture and color.
Materials
- Printable velvet fabric or pre-cut velvet fabric (stretchy or wide-width works best)
- Comma-free pillow inserts or no-sew pillow form
- Fabric glue or Iron-On adhesive (optional)
- Ribbons or tassels for edging (optional)
How to Make It
- Wrap velvet around the pillow form and secure with fabric glue or a few careful stitches (if allowed).
- Trim edges for a clean finish and add a decorative border if you like.
Pro tips: Choose rich jewel tones for a luxe look that reads high-end on camera. You’ll adore how quickly this changes a room’s vibe.
Who’ll love it: Cozy decor lovers and anyone who wants instant high-end texture without a big DIY commitment. Seriously luxurious with minimal effort.
6. Mini Washed Canvas Art Pillows
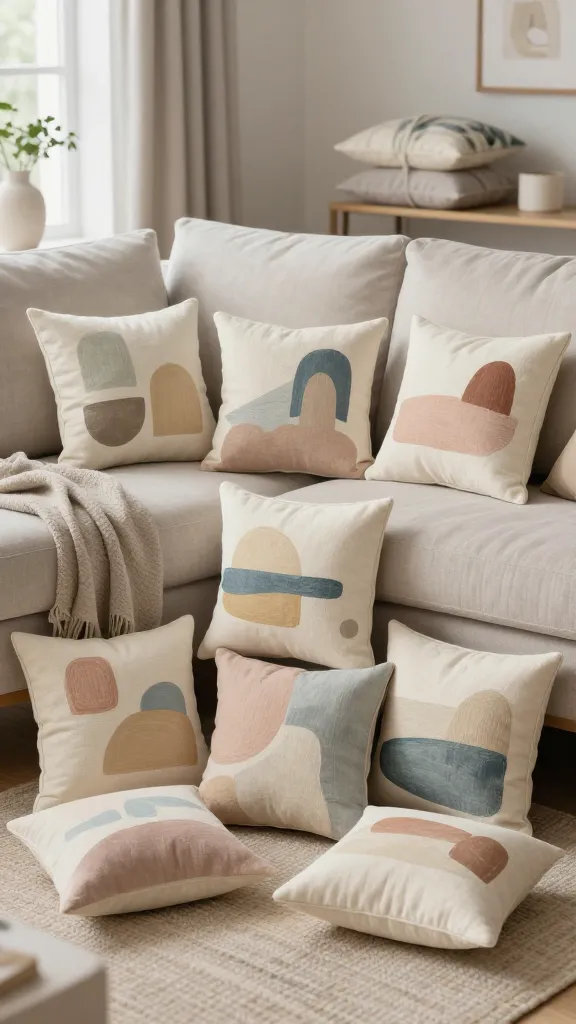
Turn small canvases into soft, personalized art pillows. A quick paint-and-pillow combo that feels gallery-worthy but wearable as decor.
Materials
- Small canvas panels (6×6 or 8×8)
- Acrylic paints and brushes
- Fray-check or fabric glue
- Small pillow inserts or fabric covers
How to Make It
- Paint simple shapes or abstract patterns on each canvas.
- Attach the painted canvases to small fabric covers or create a hanging pillow sleeve.
Pro tips: Use a cohesive palette and repeat one motif across pieces for rhythm. Perfect for a shelf stack or a headboard backdrop.
Who’ll love it: Art lovers who want portable, soft decor with a handmade touch. You’ll smile every time you see them on your couch.
7. Rent-Friendly Peel-and-Stick Wallpaper Panels
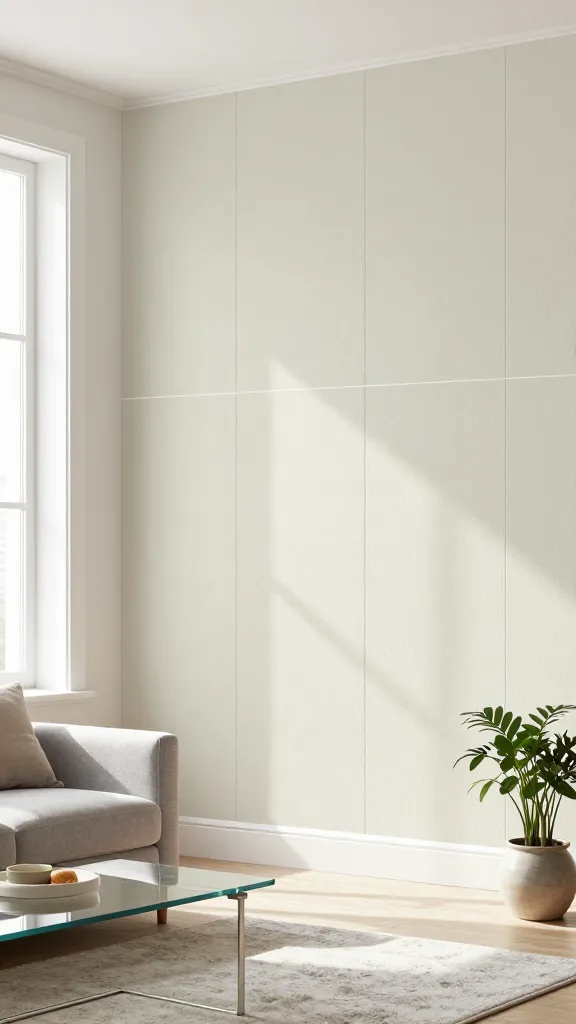
Adorn a room without committing to full-wall wallpaper with peel-and-stick paneling. It feels luxe, is incredibly forgiving, and removes in a snap when you move out.
Materials
- Peel-and-stick wallpaper panels (self-adhesive)
- Ruler or laser level for alignment
- Utility knife for trimming
How to Make It
- Plan a grid layout on a feature wall and carefully apply panels from top to bottom.
- Trim edges for clean lines and ensure seams are tight.
Pro tips: Start with a small accent wall to test the adhesion and removal. Neutral tones give a timeless look; bold prints scream personality.
Who’ll love it: Renters who crave a bold aesthetic but want the option to undo it without leaving marks. You’ll appreciate the quick transformation and the “wow” factor.
8. Glow-Under-The-Surface Resin Coasters Display

Bring an artsy glow to your coffee nook with resin coasters that glow softly in the dark. It’s a simple, dazzling, and conversation-worthy project.
Materials
- Epoxy resin kit (clear)
- Glow-in-the-dark powder or pigments
- Silicone coaster molds
- Protective gloves and a well-ventilated area
How to Make It
- Mix resin and glow pigment according to kit instructions.
- Pour into molds, cure, and pop out once set.
- Arrange on a tray or coffee table for a soft nighttime glow.
Pro tips: Add a thin layer of resin as a top coat to prevent scratches. FYI, place away from heat sources to maintain glow longevity.
Who’ll love it: Nighttime loungers and those who adore moody, ambient lighting. Seriously, it’s mesmerizing after dark.
9. No-Staple Tapestry Wall Hang

Craft a lightweight tapestry using fabric scraps and a simple frame. This is a tactile, colorful way to soften walls and bring warmth to a room.
Materials
- Fabric scraps in coordinating tones
- Wooden embroidery hoop or a lightweight frame
- Fabric glue or sewing pins
- Twine for hanging
How to Make It
- Arrange fabric pieces on a backing cloth in a pleasing pattern.
- Secure with glue or pins inside the embroidery hoop or frame.
- Hang with twine from a command hook or adhesive hanger.
Pro tips: Layer textures—knits, canvas, and satin ribbons add depth. This makes a bold statement above a bed or reading chair.
Who’ll love it: Texture lovers and anyone who wants a big art piece with a small footprint. You’ll adore the cozy, boho energy.
10. Magnetic Whiteboard Gallery Wrap

In a small apartment, a magnetic whiteboard becomes a genius multi-purpose art wall: calendar, doodle board, and photo display all in one.
Materials
- Magnetic whiteboard sheets or a ready-made magnetic board
- Decorative washi tape or paint for borders
- Mini magnets or clips
- Command strips for mounting (optional)
How to Make It
- Decorate the frame boundary with washi tape or paint a border.
- Attach photos, notes, or mini prints with magnets.
- Mount or place on a desk or mantel using removable strips.
Pro tips: Create a rotating “inspiration board” with a weekly color cue. A practical, ever-changing centerpiece for a kitchen or study nook.
Who’ll love it: Students and busy professionals who crave a functional, stylish space for reminders and memories. You’ll thank yourself every week.
11. DIY Plant Hangers From Everyday Materials
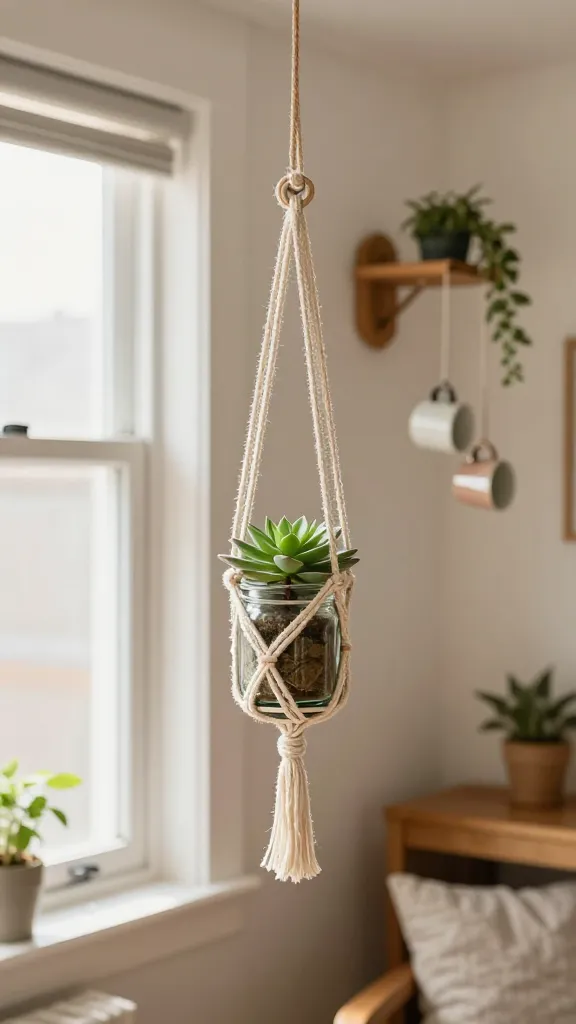
Greenery always brightens a space, and these no-fuss plant hangers use common household items. It’s greenery with a twist and no heavy mounting.
Materials
- Jute cord or decorative ribbon
- Repurposed teacups or small glass jars
- Plastic hooks or adhesive hooks
- Succulent or air plant sets
How to Make It
- Loop cords into a simple macramé pattern or knotting style to hold the pot.
- Attach to a ceiling hook or wall-mounted sconce with a plant tray.
- Place a small plant and enjoy the greenery in a floating display.
Pro tips: Use a mix of textures—soft ribbons with rough jute adds visual interest. A trio of hangers at different heights creates a dynamic corner.
Who’ll love it: Green thumbs and space-conscious folks who want vertical greenery without heavy installation. You’ll adore the airy vibe.
12. Faux Marble Contact Paper Accent Panels
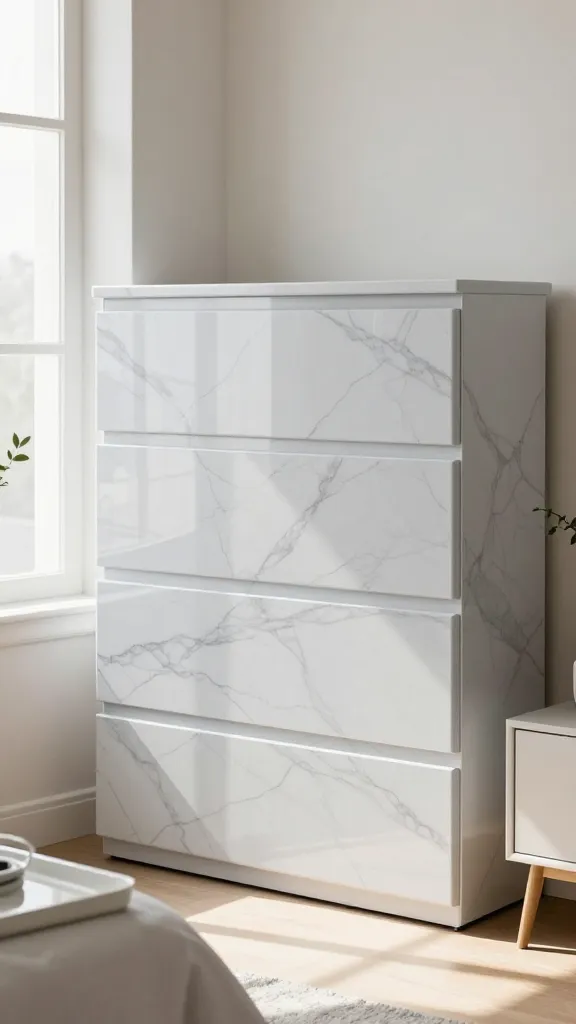
Give furniture and surfaces a luxe marble look with peel-and-stick contact paper. It’s affordable, removable, and instantly chic.
Materials
- Faux marble contact paper
- Ruler, craft knife, and smoothing tool
- Scissors for curves
How to Make It
- Measure and cut panels to fit your chosen surface (dresser fronts, small tables, trays).
- Peel and apply, smoothing from the center outward to avoid air bubbles.
Pro tips: Layer two tones for depth—light gray with white veins reads more authentic. This is a perfect weekend project for a quick upgrade.
Who’ll love it: Budget-conscious decor lovers who crave a high-end look without the cost or commitment. Seriously transformative in minutes.
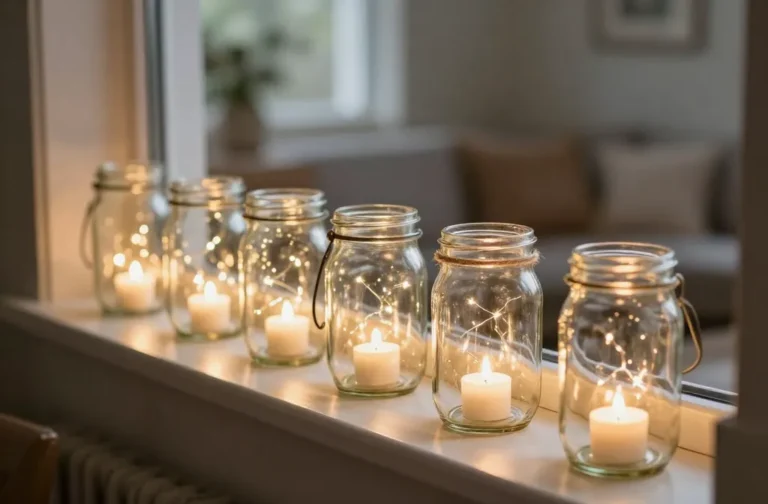
13. Lighted Jar Lanterns With Readymade Battery Candles
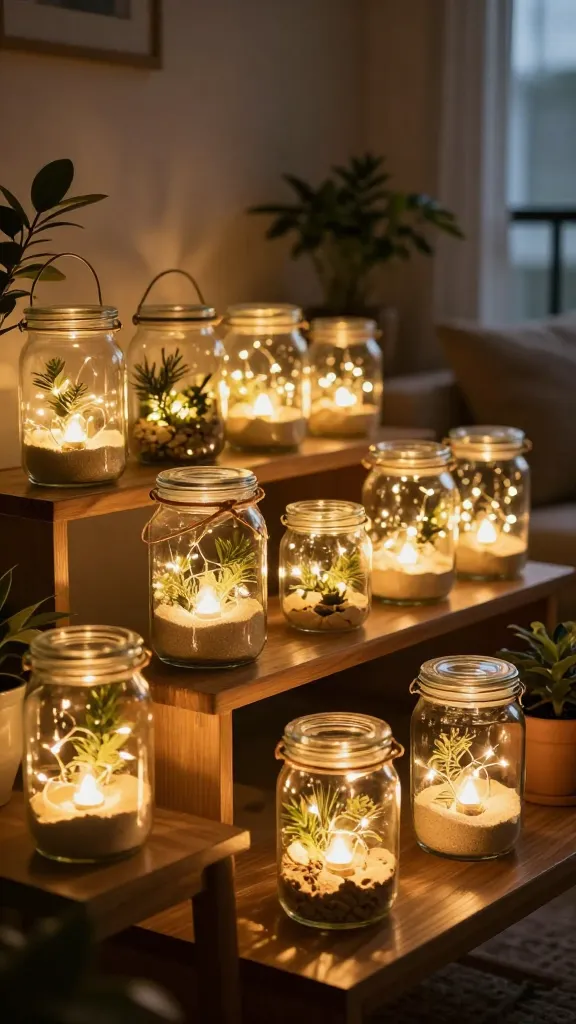
Warm, cozy, and endlessly adaptable, these lighted jar lanterns add romance to a night-in without any wiring or heat risk. Perfect for shelves, tables, or a balcony corner.
Materials
- Glass jars (various sizes)
- Battery-operated fairy lights or LED tea lights
- Decorative sand, pebbles, or faux greenery (optional)
- Ribbon or twine for a handle
How to Make It
- Fill the bottom with decorative elements if desired, then insert lights.
- Secure a ribbon or twine handle for carrying and a decorative touch.
- Place on a shelf or table to cast a soft glow.
Pro tips: Mix jar sizes for an eclectic vignette. Rechargeable battery options save hassle and waste. You’ll love how serene and cozy these look in the evenings.
Who’ll love it: Night owls and romantics who want a warm, inviting space without risk or mess. Seriously, they’re the softest lighting upgrade around.
Conclusion
Which renter-friendly project calls to you most? Any of these 13 ideas will elevate your apartment without sacrificing your security deposit. Save a few, pin a handful, and start crafting—your space will feel instantly personalized, stylish, and totally you. Happy decorating, friend—and may your walls stay happy and your décor stay delightful.