9 Quick Crafts Ideas You Need to Try
Stuck in a crafting rut? Trust me, these nine quick crafts ideas are the spark you’ve been craving. Each project is doable in a weekend, totally unique, and ready to upgrade your space or give as thoughtful, handmade gifts. Let’s dive in and get the creativity flowing.
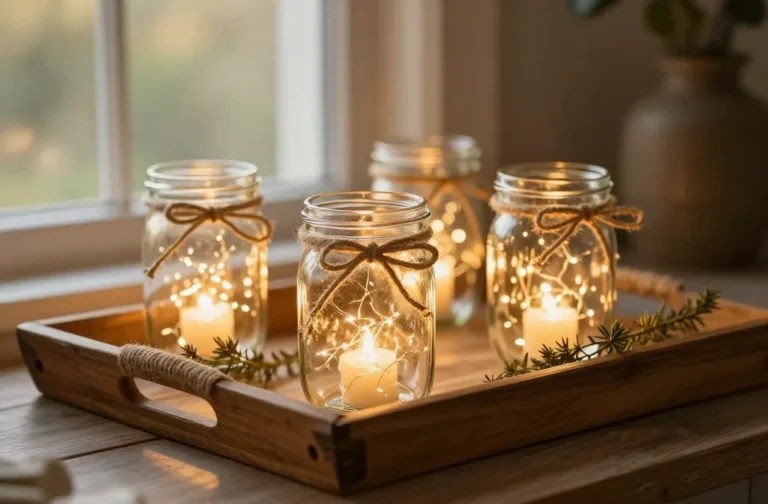
1. Rustic Mason Jar Lantern With Fairy Lights
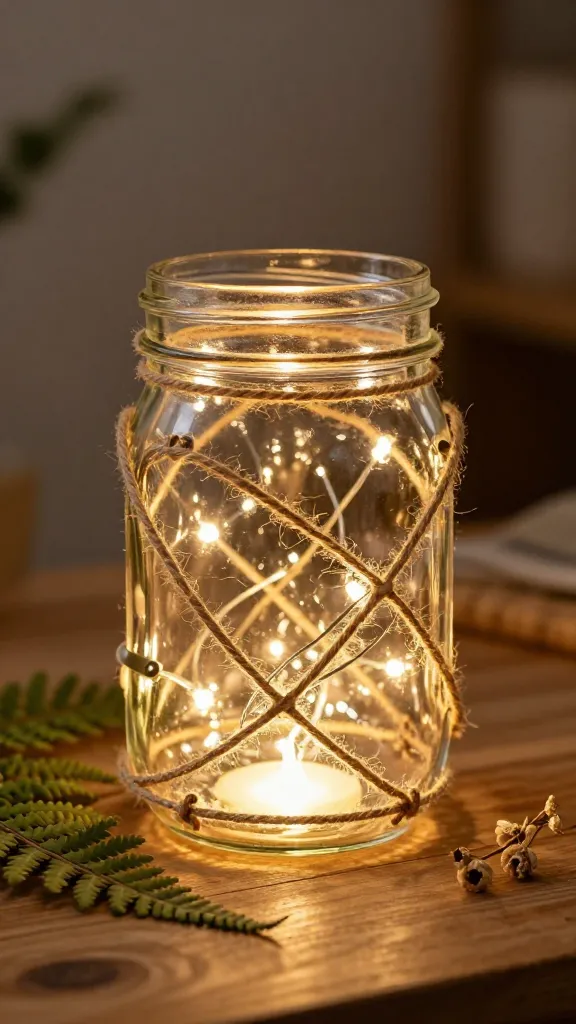
Picture this: a warm, cozy glow wafting from a jar wrapped in twine and gentle fairy lights. This lantern is simple, budget-friendly, and perfect for tabletops or entryways. The blend of rustic texture and soft light feels like a hug for your decor.
Materials Needed
- Mason jar
- Fairy lights (battery-operated)
- Jute twine
- Hot glue gun
- Optional: small fern or dried flowers
How to Make It
- Wrap the jar with jute twine in a crisscross pattern, securing with small glue dots.
- Place the battery pack inside the lid or tuck it behind the jar, ensuring easy access for turning on/off.
- Puncture tiny holes with a nail around the twine to cast pretty shadows if you’re feeling extra crafty.
- Drape fairy lights into the jar, style a sprig of greenery, and enjoy the glow.
Pro Tips
- Use thicker twine for a bold, rustic look or thin twine for a delicate vibe.
- Pair with a few dried flowers for seasonal charm.
Who will love it: Cozy homebodies and anyone craving warm, ambient lighting without wiring fuss. Perfect for coffee tables, balconies, or as a thoughtful handmade gift.
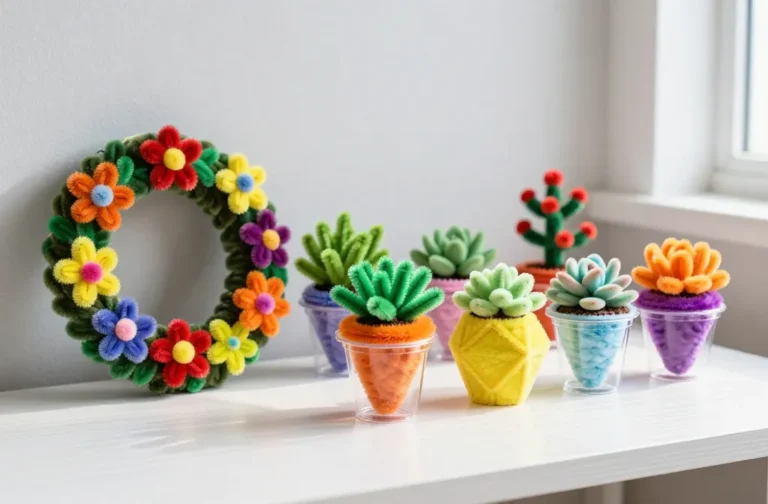
2. Marbleized Planter Jars With Colorful Accents
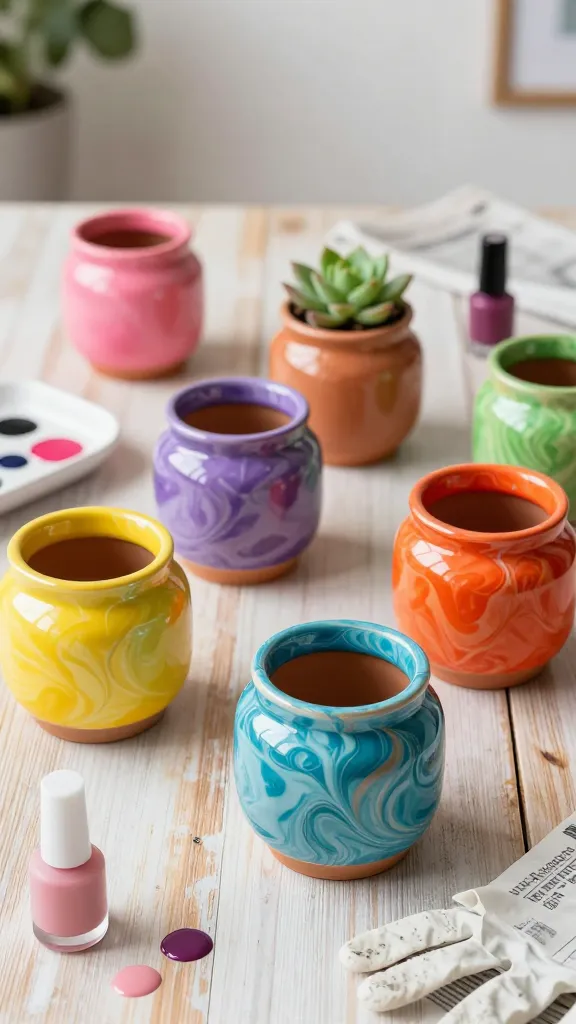
Bright, glossy plant pots with a marbled flair instantly elevate green spaces. It’s a small project with big style, and you’ll feel like a tiny artist every time you water your succulents.
Materials Needed
- Plain ceramic jars or terra-cotta pots
- Acetone and nail polish in chosen colors
- Gloves and newspaper to protect surfaces
- Paintbrush or sponge (optional for blending)
How to Make It
- Fill a shallow tray with a small amount of acetone.
- Drop a few colors into the tray and swirl with a brush to create marble veins.
- Dip or drizzle onto the pots, lifting and tilting to achieve organic patterns.
- Let dry fully before planting.
Pro Tips
- For a more controlled look, test patterns on a scrap pot first.
- Seal with a clear matte or gloss spray to protect the finish.
Who will love it: Plant lovers and dorm-inhabiting friends who crave a chic, contemporary vibe. Great for gifting herbs or tiny succulents in a stylish upgrade.
3. Upcycled Denim Wall Bunting
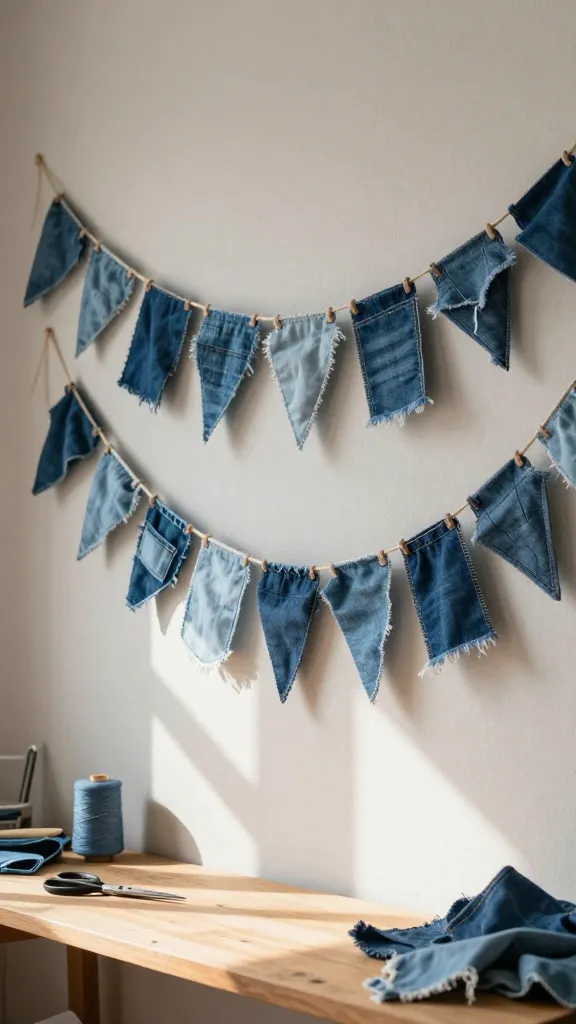
Turn old jeans into a quirky, fashionable wall hanging that adds texture and a little whimsy to any room. It’s fast, fun, and surprisingly satisfying to see denim strips flutter with personality.
Materials Needed
- Old denim jeans
- Fabric scissors
- Needle and thread or a sewing machine
- Ribbon or twine for hanging
- Optional: fabric paint or patches
How to Make It
- Cut denim into uniform shapes (triangles or rectangles) from pant legs or pockets.
- Stitch shapes onto a long strip of fabric or directly onto a lightweight backing, alternating patterns.
- Attach hanging twine to each end and string up a tiny banner on your wall.
Pro Tips
- Mix light and dark denim for contrast.
- Add a few painted patches or stitched initials for a personalized touch.
Who will love it: Denim lovers and folks who adore eclectic, boho-chic decor. A perfect hallway accent or bedroom garland.
4. Confetti Coaster Set Made From Concrete and Resin
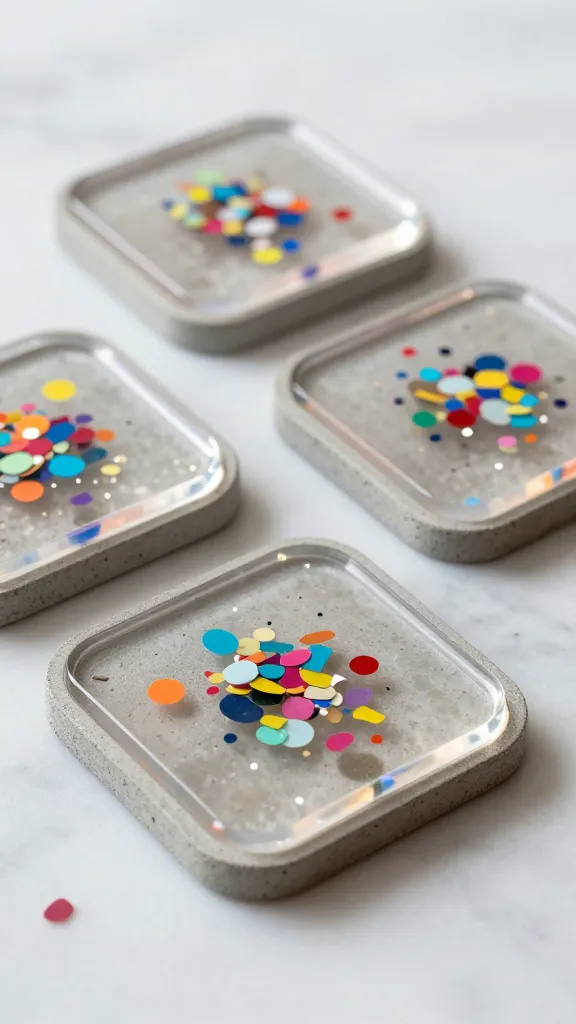
Yes, you can make sturdy, glossy coasters with a modern edge. Concrete plus resin creates a durable, conversation-starting set that looks designer without breaking the bank.
Materials Needed
- Concrete mix
- Silicone coaster molds
- Resin and hardener
- Confetti or acrylic pigments
- Sealant
How to Make It
- Mix concrete per package directions and pour into molds, leaving space for a glossy resin top layer.
- Sprinkle confetti or pigments, let set partially, then top with resin as directed by product instructions.
- Demold once fully cured and seal for extra durability.
Pro Tips
- Pour small batches to create a mixed set with varied colors.
- Use cork backing to protect furniture.
Who will love it: Hosts, student apartments, and anyone who appreciates a clean, modern table setting with a splash of color.
5. Fold-Over Leather-Leaf Bookmarks
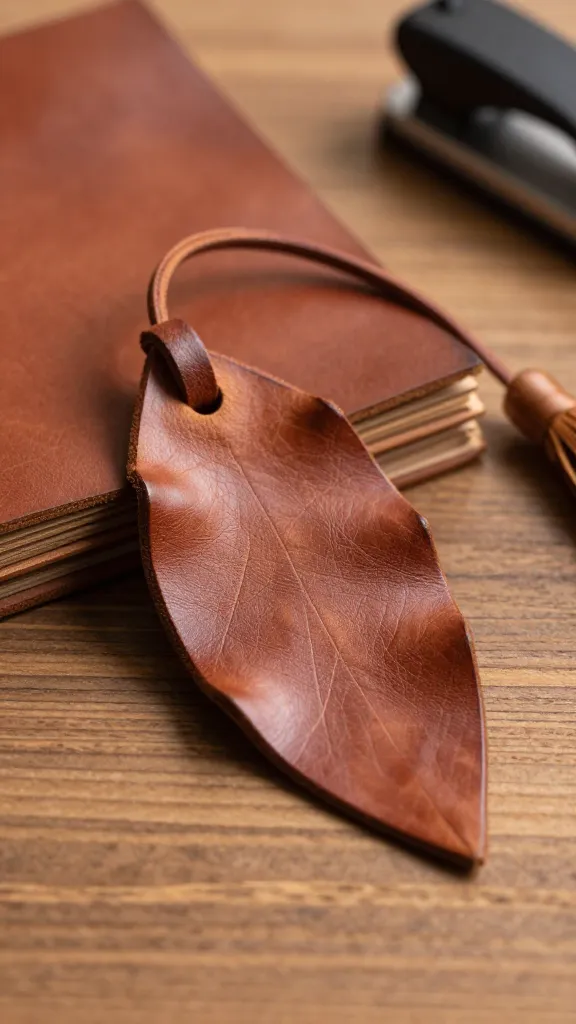
Crafty bookmarks that feel luxe and durable, all from scraps of leather. They’re quick to assemble, practical, and make great small gifts for readers.
Materials Needed
- Leather scraps or sturdy faux leather
- Quilted thread or waxed cord
- Scissors and hole punch (optional)
- Rivets or decorative studs (optional)
How to Make It
- Cut leather into leaf-shaped bookmarks with a small tail folded over the top.
- Punch a hole at the top and thread with a short leather cord or thread to tie a tassel.
- Optional: add rivets or small studs for a chic finish.
Pro Tips
- Experiment with colored leather for a bold set.
- Seal the edges with a light burnish for longevity.
Who will love it: Avid readers and stationery lovers who appreciate a touch of luxury with a handmade vibe.
6. Tiny Terrarium Hand-Painted Glass Orbs
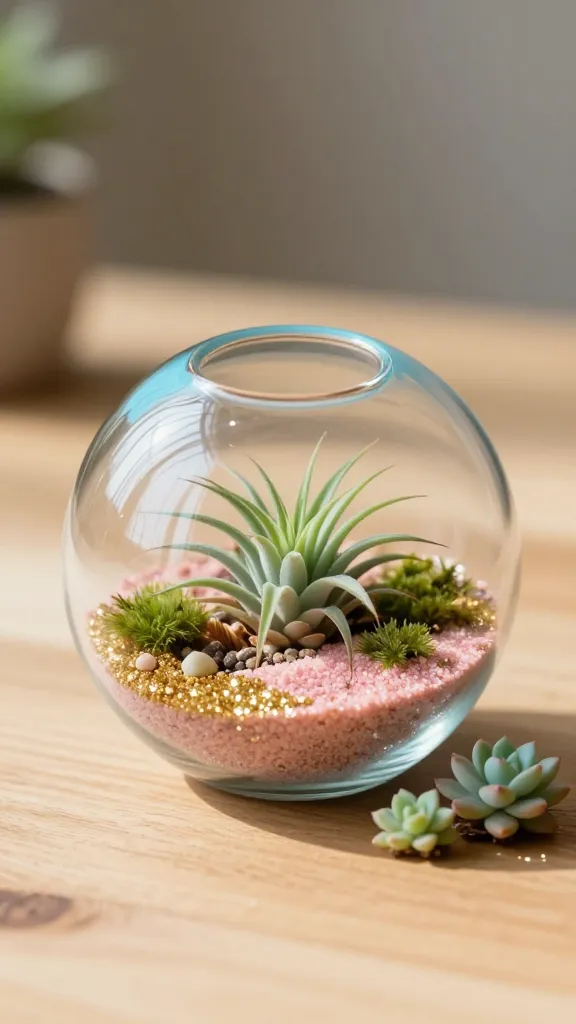
Glass orbs become miniature worlds when filled with tiny plants, colored sands, and a dash of glitter. This project is mesmerizing to make and even more captivating to display.
Materials Needed
- Clear glass orbs or mini glass jars
- Air plants or tiny succulents
- Colored sand, small pebbles, and moss
- Acrylic paints and brushes
How to Make It
- Paint the outside of the orb with a soft color wash or abstract design.
- Layer sand, pebbles, and moss inside, then anchor a tiny plant or air plant with a dab of adhesive.
- Top with a cork or cap to keep contents secure.
Pro Tips
- Use waterproof paint if the orb will be in humid spaces.
- Display in a cluster for maximum visual impact.
Who will love it: People who adore mini worlds and nature-inspired decor. Great desk accents or shelf toppers.
7. Chalkboard Wall Panels With A Pop of Color
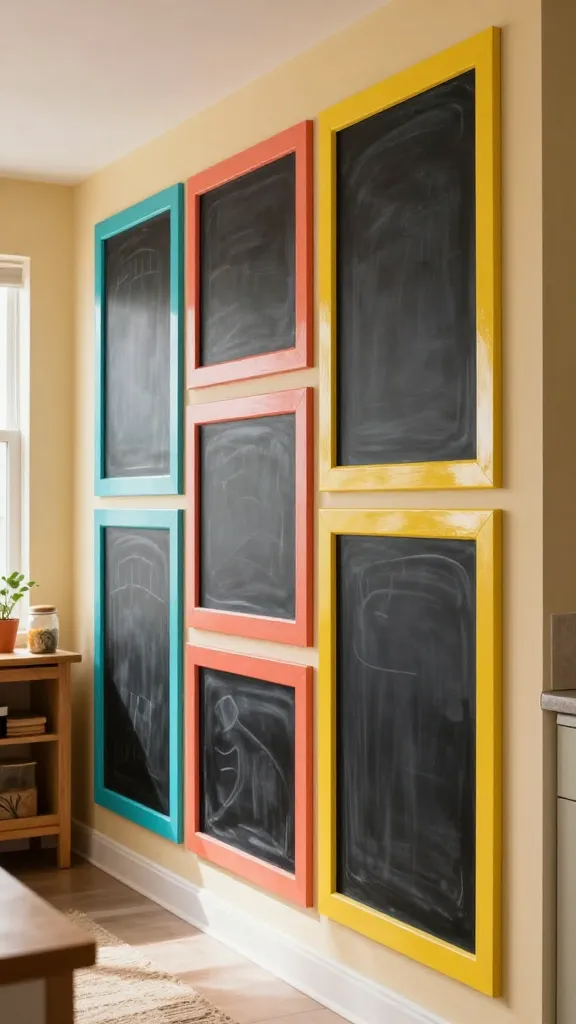
Turn a plain wall into a playful, reusable canvas. A few chalkboard panels with bright frames instantly transform a kitchen, playroom, or entryway.
Materials Needed
- Plywood panels or ready-made chalkboard sheets
- Chalkboard paint or actual chalkboard material
- Acrylic paint for frames
- Paint brushes and sealant
How to Make It
- Paint the panel with chalkboard paint and let dry.
- Frame the edges with bold acrylic-painted trim for a punchy look.
- Hang in a high-traffic area and let your family write and doodle freely.
Pro Tips
- Use magnets behind the chalkboard for additional notes or reminders.
- Rotate color frames with seasons for a fresh feel.
Who will love it: Busy families, creative spaces, and anyone who loves reusable surfaces for notes, menus, or doodles.
8. Geometric Ribbon Ball Ornaments
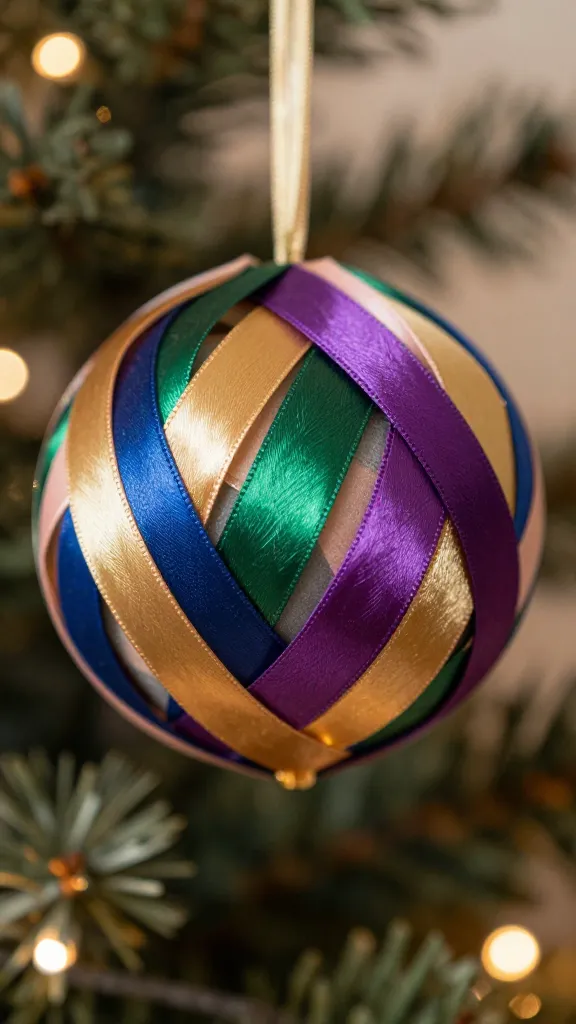
Feather-light, festive, and incredibly stylish. These geometric ribbon balls bring whimsy to holiday decor or year-round display without requiring heavy materials or complex steps.
Materials Needed
- Foam orbs
- Assorted ribbons in orchestration of colors
- Hot glue or craft glue
- Thin metallic thread for hanging
How to Make It
- Cut ribbons into long strips and wrap around the foam ball, securing with glue, layering in geometric directions.
- Continue until the orb is completely covered and feels sturdy.
- Attach a thread for hanging and display in a garland or on a tree.
Pro Tips
- Choose metallics and jewel tones for a luxe vibe.
- Mix matte and shiny ribbons for texture variation.
Who will love it: Holiday lovers, party planners, and anyone who enjoys modern, airy decor accents.
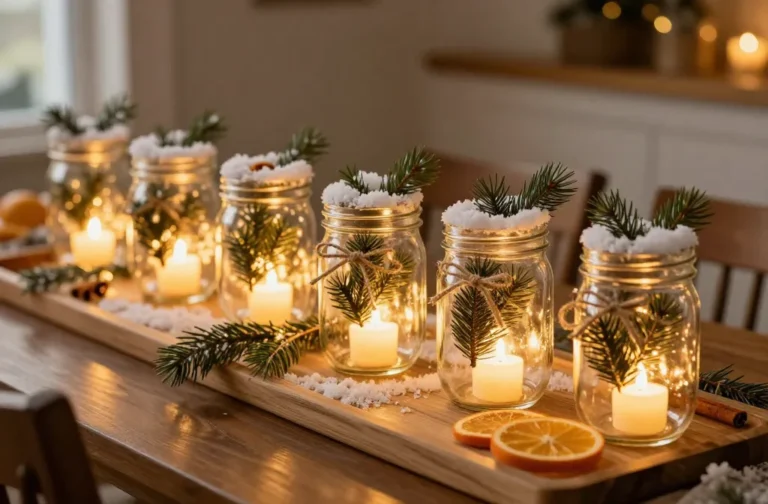
9. Mini Cloth Lanterns With Stitched Details
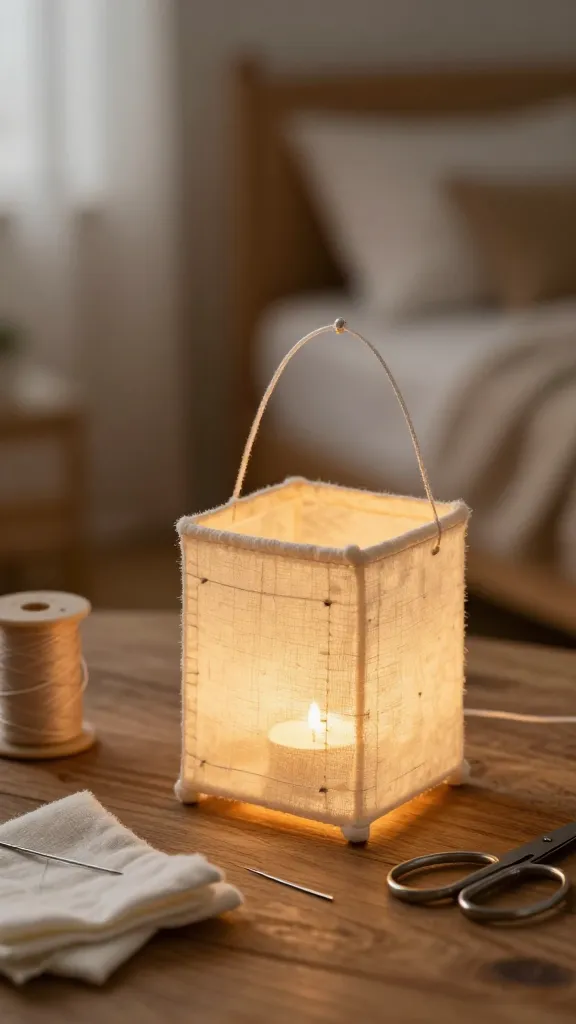
Soft, fabric lanterns that glow warmly from within. These mini lanterns are perfect bedside lights or window decor during cozy evenings.
Materials Needed
- Mini fabric pouches or sturdy cotton fabric
- Battery-operated tea lights
- Clear fishing line or thin string
- Needle and thread
How to Make It
- Cut fabric into small squares and stitch three sides, leaving one side open to insert a tea light.
- Turn right side out, insert the light, and seal the opening with a cautious stitch or small Velcro tab.
- Hang with the string, or set on a shelf for a soft glow.
Pro Tips
- Use light, airy fabrics like linen or muslin for a delicate glow.
- Add a tiny tassel or beaded trim for personality.
Who will love it: Nighttime readers, mood-setters, and anyone who enjoys gentle, ambient light without buzzing lamps.
Conclusion: These nine Quick Crafts Ideas You Need to Try Right Now are windows into how simple materials, a little imagination, and a playful spirit can transform ordinary days into something delightfully creative. Pick one (or all nine) and start crafting—your space, your vibes, your handmade joy. You’ll love this journey from plain to Pinterest-perfect in no time.