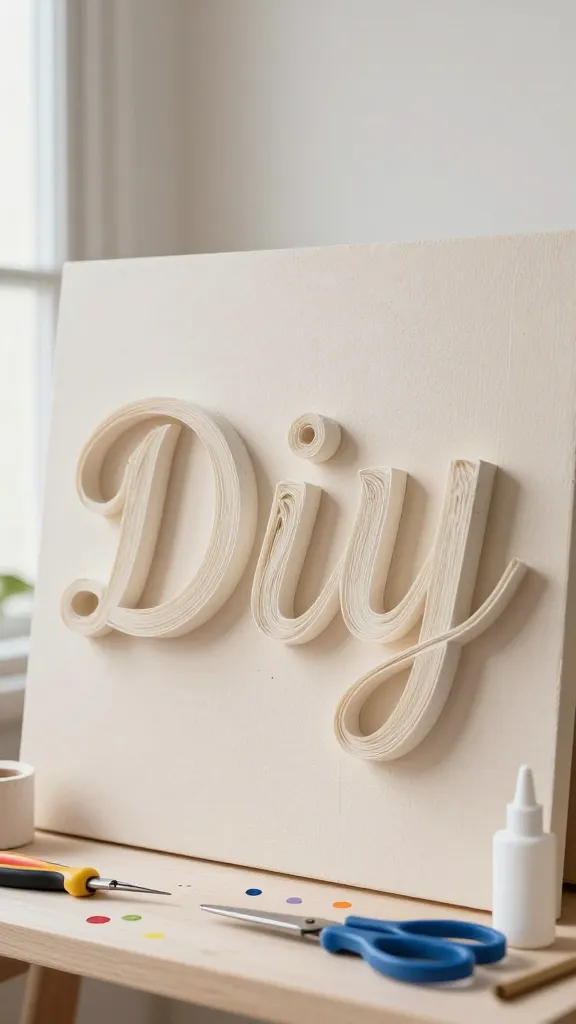
5 DIY Toilet Paper Roll Crafts Wall Art
Welcome, crafty friends! These five DIY toilet paper roll crafts wall art ideas are quick, affordable, and totally Instagram-ready. Trust me, you’ll be surprised how far a few humble rolls can go when you unleash your imagination.
1. Botanical Burst Wall Panel: Cardboard Leaves and Gold Accents
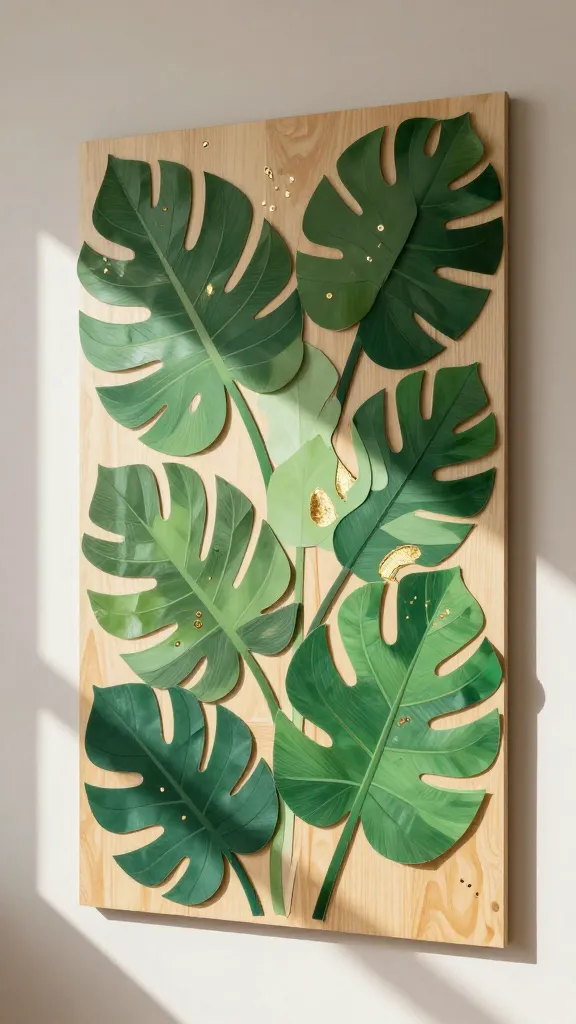
Picture a sunny wall speckled with green leaves and shimmery gold highlights, all arranged in a lively, botanical pattern. This piece feels airy, modern, and a little luxe—without breaking the bank.
Materials
- Toilet paper rolls (about 12–16)
- Green paint in multiple shades
- Gold acrylic paint or metallic tape
- Plywood or thick poster board as backing
- Hot glue gun, craft glue
- Scissors, ruler, pencil
How to Make It
- Flatten rolls and cut into leaf shapes of varying sizes.
- Paint leaves in a palette from olive to emerald, adding lighter veins with a fine brush.
- Arrange leaf shapes on the backing in a dynamic, sunburst-inspired layout. Glue down with hot glue.
- Add thin gold tips or a few metallic strip accents to some leaves for a luxe touch.
- Seal with a light clear spray if you want extra durability.
Pro Tips / Styling Ideas
- Layer overlapping leaves for depth; keep some negative space for balance.
- Hang near a window to catch natural light and make the gold pop.
Who’ll love this? Nature lovers and glam-minimalists alike, especially as a spring or living room focal piece.
2. Constellation Mosaic: Starry Night Toilet Paper Roll Tiles
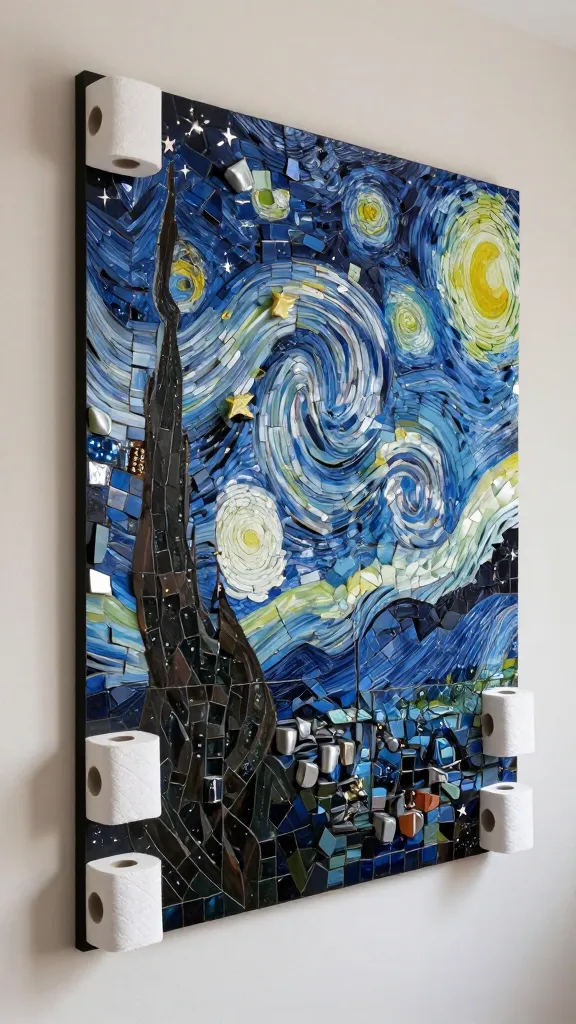
Imagine a night sky mapped in tiny, twinkling tiles. This constellation wall art brings a dreamy, cosmic vibe to any space and uses totally budget-friendly materials.
Materials
- Toilet paper rolls (enough for about 20–30 “tiles”)
- Black or navy cardstock or thin wood board for backing
- White, silver, and pale blue acrylic paints
- Glue, scissors, exacto knife
- Optional: tiny bead stars or white paint splatter for extra star effect
How to Make It
- Cut rolls into short segments (2–3 cm wide) to act as “tiles.”
- Paint each segment to resemble stony, speckled tiles with subtle gradients.
- Arrange into a scattered constellation pattern on the backing, forming clusters like a real sky map.
- Glue securely and add a few bright white spots to represent brighter stars.
Pro Tips / Styling Ideas
- Keep a loose grid for a more formal look or a freeform scatter for whimsy.
- Pair with a dark wall to maximize contrast and drama.
Who’ll love this? Astronomy fans, teens’ rooms, or a moody hallway display.
3. Coastal Sunburst Frame: Driftwood Hues and Warm Neutrals
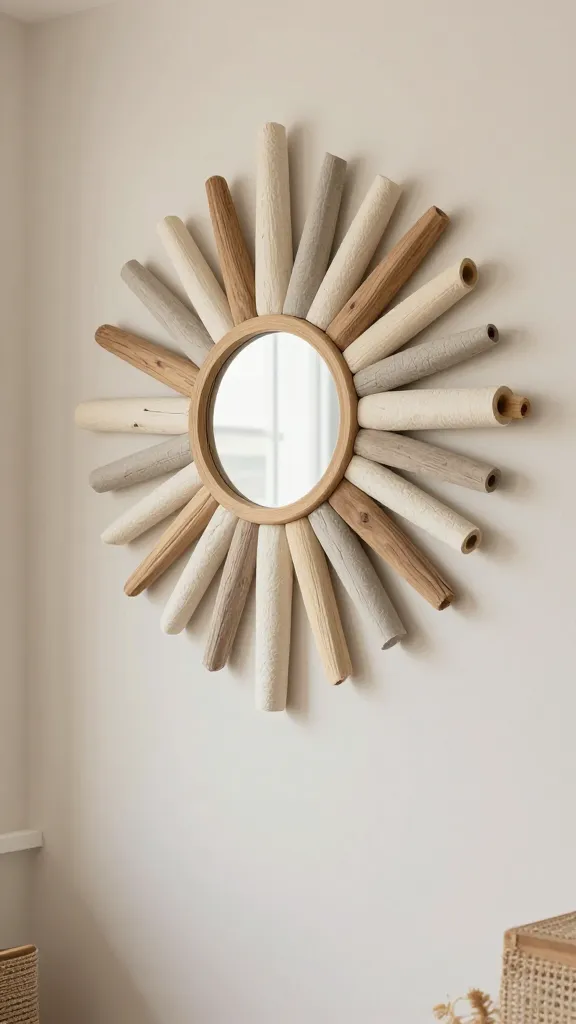
Think sandy beaches, sunlit mornings, and a touch of coastal charm. This wall art uses natural tones and a sunburst layout that instantly brightens any room.
Materials
- Toilet paper rolls
- Sand-colored, cream, and light taupe paints
- Thin wooden frame or a sturdy rectangular board
- Hot glue, ruler, pencil
- Optional: tiny shells or raffia for texture
How to Make It
- Cut rolls into tapered wedges to mimic sunburst rays.
- Paint wedges in layered neutrals for a driftwood effect.
- Center a small round mirror or a neutral disc in the middle for a focal point.
- Glue wedges onto the frame or board in a circular burst, leaving a clean center.
Pro Tips / Styling Ideas
- Vary the length of the wedges for a more organic, sun-kissed look.
- Hang above a console or bed for a warm, resort-inspired vibe.
Who’ll love this? Fans of coastal vibes, Scandinavian-minimalists, and anyone craving warm, sunny energy.
4. Textured Typography Wall Art: Say It with Rolled Quotes
Fonts can be crafted from the most unexpected materials. This idea uses rolled toilet paper tube strips to spell out a favorite short word or quote, giving you custom art that’s both tactile and chic.
Materials
- Toilet paper rolls
- Acrylic paints in two or three colors
- Plain wooden board or canvas
- Glue, scissors, needle-nose pliers (optional for shaping)
- Fine-tipped marker or paint for outlining letters
How to Make It
- Cut and slightly roll strips of painted rolls to form letter shapes (think “JOY,” “HOME,” or “DREAM”).
- Glue each letter onto the backing, layering to create dimension and a shadowy effect.
- Outline letters with a fine marker for crisp typography against the textured background.
Optional Subsections
- Materials
- How to Make It
- Pro Tips / Styling Ideas
Pro Tips / Styling Ideas
- Use a bold color for letters against a soft backdrop to maximize readability.
- Pair with minimalist furnishings to let the texture do the talking.
Who’ll love this? Word-craft lovers, gallery-wall enthusiasts, and anyone wanting a personal message in a handmade style.
5. Geometric Prairie Weave: Interlaced Rings and Squares
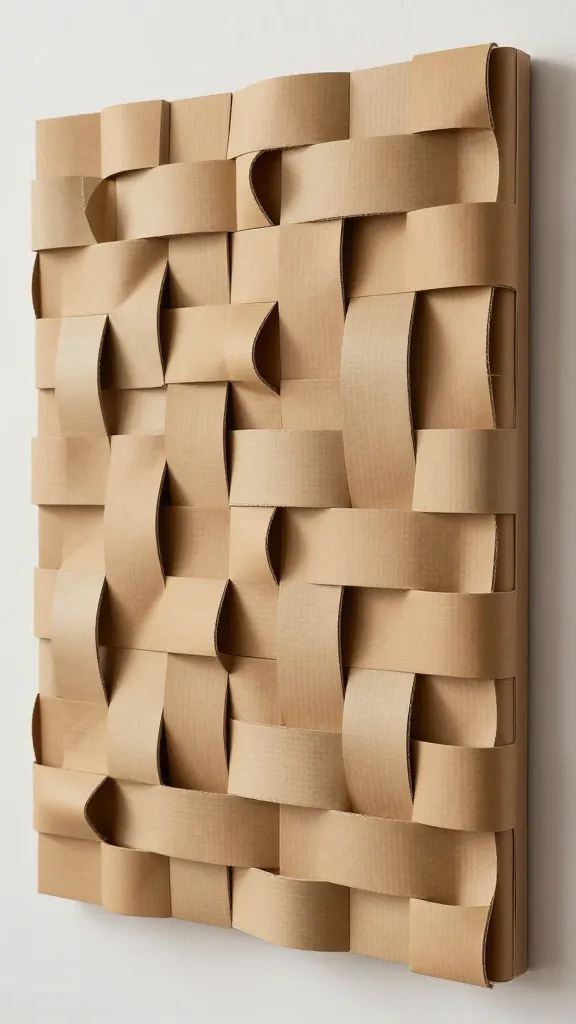
Ready for a modern, tactile statement piece? This geometric design uses interlaced rolls to create a woven “fabric” effect that feels fresh and architectural.
Materials
- Toilet paper rolls
- Bright or earth-toned paints (two to three complementary colors)
- Backing board or thick canvas
- Hot glue gun, scissors
- Optional: thin cord or fabric strips for extra texture
How to Make It
- Cut rolls into short sections and flatten slightly to create a flexible tile.
- Paint in two to three colors; let some pieces be a plain natural color.
- Arrange in a repeating geometric pattern: alternating rings and squares with woven overlaps.
- Glue down piece by piece, pressing firmly to secure the texture.
Pro Tips / Styling Ideas
- Use a bold color palette for a graphic impact or soft neutrals for subtle texture.
- Hang as a large statement piece or in a trio with complementary shapes.
Who’ll love this? Design lovers, mid-century enthusiasts, and anyone who enjoys tactile, eye-catching wall art.
Conclusion
Five unique, completely distinct DIY toilet paper roll crafts wall art ideas you can whip up in a weekend. These projects prove that humble supplies can become high-impact decor with a pinch of imagination. So, which one will you try first—or will you go all out and make them all? Happy crafting, and may your walls thank you with compliments.