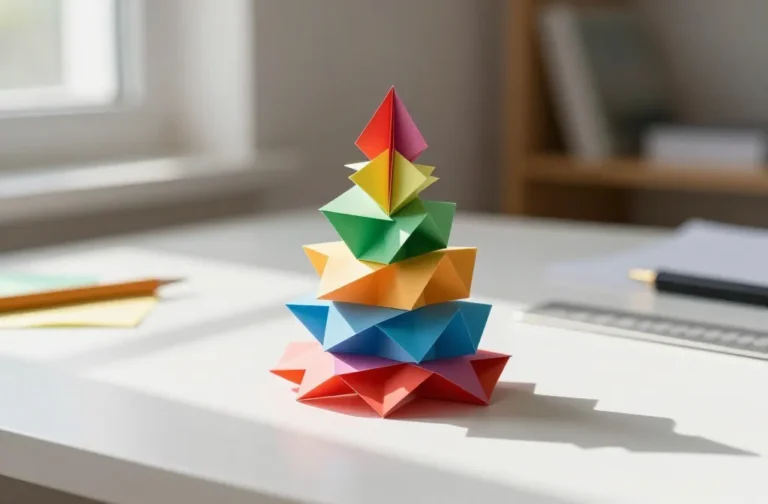
5 Genius Toilet Paper Roll Crafts
Kick back, grab a roll, and let’s turn those everyday tubes into something unexpectedly chic. You’ll love how quick, affordable, and totally Pinterest-worthy these ideas are. Trust me, you’ll want to make them all.
1. Rustic Wall Planter Trio: Toilet Paper Roll Succulent Shelves
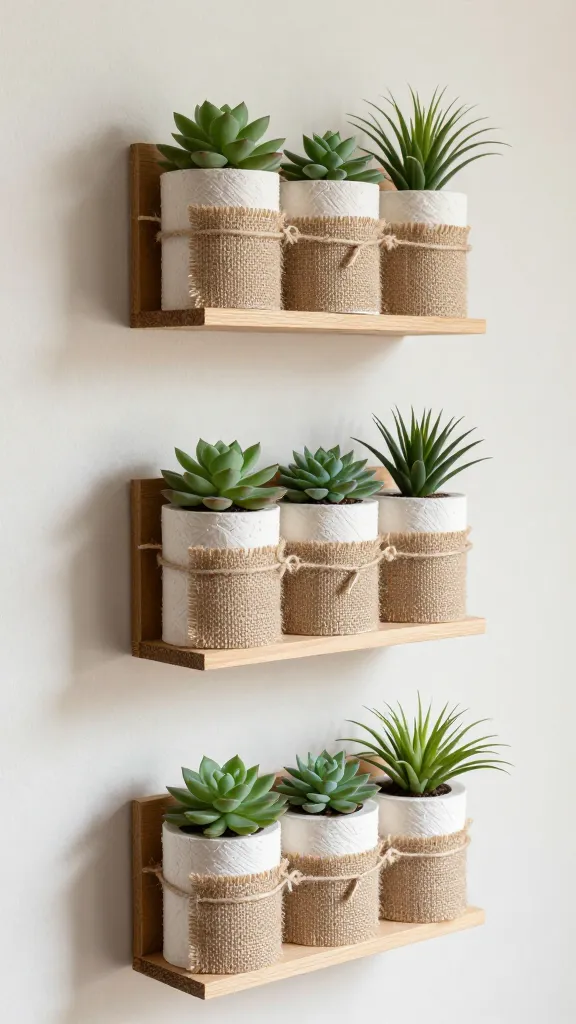
Picture a vertical trio of mini planters, each with a touch of burlap, twine, and just-picked greenery. These little shelves cling to your wall and bring a hint of whimsy to any room. They’re lightweight, easy to customize, and seriously charming.
Materials Needed
- Toilet paper rolls (6–9, depending on how many tiers you want)
- Hot glue gun and glue sticks
- Small wood or cardboard backing (rectangle or staggered panels)
- Twine or jute for hanging
- Mini potted succulents or air plants
- Decorative paint or washi tape (optional)
How to Make It
- Cut the rolls to desired heights if you want staggered tiers.
- Arrange on a backing board in a row or triangular formation, then hot-glue each tube in place.
- Wrap the outer surfaces with decorative tape or paint for a cohesive look.
- Attach twine to the top corners for hanging, or mount directly to a wall using small brackets.
- Add small succulents and a touch of moss in each tube for a lush, dry-garden vibe.
Pro Tips / Styling Ideas
- Pair with a clean, light wood backdrop to maximize the natural textures.
- Paint tubes in a gradient from white to sage for a calming palette.
- Switch in faux herbs or tiny lavender sprigs for a homey aroma.
Who would love this? Anyone craving nature indoors—perfect for apartments, sunrooms, or entryways. Seriously decor that feels like a mini greenhouse, without the maintenance.
2. Festive Lanterns Made from Toilet Paper Rolls
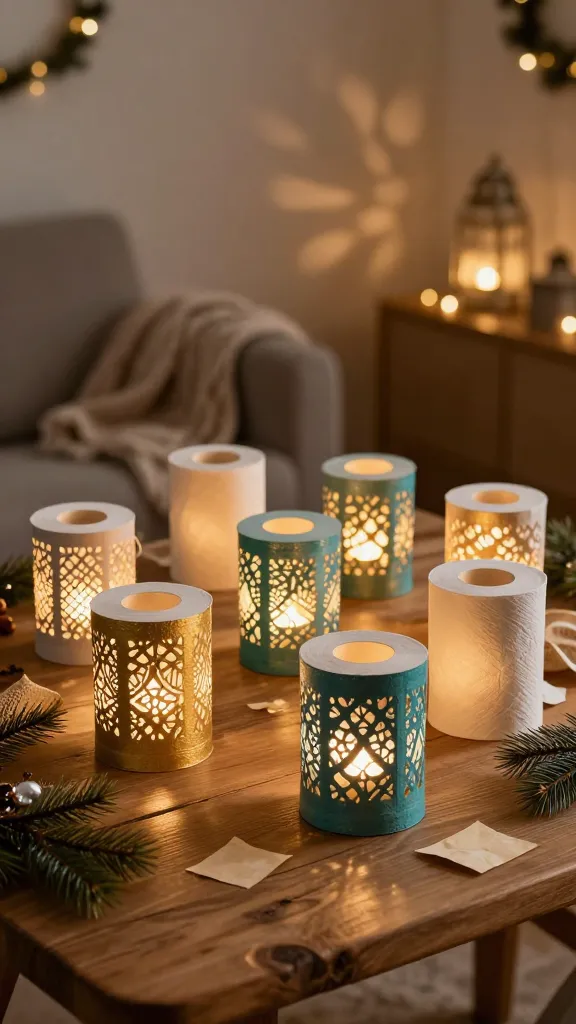
These little lanterns glow softly with tea lights or battery candles, casting cozy patterns on walls. They’re delightful for holidays, parties, or a cozy movie night. Simple, warm, and oh-so-Instagrammable.
Materials Needed
- Toilet paper rolls (6–8)
- Parchment paper or vellum
- Spray paint in metallic or matte finishes (optional)
- Tea lights or small LED candles
- Scissors, craft knife, and ruler
- Pencil for marking
How to Make It
- Cut decorative patterns into each roll using a craft knife or scissors.
- Wrap the outer tube with parchment to soften the light and prevent scorching.
- Slide the parchment-covered tube back over the cut tube so the design shows through.
- Optionally spray paint the outer shell for a festive metallic glow.
- Place a tea light inside or hang with twine for a string of glowing orbs.
Pro Tips / Styling Ideas
- Group in odd numbers for a balanced centerpiece or mantel display.
- Use in a row along a staircase or as a halo around a party buffet.
- Coordinate with seasonal colors: copper for fall, red-white for Christmas, pastel for spring.
These lanterns shine in the living room, on a patio, or as a festive centerpiece. You’ll love the warm ambiance without any complicated setup.
3. Wall Art Stamps: Abstract Canvas Doodles with Cardboard Tubes
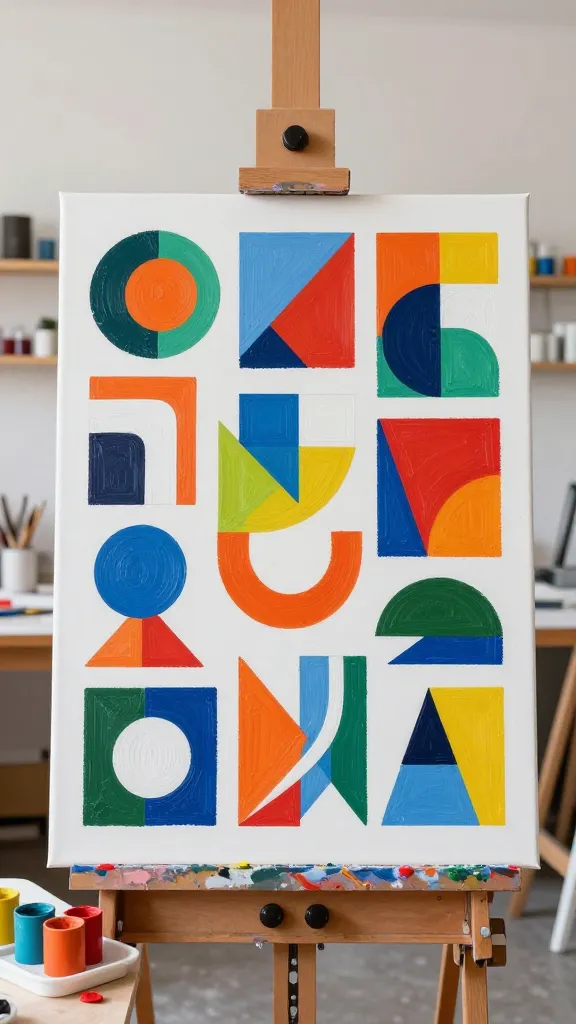
Turn toilet paper tubes into modern art stamps and create a gallery-worthy canvas that’s totally you. This project is all about color, texture, and bold shapes—no art degree required, just a playful spirit.
Materials Needed
- Toilet paper rolls (3–4 to cut into shapes)
- Pack of foam stamps or craft foam
- Acrylic paints in 3–5 bold colors
- One blank canvas or sturdy paper
- Painter’s tape (optional for clean edges)
How to Make It
- Cut the ends of tubes into varying shapes: circles, squares, triangles, scallops.
- Attach shapes to a flat board or directly to a foam stamp to create bold patterns.
- Dip shapes in paint and press onto the canvas, building a layered, abstract composition.
- Let it dry, then add a few accents with contrasting colors for depth.
Pro Tips / Styling Ideas
- Keep a cohesive color palette for a polished look, or go wildly colorful for a playful vibe.
- Add gold or black outlines using a fine brush for a graphic finish.
- Mount with a floating frame or directly on a bold wall color to maximize impact.
Who would love this? Anyone chasing a modern, artistic statement piece that’s as budget-friendly as it is expressive. It’s like a DIY gallery wall—minus the pricey art rentals.
4. Cozy Storage Baskets: Weave-Style Organizers from Tubes
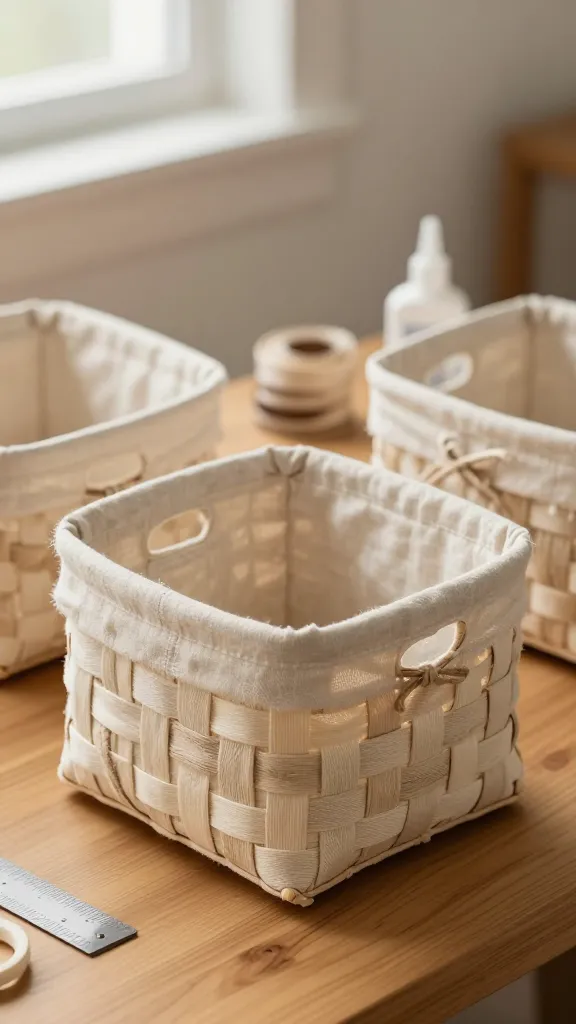
These small, woven baskets bring texture and practical storage to desks, deskside, or shelves. They’re surprisingly sturdy when layered with a little glue and a dash of creativity. DIY doesn’t get cozier than this.
Materials Needed
- Toilet paper rolls (8–12 per basket)
- Craft glue or hot glue
- Ribbon, jute, or thin fabric strips for weaving
- Small scissors and a ruler
- Optional: fabric lining or felt for a finished bottom
How to Make It
- Flatten rolls after removing the inner tube to create flexible weaving strips.
- Cut strips evenly to ensure a consistent weave pattern.
- Begin by fusing several strips into a circular base, then weave additional strips around to build the sides.
- Glue as you go to secure each weave, creating a sturdy, bowl-like basket.
- Line with fabric or felt for a polished bottom and a touch of softness.
Pro Tips / Styling Ideas
- Use as a desk organizer for pens, clips, or small notebooks.
- Create a set in varying sizes for a cohesive storage system on a shelf.
- Choose ribbon in a color family that matches your room for a cohesive look.
These baskets are a hit for students, home offices, or anyone who loves tiny, tidy storage with a warm, handmade touch. You’ll adore their texture and practicality.
5. Seasonal Paper Garland: Paper Tube Snowflakes to Festive Banners
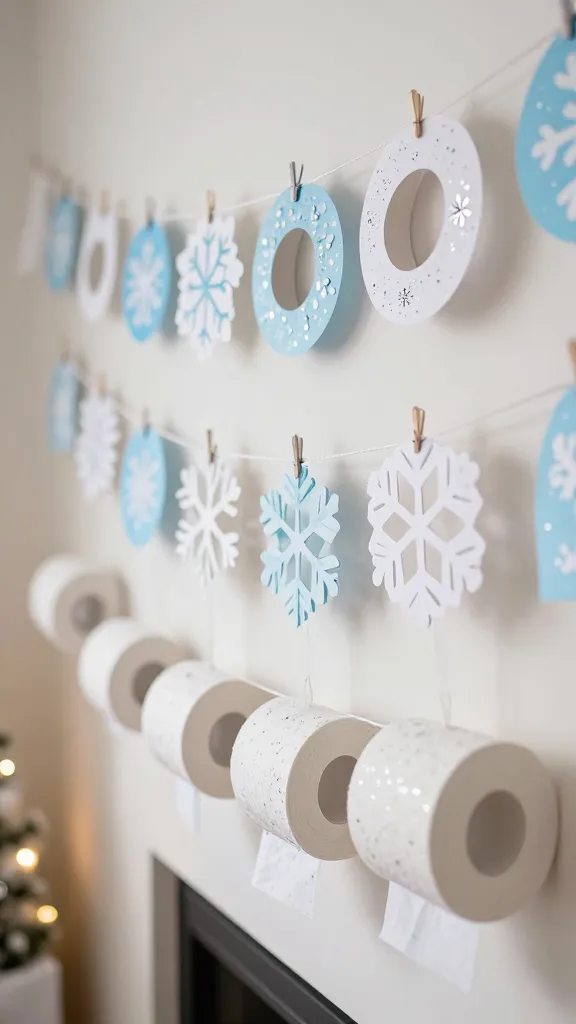
Rolls transformed into snowflakes, trail banners, or confetti shapes create whimsical decor that’s perfect for celebrations or everyday cheer. It’s an endlessly customizable craft that pays off with big visual impact.
Materials Needed
- Toilet paper rolls (6–12, depending on garland length)
- Scissors and craft knife
- Ribbon or twine for hanging
- Paint, markers, or colored paper for decorating
- Punch or small circle cutter (optional)
How to Make It
- Cut the rolls into rings or sections to form different shapes—snowflakes, pennants, banners.
- Decorate with paint or colored paper; punch holes for stringing if making a garland.
- String the shapes together to create a length of festive decor.
- Alternate with tassels or paper pompoms for extra texture.
Pro Tips / Styling Ideas
- Hang the garland across a mantle, doorway, or window for a playful focal point.
- Switch to fall colors for a seasonal vibe or keep it all-white for a chic, minimalist look.
- Use as gift toppers or party decor that doubles as keepsakes.
Who would love this? Anyone planning a party, holiday, or cozy weekend project. It’s the kind of craft that scales from a tiny accent to a full-on décor statement, depending on your mood.
Conclusion
Five completely unique, genuinely easy projects, all born from simple toilet paper rolls. They prove you don’t need fancy materials to create something Pinterest-worthy and functional. Pick your favorite, or try them all—your space will thank you, and your future self will thank you for the clutter-free brain space that comes with clever organization. Go ahead, start crafting and see how delightful small, sustainable ideas can be.