6 Cool Craft Ideas for 10-Year-Olds
Looking for simple, sparkly projects that spark imagination and fit into a busy kid’s schedule? You’re in the right place. These crafts are colorful, approachable, and totally binge-worthy for curious, creative ten-year-olds and their crafty friends.
Trust me: each idea is a tiny, glittery adventure—fun to start, satisfying to finish, and perfect for gifts, room decor, or weekend projects with a mini-bring-a-friend vibe. FYI, you’ll love how quick and satisfying these turnarounds can be.
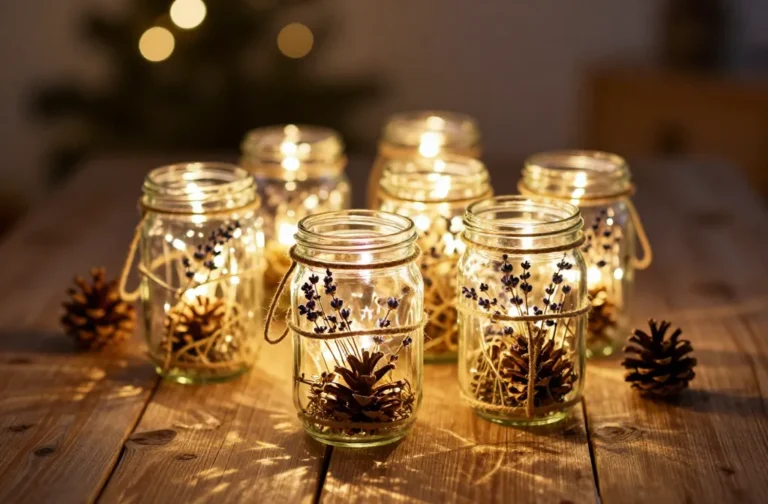
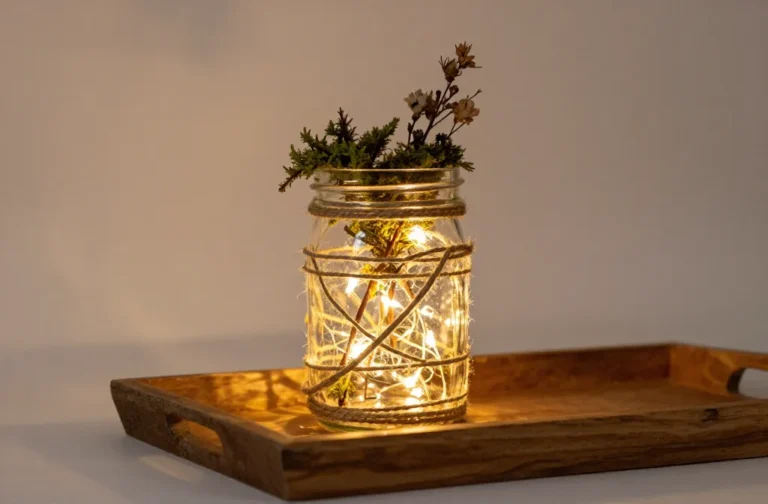
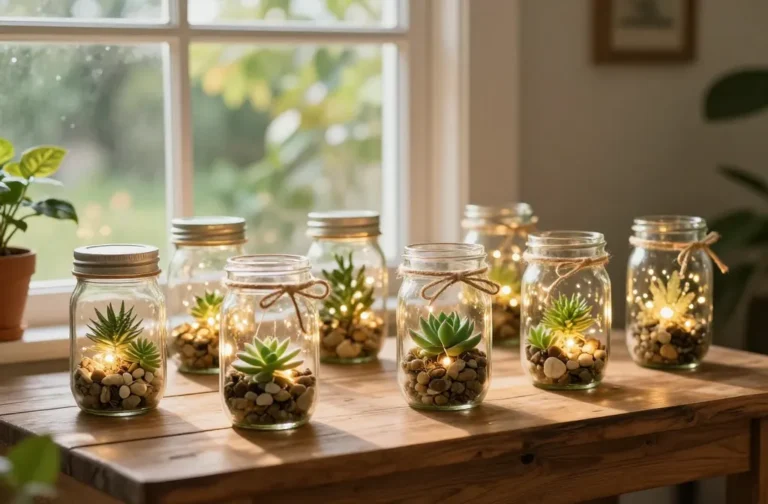
1. Glow-in-the-Dark Constellation Terrariums
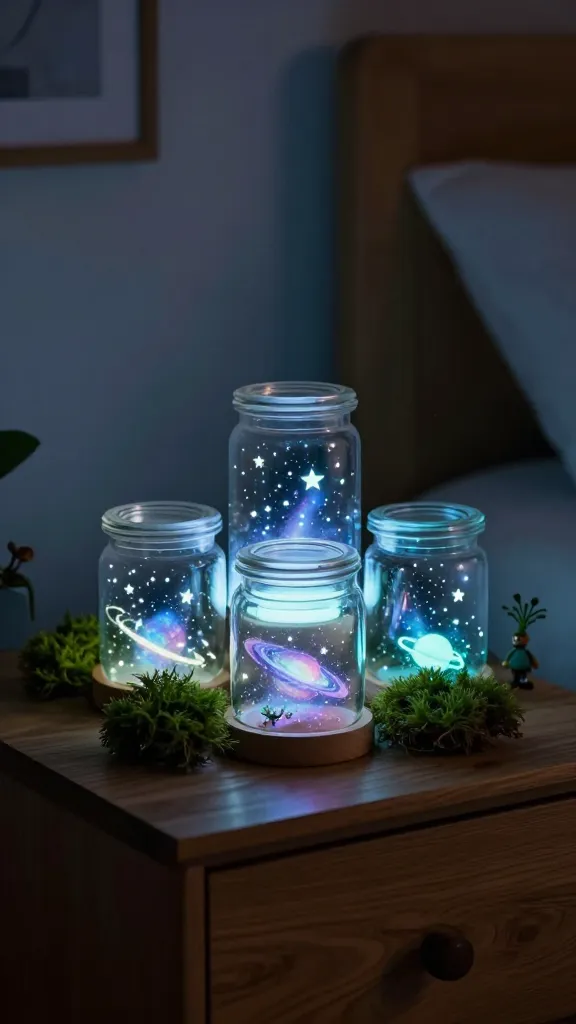
Picture a mini world that glows softly in the dark, full of twinkling stars and tiny planets. These constellation terrariums are dreamy, educational, and surprisingly easy to assemble with mostly reusable supplies. They make your nightstand feel like a tiny galaxy.
Materials Needed
- Clear small jars or mini terrariums with lids
- Glow-in-the-dark paint or stickers
- Black paper or cardstock
- White gel pen or fine-tipped marker
- Glue or double-sided tape
- Optional: tiny faux plants or moss
How to Make It
- Cut out simple constellation shapes from black paper and trace them onto the jar with a white gel pen.
- Decorate the outside with glow-in-the-dark stickers or paint. Let the stars linger in your imagination while you clean up.
- Place a few faux plants inside for a desert-meets-space vibe, then cap the jar to keep the glow going long after lights out.
Pro Tips / Styling Ideas
- Switch up constellations with each season—Orion in winter, a friendly Leo for summer vibes.
- Pair with a tiny LED tea light for a safe, ambient glow.
- Line several jars on a shelf for a nocturnal galaxy display.
Who would love it or when to use it
This is perfect for a bedroom decor upgrade, a science-camp project, or a thoughtful gift for a space-obsessed friend. It’s a tiny galaxy you can carry in a jar—seriously adorable.
2. Fabric Scrap Mosaic Laptop Skins
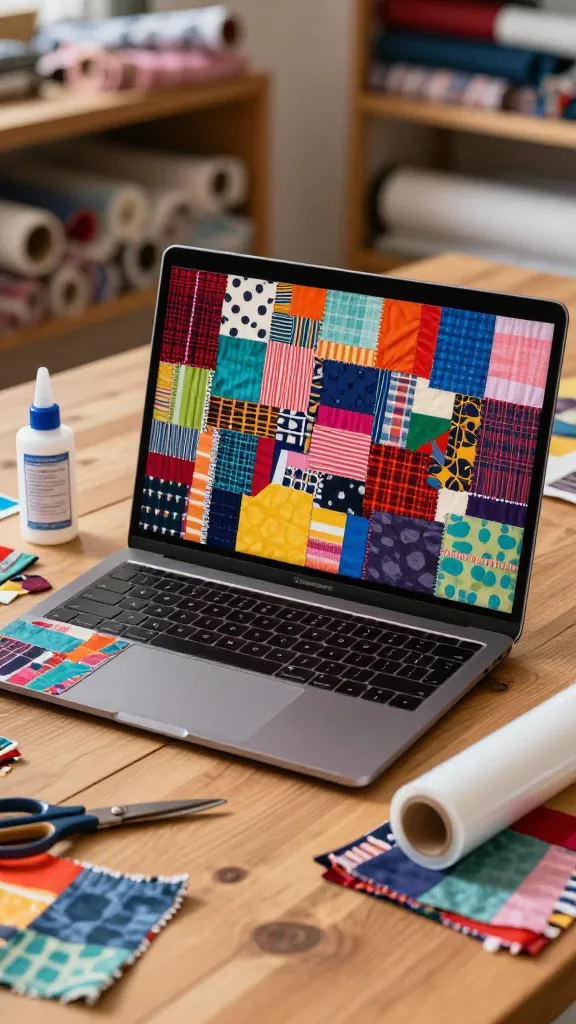
Turn boring devices into art with a tactile mosaic skin made from colorful fabric scraps. It’s a satisfying, quick craft that results in a unique, personal accessory your friends will admire. You’ll love the texture and the burst of color against techy surfaces.
Materials Needed
- Old laptop or tablet skin or durable contact paper
- Assorted fabric scraps (bright patterns, solids, textures)
- Fabric glue or mod podge
- Scissors
- Clear sealant spray (optional)
How to Make It
- Cut fabric scraps into small shapes—circles, squares, triangles, and abstracts work well.
- Arrange pieces on the skin to form a playful mosaic. Don’t glue yet—play with placement until it sings.
- Glue pieces down one by one, overlapping edges slightly for a cohesive field of color.
- Seal with a light spray to protect the finish if your surface allows.
Pro Tips / Styling Ideas
- Use a theme (tropical, geometric, candy-bright) for a coherent look.
- Incorporate a few metallic scraps for a luxe vibe.
- Keep it slightly flexible by using a thin, flexible adhesive for laptop skins.
Who would love it or when to use it
Great for back-to-school vibes, gifting a customized device cover, or brightening a home office nook. It’s soft, punchy, and totally you.
3. DIY Bubble Wrap Wall Art
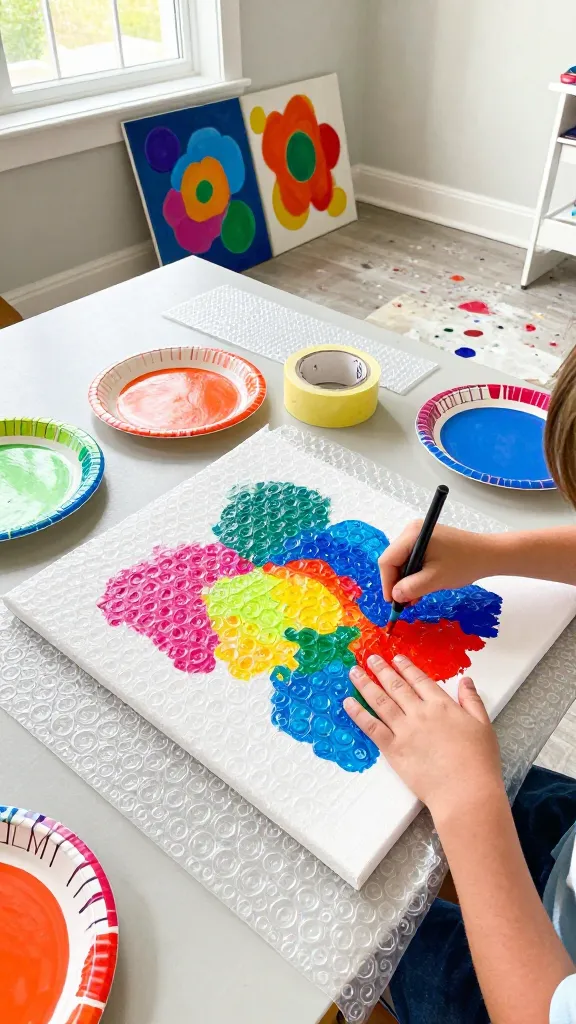
Yes, bubble wrap can become a masterpiece. This project transforms simple packaging material into bold, tactile wall art that’s unexpectedly chic. It’s oddly satisfying to pop the last bubble as part of the finishing flourish.
Materials Needed
- Bubble wrap (varied bubble sizes if possible)
- Acrylic paints in bold colors
- Canvas, poster board, or thick paper
- Paint tray or paper plates
- Painter’s tape (optional for clean edges)
How to Make It
- Lay bubble wrap on your working surface and dab paint onto the bubbles with a sponge or brush.
- Press the paint onto the canvas, rotating or flipping the bubble wrap to create abstract patterns.
- Let it dry, then add a few bold splashes or geometric lines with a contrasting color for extra drama.
Pro Tips / Styling Ideas
- Mount as a triptych with three canvases across a wall for maximum impact.
- Choose colors that complement your room; neon accents pop against neutrals.
- Seal with a matte spray to reduce texture if you plan to touch it often.
Who would love it or when to use it
Perfect for a teen’s art corner, a playful living-room wall, or a rapid-fire gift for a friend who loves textures and color.
4. Mini Felt-On-Canvas Portraits
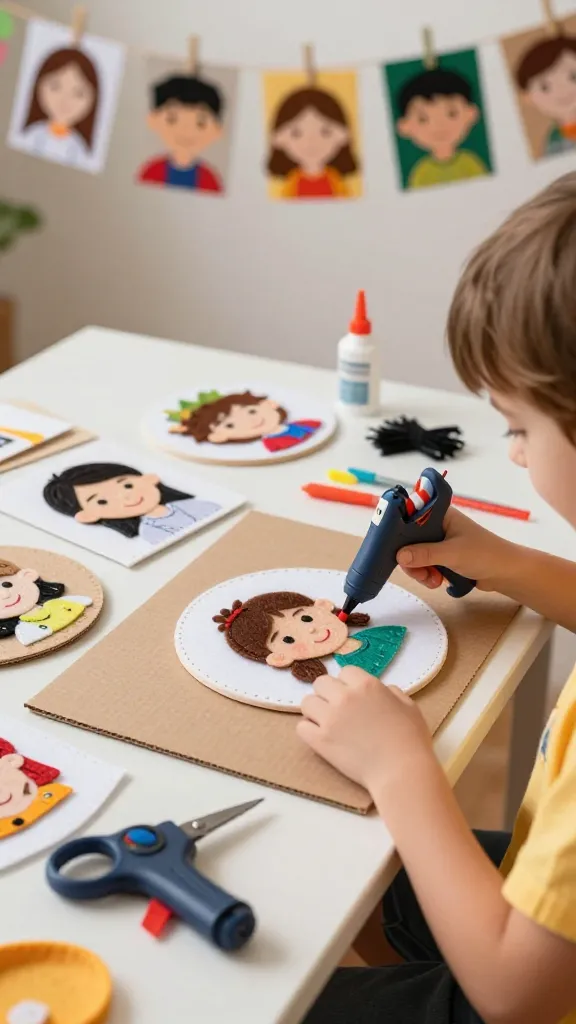
Turn simple felt shapes into tiny, joyful portraits. These mini canvases are cute, quirky, and surprisingly expressive—like little people you can hang on a string or doodle on a gallery wall.
Materials Needed
- Small canvases or thick cardboard
- Assorted felt sheets in skin tones and colors
- Fabric glue or hot glue gun (adult supervision for hot glue)
- Black embroidery floss or gel pen for features
- Scissors
- Optional: tiny beads or yarn for hair and accessories
How to Make It
- Cut a round or square skin-toned felt piece to cover the canvas like a tiny face.
- Layer smaller felt pieces for hair, clothing, and features, gluing them in place.
- Use floss or a marker to add eyes, a mouth, and a few freckles or blush.
Pro Tips / Styling Ideas
- Create a whole collection: a family of felt portraits with different expressions.
- Hang with natural twine and mini clothespins for a cute gallery line.
- Experiment with whimsical outfits or seasonal costumes to keep it fresh.
Who would love it or when to use it
Ideal for a DIY wall of personality, a thoughtful present, or a playful addition to a kid-friendly reading nook.
5. Upcycled CD Mosaic Bird Feeder
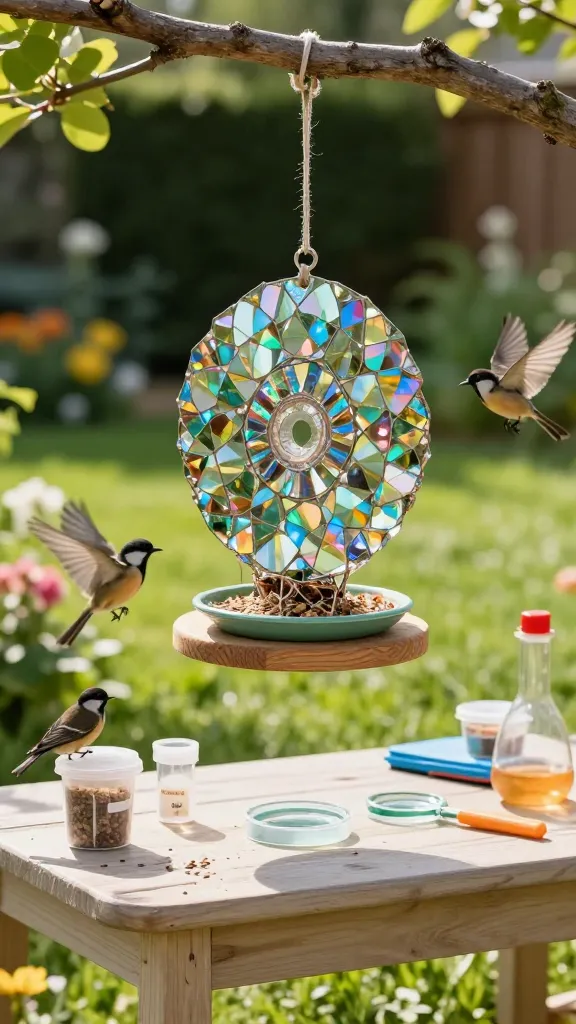
Combine recycling with a charming garden accessory. This bird feeder sparkles in the sun and doubles as a curious, kid-friendly science mini-lab—watching birds swoop by is seriously rewarding.
Materials Needed
- Old CDs or DVDs
- Non-toxic outdoor glue or hot glue (adult supervision)
- Wooden or sturdy plastic base for the feeder
- Short screws or nails, string for hanging
- Birdseed and a small dish or tray
How to Make It
- Break CDs into mosaic-friendly shapes or use whole discs as reflective panels.
- Glue CD pieces onto the base in a colorful, sun-catching pattern. Let dry completely.
- Attach a shallow dish for seed and a hanger so you can place it outside.
Pro Tips / Styling Ideas
- Arrange a rainbow arc around the feeder to maximize sparkle in sunlight.
- Place near shrubs or a window for a closer bird-watching view.
- Replace seed regularly to keep birds returning and to keep it tidy.
Who would love it or when to use it
Great for nature lovers, a backyard project, or a thoughtful, eco-friendly gift for a grandparent’s garden space.
6. Customizable Tie-Dye Phone Case Cushions
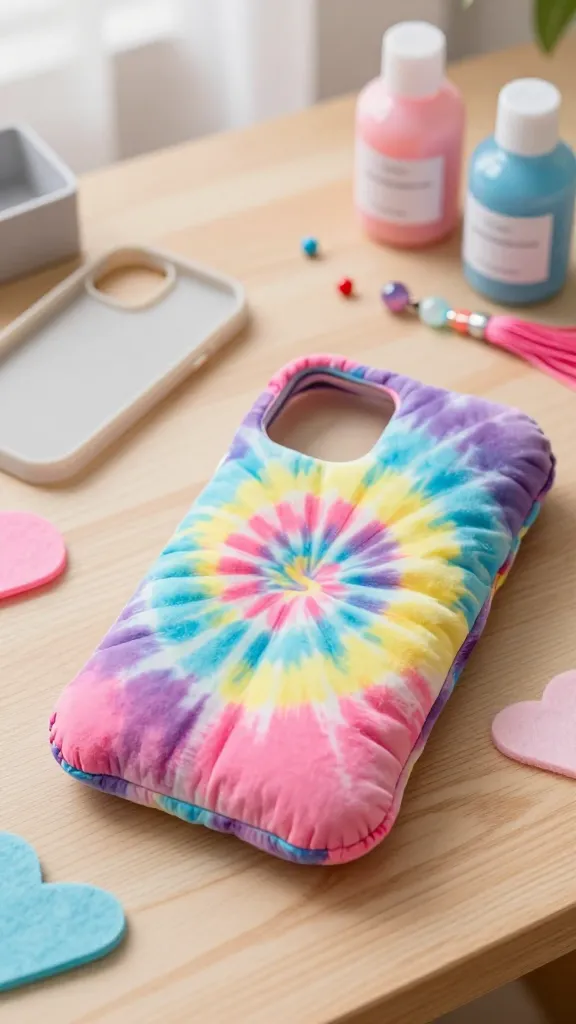
Mix fashion with cozy decor by turning a plain phone-case into a soft, squeezable cushion with a tie-dye twist. This project gives a wearable or desk-friendly accessory a playful, huggable upgrade. You’ll smile every time you grab your phone.
Materials Needed
- Plain silicone phone-case or removable back plate
- Fabric dye or permanent markers (rinse-safe for fabrics)
- Soft felt or foam padding to insert inside for cushion effect
- Glue or double-sided tape
- Optional: decorative beads, tassels, or embroidery floss
How to Make It
- Apply a bold tie-dye pattern to a fabric-cover sleeve or interior fabric using markers or dye, letting it dry thoroughly.
- Line the interior with soft padding to create a cushiony feel when you press the phone case.
- Seal edges with glue and add small decorative elements if desired.
Pro Tips / Styling Ideas
- Pair with neon laces or a playful keychain for a complete look.
- Make a matching cushion for a tablet stand or desk organizer.
- Use ultraviolet-reactive markers for an extra pop in dim light.
Who would love it or when to use it
Perfect for tween fashion-forward styling, desk decor, or gifting a friend who loves cozy, tactile accessories with personality.
Conclusion
Ready to dive in? These six completely unique projects are designed to spark creativity, not chaos. Pick one, or grab a few friends and start a mini crafting club—these ideas are easy to adapt, endlessly reusable, and seriously satisfying to finish. Save, share, and craft your way to a colorful, handmade week.