6 Fun Craft Activities for 5-Year-Olds
Ready to unlock a burst of creativity with your favorite tiny humans? These six unique crafts are perfect for curious 5-year-olds—simple, tactile, and proudly proud of the finished results. Trust me, they’ll be begging to try them all, one colorful project at a time.
1. Preschool Sparkle Paper Plate Dreamcatchers
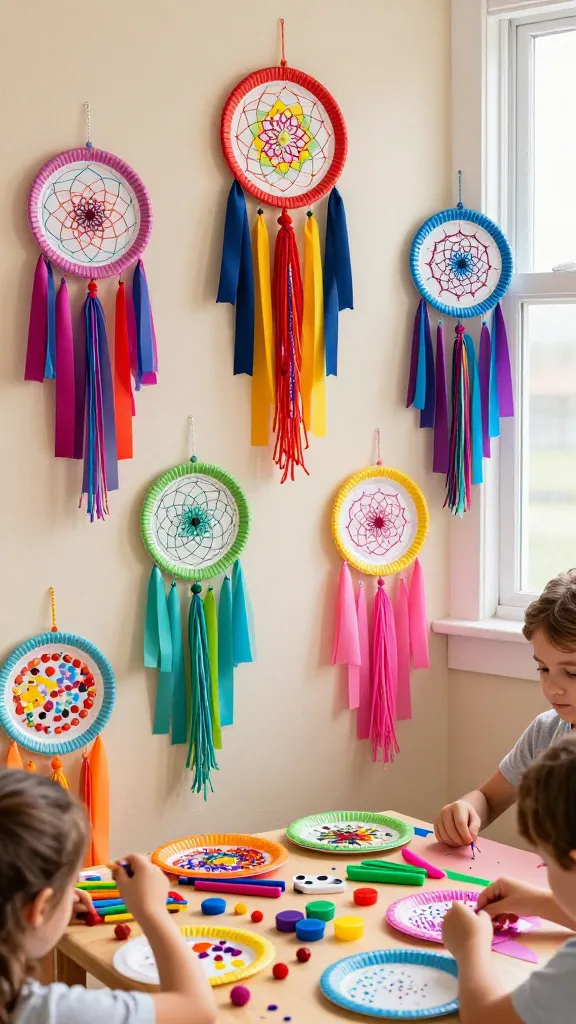
Picture a wall or window glittering with friendly dreamcatchers, each one a riot of color and texture. This craft makes art out of plain paper plates, with kids stitching, stapling, and sprinkling confetti until tiny rainbows appear. It’s playful, tactile, and surprisingly sturdy for little hands.
Materials Needed
- Plain paper plates
- Colored markers, crayons, or paints
- Ribbon or yarn
- Hole punch
- Googly eyes, buttons, pom-poms (optional)
- Glitter or confetti (optional)
How to Make It
- Decorate the plate’s inner circle with doodles and colors—make it bold and kid-friendly.
- Cut a small circle in the center, creating a ring. Poke holes around the inner edge with a hole punch.
- Weave yarn or ribbon through the holes in a simple pattern, then tie ends to create a fringe.
- Attach a strand of ribbon to hang, and adorn with confetti and mini embellishments.
Pro Tips / Styling Ideas
- Use metallic markers for a little extra shimmer that catches the light on sunny days.
- Hang in a kid’s room or create a wall display for a “dreamcatcher forest.”
End Note
This is perfect for little完成ers who love mess-free decorating and tiny sparkles. A fun gift for grandparents, too—who wouldn’t adore a handmade dreamcatcher card?
Who would love it: Curious crafters who adore drawing and turning simple shapes into something magical.
2. Cork Stamps Nature Cards
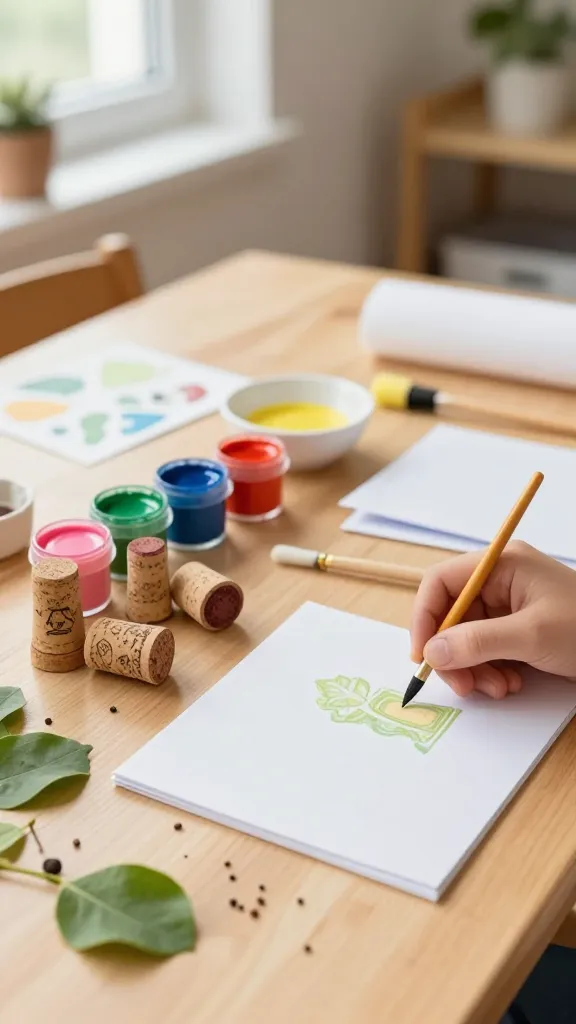
Turn everyday nature finds into stamp-ready art with mini cork stamps. It’s a joyful way to celebrate leaves, seeds, and twigs while teaching little ones about texture and layering. The cards become tiny keepsakes to gift or mail to loved ones.
Materials Needed
- Cork halves from wine bottles (or corks)
- Acrylic paint in child-friendly colors
- Foam brushes
- Blank greeting cards or sturdy colored paper
- Paper towels for quick cleanups
How to Make It
- Slice corks into flat stamps or leave whole for a chunky look. Dip in paint.
- Stamp shapes onto cards—trees, hearts, circles—whatever the adventure inspires.
- Let little hands experiment with color blending and layering.
Pro Tips / Styling Ideas
- Pair with natural textures like pressed leaves or twine accents for a mini nature gallery.
- Use a “forest palette” (greens, browns, and soft yellows) for a cohesive set of cards.
End Note
Simple, earthy, and satisfying to complete in one short session. Kiss of creativity in every stamp makes this one a repeat favorite.
Who would love it: Kids who love mess-free stamping and nature-themed art.
3. Pom-Pom Party Gingerbread Friends

Imagine a group of cuddly, fuzzy friends built from pom-poms, felt, and tiny googly eyes. This little assembly line of cuteness yields ornaments, garland, or desk buddies—great for holiday vibes or just because you’re feeling cozy and crafty.
Materials Needed
- Pom-poms in assorted sizes
- Colored felt scraps
- Glue sticks or craft glue
- Googly eyes
- Small buttons or beads for noses
- Thread or string for hanging (optional)
How to Make It
- Glue two pom-poms together to build a friendly body and head duo. Add a smaller pom-pom as a hat or hair.
- Cut tiny felt pieces for ears, noses, and mouths. Attach with glue.
- Affix googly eyes and any extra decorations. Add a string if you want to hang them as ornaments.
Pro Tips / Styling Ideas
- Create a whole crew: reindeer pals with brown pom-poms, carrot noses from orange felt, and sparkly pipe-cleaner antlers.
- Use these as a tactile gift tag garland by attaching to cards or gift wraps.
End Note
Cute, squishy, and super kid-friendly, these friends spark joy and a little imagination with every squeeze.
Who would love it: Tiny party planners who adore soft textures and character-building crafts.
4. Egg Carton Forest Critters
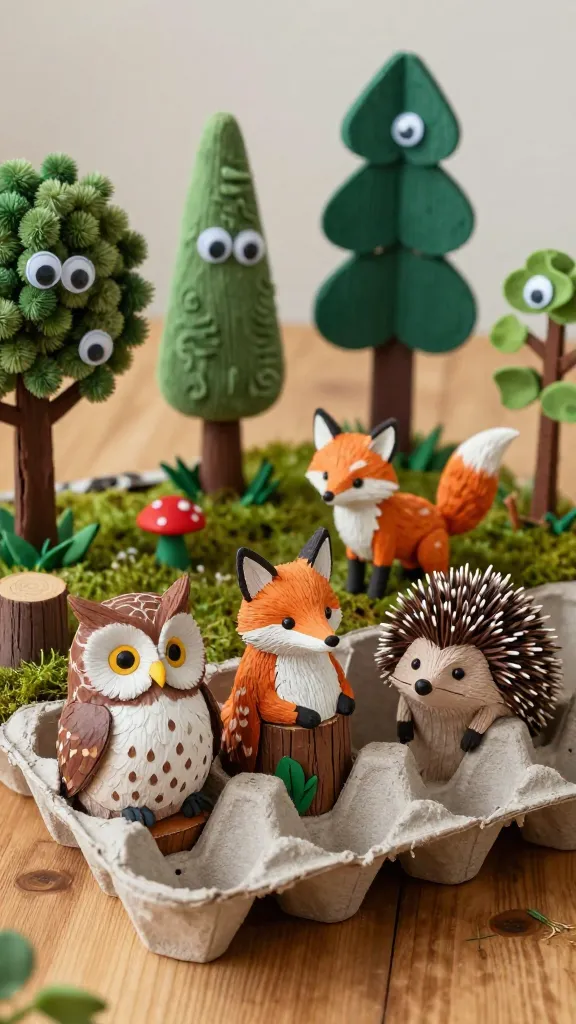
Give new life to a humble egg carton by turning it into a tiny woodland scene. Think mini owls, foxes, and hedgehogs perched on painted tree stumps. It’s a scalable project—start with one critter and build a whole little forest as time allows.
Materials Needed
- Egg carton cups
- Acrylic paints (various greens, browns, and a pop color)
- Pipe cleaners
- Googly eyes
- Glue and scissors (adult supervision)
- Cardboard for a base (optional)
How to Make It
- Cut the egg carton cups and paint them to resemble animals or trees. Let colors dry between coats.
- Attach pipe cleaners as branches or tiny legs, then add eyes or noses with paint or googly eyes.
- Create a base from cardboard and arrange the critters on a painted “forest floor.”
Pro Tips / Styling Ideas
- Add tiny leaf confetti or tissue paper leaves for a pop of color.
- Place the scene on a shelf or use as a playful centerpiece for a birthday table.
End Note
Earth-friendly, frugal, and wonderfully imaginative, this forest grows with every addition.
Who would love it: Kids who adore animals and scenes, plus parents who appreciate upcycling.
5.DIY Stitched Photo Banner
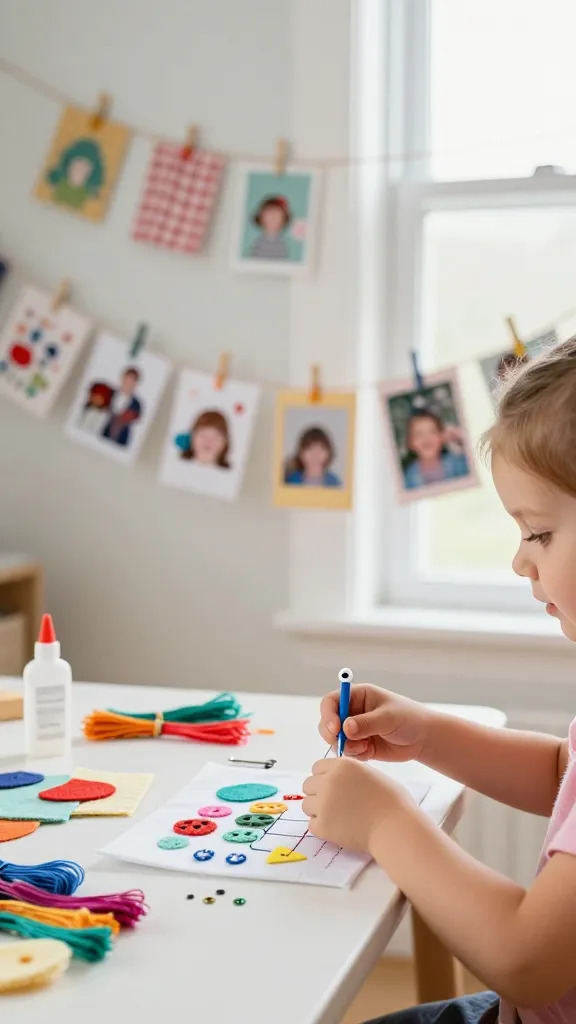
A banner that doubles as a memory-keeper? Yes, please. This project is a gentle intro to sewing-like activities, using simple stitches, fabric scraps, and favorite snapshots or drawings. The result is a cheerful wall garland that feels personal and proud.
Materials Needed
- Pre-cut fabric squares or felt pieces
- Colored embroidery floss or yarn
- Plastic needle with a large eye (or safety plastic needle)
- Photos, drawings, or printed mini art
- Grommets or clothespins for hanging
- Glue (optional)
How to Make It
- Let kids thread a needle with a simple running stitch around the fabric edge or through simple shapes.
- Attach a photo or drawing to each fabric square with glue or a simple stitch.
- Line up the squares and string them together with embroidery floss, leaving some fringe for a playful touch.
Pro Tips / Styling Ideas
- Choose a color palette that matches a room’s vibe for a cohesive look.
- Hang across a doorway, window, or bed headboard for instant charm.
End Note
It feels personal yet wonderfully decorative—a banner with stories stitched into every square.
Who would love it: Mini-sewers and story-tellers who enjoy turning memory keepsakes into room decor.
6. Salt Dough Miniature Fairy Garden Sets
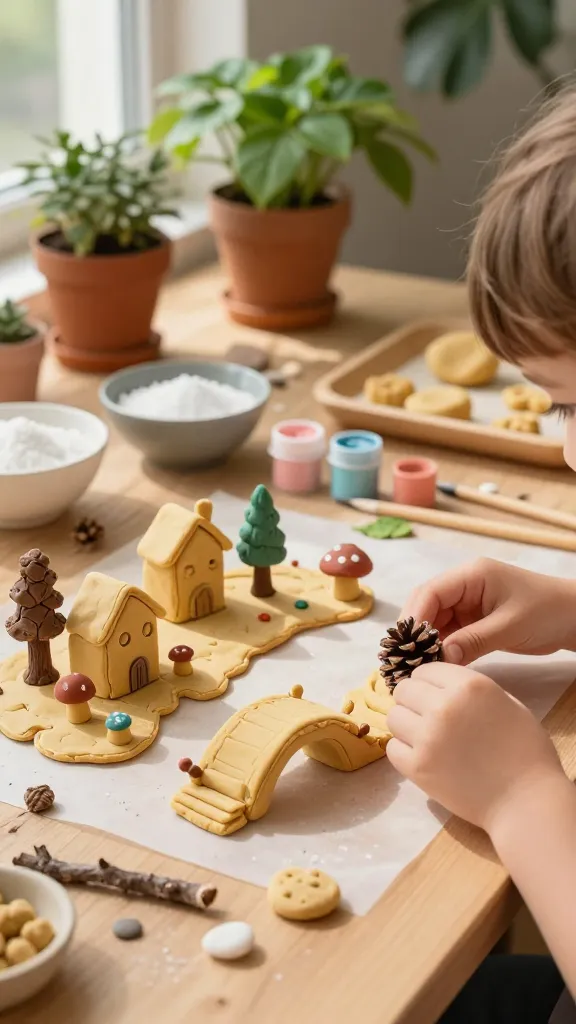
Turn a handful of kitchen staples into a miniature fairy garden bursting with texture and whimsy. Kids roll, press, and shape tiny houses, mushrooms, and benches—then bake, paint, and hide them among real potted plants or a dedicated tabletop scene. This is nature meets pretend play in the coziest way.
Materials Needed
- Salt dough (1 cup flour, 1/2 cup salt, 1/2 cup water)
- Acrylic paints and brushes
- Miniature trinkets or natural accents (pebbles, leaves, twigs)
- Cookie cutters in fun shapes (optional)
- Clear varnish or Mod Podge (optional, for sealing)
How to Make It
- Mix dough and roll out to about 1/4 inch thick. Use cookie cutters or shape with hands to form tiny houses, mushrooms, benches, and critters.
- Bake according to dough instructions until hard, then cool.
- Paint with bright colors and seal with varnish if desired. Arrange in a shallow tray or nestled among plants.
Pro Tips / Styling Ideas
- Create a dedicated fairy corner on a bookshelf or windowsill for ongoing play.
- Place a few real stones and moss to ground the miniature scene in nature.
End Note
A tiny world in your home that grows with each season, offering endless storytelling opportunities.
Who would love it: Imaginative kids who adore tiny structures and nature-inspired play.
Conclusion
Six completely unique crafts, all delightfully suited for 5-year-olds—easy to set up, inviting to touch, and bursting with color. Grab a plan, a few simple supplies, and your kiddo, and dive into a weekend of creative play. You’ll love watching their faces light up as each project comes to life—and trust me, you’ll save these ideas for future rainy days, birthdays, and seasonal decor too.