7 Creative Craft Ideas for 4-Year-Olds
Brace yourself for a burst of color, glue, and giggles. These 7 Creative Craft Ideas for 4-Year-Olds are all about simple supplies, big smiles, and finished projects that actually look artistic enough for the fridge wall. Trust me, your tiny Picasso will be proud of every stamp, splash, and sprinkle.
1. Bubble Wrap Monster Tape Art
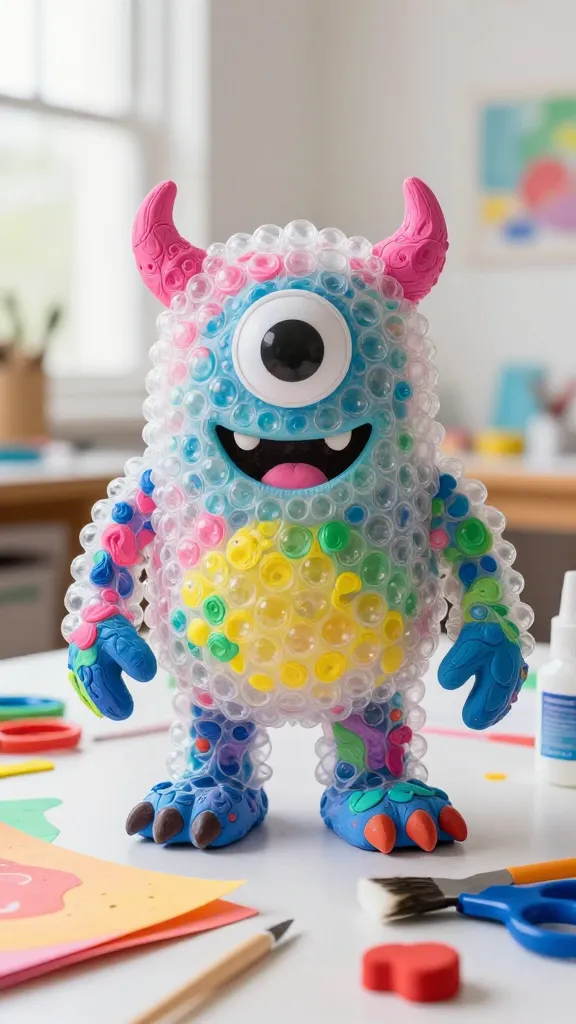
Imagine a friendly monster made from bubble wrap textures and bold paint. This project turns a household packing material into a gallery-worthy creature that kids adore to touch and create with. It’s oddly satisfying and unbelievably tactile.
- Materials: bubble wrap, tempera paints, thick paper or cardstock, washable child-safe glue, googly eyes, markers
- Tools: foam brushes, blunt scissors
- Key steps:
- Squish paint onto the bubble wrap, press a sheet of paper over it, and peel away to reveal a bubbly print.
- Cut bubble shapes into monster silhouettes, add eyes, and draw silly mouths.
- Glue the bubbles onto a final background and add accents with markers.
Finish with a goofy grin and a name tag for your new buddy. This one’s perfect for a kid’s room display or a playful gift for family members who could use a giggle. Your kid will love seeing texture come to life, and you’ll love the quick cleanups. FYI, it’s surprisingly forgiving for little hands.
2. Paper Plate Animal Parade Masks
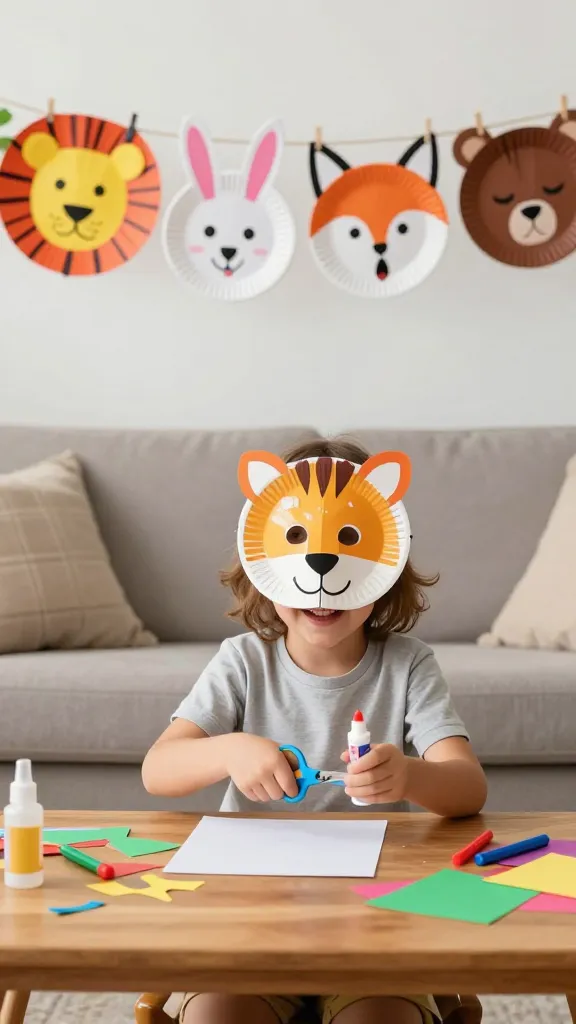
Turn plain paper plates into a parade of cute critter masks that spark make-believe adventures. The colors pop, the shapes are friendly, and your kid gets to practice scissor skills without the scary part. It’s a mini-costume party in your living room.
- Materials: paper plates, kid-safe scissors, washable markers, colored paper, glue sticks, elastic string
- Tools: scoring tool or crayon to crease, hole punch
- Key steps:
- Cut out facial features from colored paper and glue them onto the plate.
- Color the plate backing and punch two small holes for the strap.
- Attach elastic so the mask fits snugly on little faces.
Consider making a whole animal lineup: lion, bunny, owl, and frog. These masks are great for pretend play, story time, or a quick photo booth setup at a birthday party. The best part? They store flat for easy crafting on a rainy day.
3. DIY Color Mixing Sensory Bags
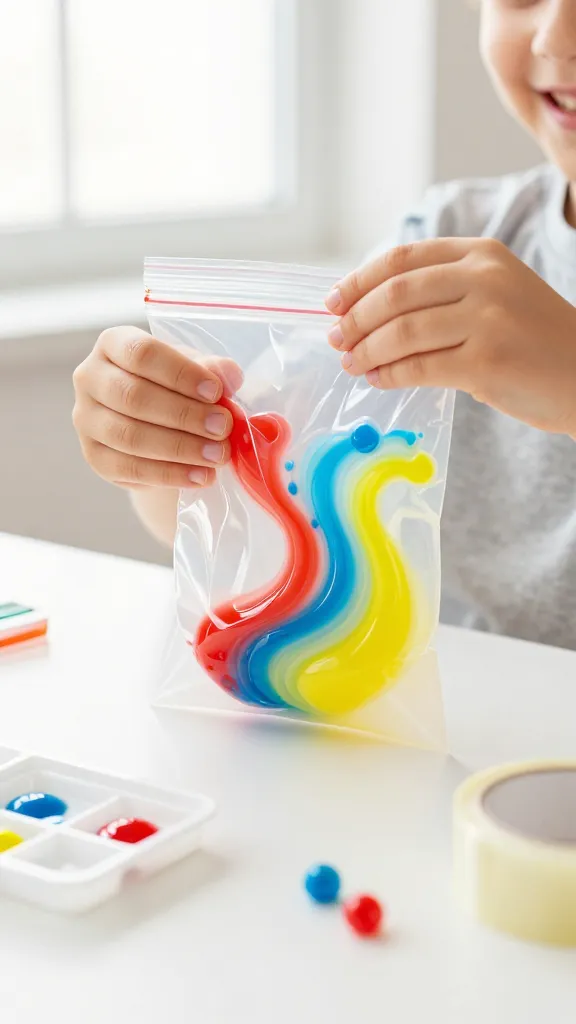
Sensory play meets color science in a sealed, squishy bag that’s safe, reusable, and mesmerizing to watch. The bright swirls teach early color mixing while keeping mess in check—seriously, it’s soothing for both parents and toddlers.
- Materials: gallon-sized zipper bags, clear hair gel or white school glue, food coloring or paste paints, small plastic trays
- Tools: tape or packing tape to seal
- Key steps:
- Fill a bag with gel or glue and a few drops of color. Seal tightly with extra tape.
- Let your child tilt, press, and watch colors blend into new hues.
- For added texture, sprinkle a pinch of glitter or confetti inside before sealing.
These are perfect for a quiet crafting station, a calming sensory break, or a travel-friendly activity. Kids adore the magical swirls, and you’ll appreciate how calming it feels to watch them explore color. You’ll love how quick cleanups are—trust me.
4. Foam Sticker Collage Trees

A leafy forest on the wall that your little artist actually built with their own hands. This project uses foam stickers to create textured leaves and a layered tree scene, giving 4-year-olds a sense of accomplishment with visible results.
- Materials: green and brown foam stickers, construction paper or canvas, child-safe glue, pre-cut tree trunk shapes
- Tools: scissors (for adult use), optional gold and orange stickers for fall accents
- Key steps:
- Draw or pre-cut a simple tree trunk on paper or canvas.
- Let kids press foam leaves in a mosaic pattern to build a lush canopy.
- Add a sun, clouds, or birds for extra whimsy.
Display the collage on a bedroom wall or in a hallway as a seasonal “forest” scene. It’s a wonderful way to practice fine motor skills while making something that looks delightfully finished. This one says: you’re creative, and the forest is your canvas.
5. Recycled Cardboard Box City
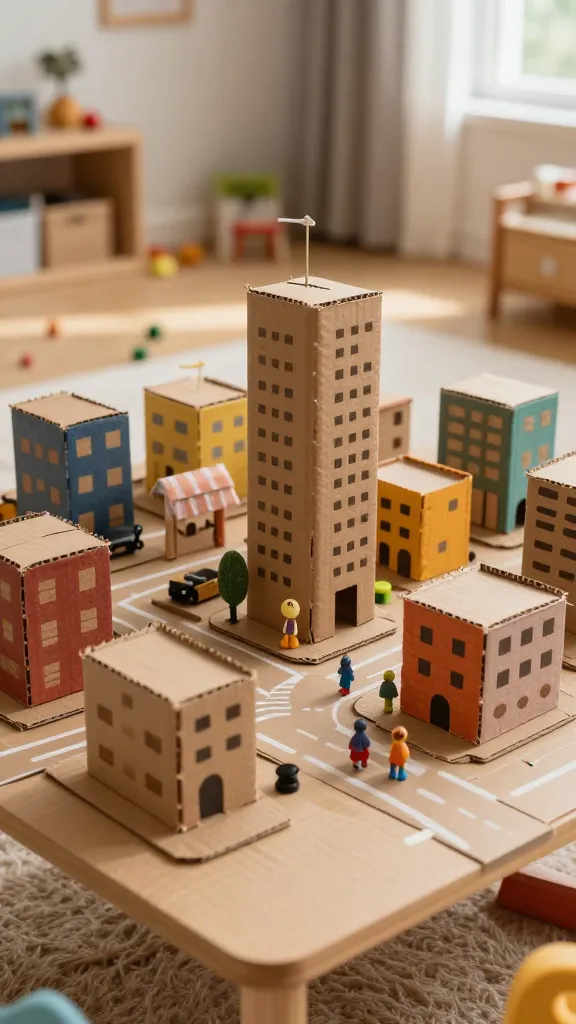
Transform cardboard boxes into a tiny cityscape with roads, buildings, and little people. The magic lies in the scale and the texture—everything feels big enough for little hands to manipulate, yet compact enough to fit on a coffee table. Ready for a tiny urban planner to emerge?
- Materials: cardboard boxes, markers or acrylic paints, old fabric scraps, bottle caps, glue, tape
- Tools: craft knife (adult use only)
- Key steps:
- Flatten and paint the exterior of boxes to create separate buildings and sidewalks.
- Use fabric scraps for roads and tiny fabrics for park spaces. Glue bottle caps as wheels or trees.
- Create little paper people or use foamy dolls to populate the city.
One afternoon, you’ll watch a bustling micro-city come to life, and your kiddo will be proud to host a grand opening with a “city tour” for stuffed animals. It’s sturdy, stashable, and endlessly reconfigurable—a true craft-core favorite.
6. Magnetic Button Forest Ornaments
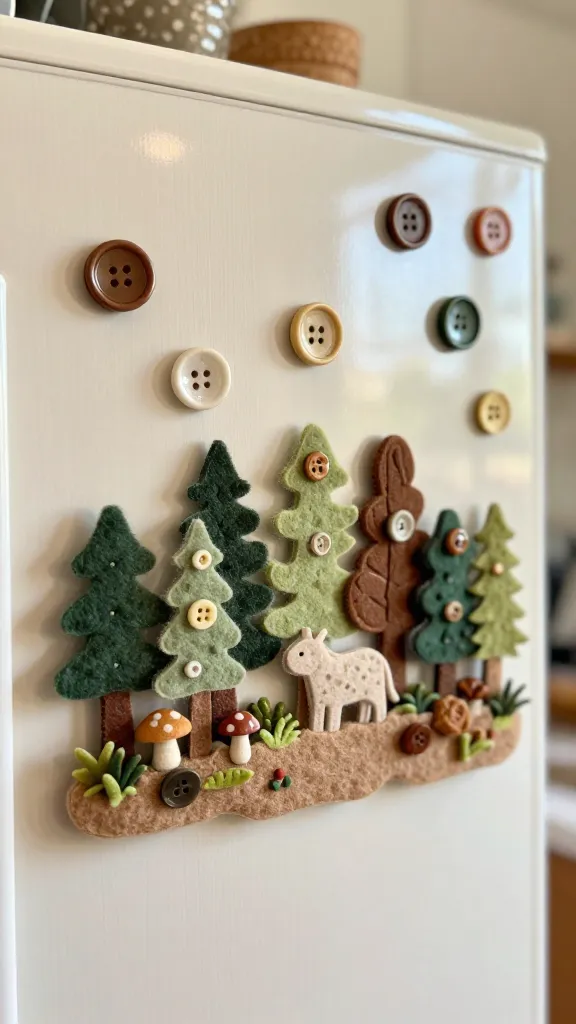
Bring a touch of whimsy to the refrigerator with tiny “forest” ornaments made from buttons, felt, and magnets. It’s a playful, tactile project that doubles as a fridge gallery and a peek into gentle nature vibes.
- Materials: assorted buttons, felt shapes, small magnets, craft glue, wooden or cardboard bases
- Tools: scissors, hot glue gun (optional, for stronger hold)
- Key steps:
- Arrange forest shapes on felt and glue to create a mini scene.
- Attach a magnet to the back of each ornament.
- Stick them onto a metal board or the fridge for a magnetic mini-forest display.
This project is a crowd-pleaser for grandparents, teachers, or anyone who loves a tiny, tactile ode to trees. It’s simple to customize with your kid’s favorite colors, and the magnets make it a permanent, playful home feature.
7. Salt Dough Keepsake Footprint Ornaments

A classic with a modern twist—personalized keepsakes that capture a moment in time. The dough is forgiving for tiny hands, and the resulting ornaments are charming gifts or memory-filled decorations to hang year after year.
- Materials: 2 cups flour, 1 cup salt, 3/4 cup water, acrylic paints, ribbon or twine, sealant (optional)
- Tools: mixing bowl, rolling pin, oven
- Key steps:
- Mix dough until smooth, roll flat, and press child’s foot (or hand) to create a print.
- Cut around the print with a simple shape, poke a hole for hanging, bake until hard.
- Paint with colors and seal to preserve. Tie on ribbon for a ready-to-hang ornament.
Adorable as a holiday keepsake or a year-round decoration, these ornaments celebrate growth and memory. It’s a sweet, sentimental project that kids will love making for family members who adore their tiny artist.
Conclusion
These 7 Creative Craft Ideas for 4-Year-Olds are the perfect blend of play, learning, and adorable results. Each project is designed to be simple, mess-limiting, and seriously satisfying for little hands and big imaginations. Pick one (or all seven) and set up a mini craft party—your fridge, walls, and future photo albums will thank you.
Ready to start? Gather a few supplies, pick a project that matches your mood, and let the creativity flow. You’ll love how easy and fun these are, and your kid will proudly show off their masterpieces to anyone who visits. Happy crafting!