6 Educational 3rd Grade Craft Ideas for School
Ready to spark curiosity and creativity in the classroom? These six DIY crafts are perfect for 3rd graders—engaging, educational, and totally shareable on Pinterest. You’ll love how easy they are to set up and how excited students get to show off their work.
Let’s dive into craft ideas that blend hands-on making with core learning moments. Trust me, these projects turn lessons into memorable masterpieces.
1. Solar System Swirl Wall Mobiles
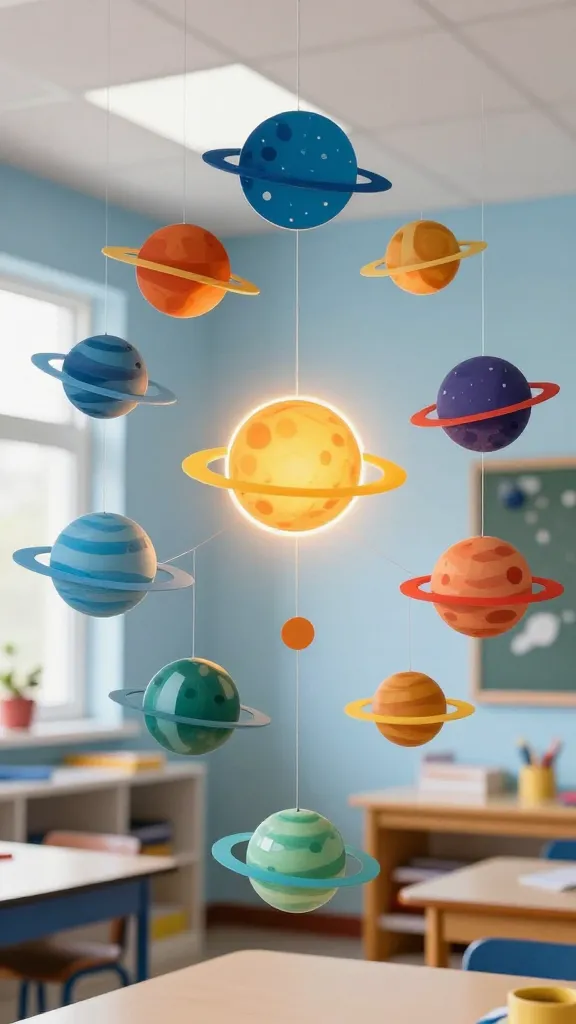
Finish with a sky-full of planets orbiting a glowing sun, and you’ve got a classroom centerpiece that doubles as a science refresher. The colors pop, the textures are playful, and the project reinforces order of the planets and basic space facts. Seriously, imagine students explaining their own planet’s distance from the sun—adorable and educational.
Materials Needed
- Cardstock in space-themed colors
- Sturdy paper circles or foam sheets for planets
- String or thin fishing line
- Shiny tape or glue
- Scissors, hole punch, and a lightweight wooden dowel or embroidery hoop
- Marker or paint for planet labels
How to Make It
- Cut out circles for each planet in the correct order from the sun (Mercury to Neptune) and label them.
- Paint or color the planets with distinctive textures—rings for Saturn, bands for Jupiter, etc.
- Punch holes at the top of each planet and string them along different lengths.
- Attach the strings to the dowel or hoop in a balanced arrangement.
- Hang the mobile where students can study it from below or above.
Pro Tips / Styling Ideas
- Use glow-in-the-dark paint for a night-sky effect.
- Group the mobile with a simple labeled star chart on nearby wall space.
End Note
This craft is perfect for science centers or hallway displays. It’s a crowd-pleaser for kids who love astronomy, and it helps reinforce the relative positions of planets.
Who would love this?
Science buffs, visual learners, and students who adore big, bright decor.
2. Time-Travel Timeline Bookmarks
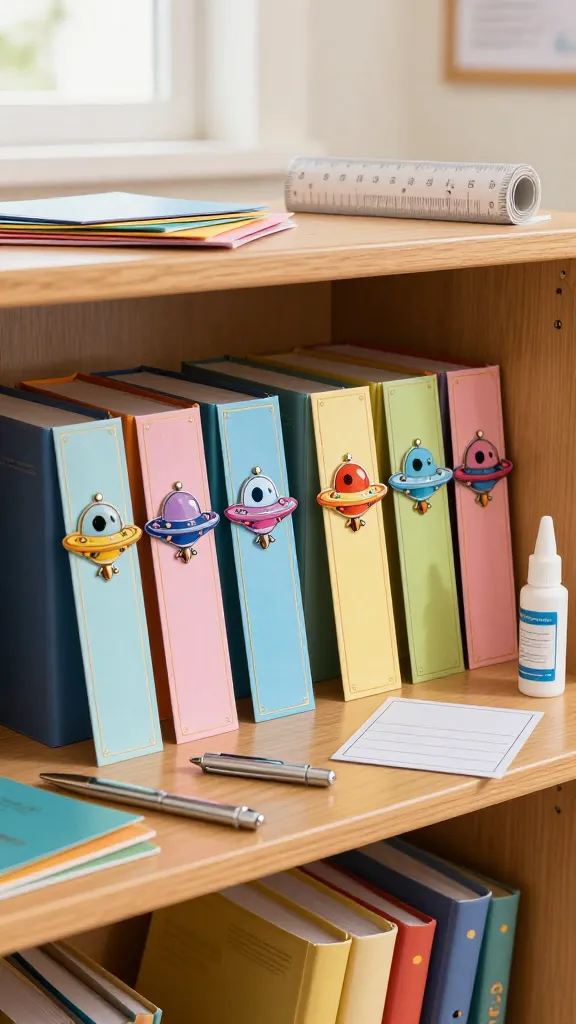
Picture a shelf full of bookmarks that double as mini history lessons. These time-traveling anchors keep students engaged as they flip through their reading. They look adorable tucked into novels or used as classroom library reminders of key dates and events. You’ll love how quickly they come together and how proudly students display them.
Materials Needed
- Cardstock or craft foam in multiple colors
- Printable timeline dates or create your own
- Metallic pens or markers
- Ruler, scissors, glue sticks
- Optional: small stickers or stamps for decoration
How to Make It
- Cut bookmark shapes (about 2 inches by 6 inches) from colored cardstock.
- Decorate each bookmark with a historic era, a famous figure, or a key date.
- Write a one-sentence clue or fact on the back for quick study prompts.
- Laminate if you want durability, and punch a hole for a tassel if you like.
Pro Tips / Styling Ideas
- Coordinate colors with a classroom history unit’s theme.
- Attach a small ribbon or tassel for a bookstore-like vibe.
End Note
These bookmarks turn silent reading into an interactive scavenger hunt. They’re fantastic for character studies, ancient civilizations, or pivotal moments in history.
Who would love this?
Reading groups, history lovers, and kids who adore collecting neat little classroom keepsakes.
3. Fraction Art Quilt Blocks
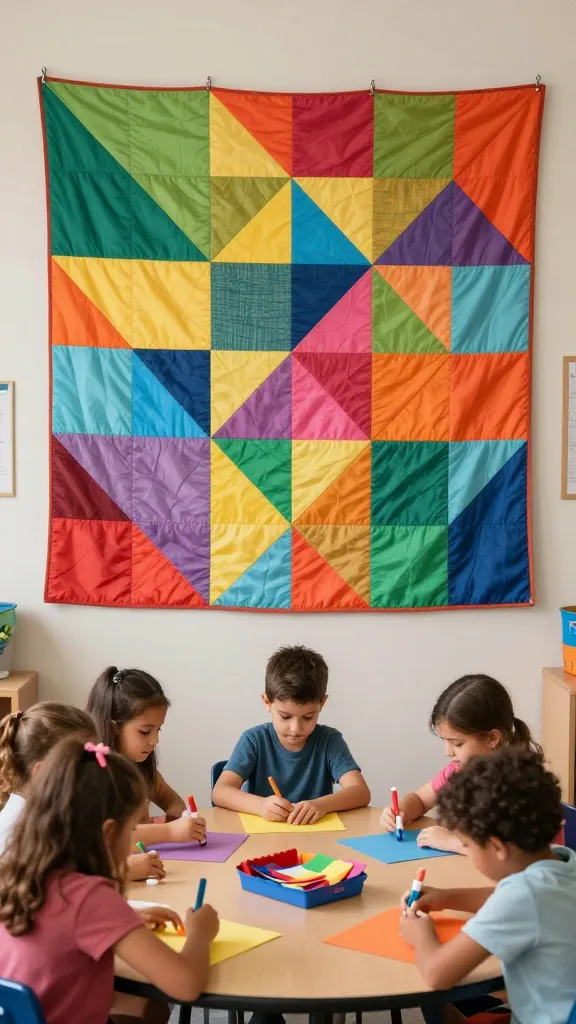
Turn fractions into a cozy, color-splashed art piece students can proudly hang. Each block represents a fraction, and the collective quilt demonstrates equivalent fractions, part-whole relationships, and color-matching skills. It’s both a math lesson and a visual feast—plus it looks stunning above a reading corner or math wall. You’ll be surprised by how much teamwork shines in this one.
Materials Needed
- Squares of foam or cardboard (about 6×6 inches each)
- Colored paper or fabric scraps
- Glue, scissors, ruler
- Black marker for outlining
- Optional: button or fabric texture for added interest
How to Make It
- Assign each student a fraction (e.g., 1/4, 1/3, 1/2) and provide a base square.
- Have students fill the square with shapes or colors that illustrate the fraction and its equivalents.
- Arrange the blocks into a quilt pattern and mount on a display board or wall.
Pro Tips / Styling Ideas
- Include a small legend on the board to reinforce fraction values.
- Mix textures with fabric scraps for tactile learning.
End Note
Fraction Art Quilt Blocks celebrate both math accuracy and creative design. It’s a perfect group activity that yields a teachable display piece.
Who would love this?
Math-minded kiddos, color lovers, and anyone who appreciates a cozy classroom vibe.
4. Alphabet Shadow Box Creatures
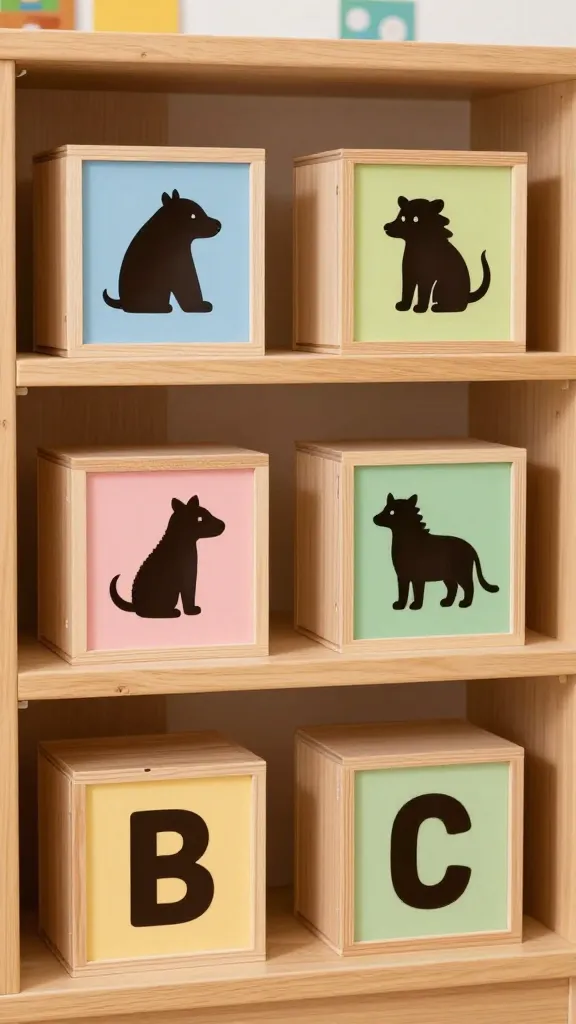
Educational and whimsical, these shadow boxes bring letters to life with friendly animal silhouettes. Each box highlights a letter, its sound, and a quick fact related to the animal chosen. It’s a tactile alphabet booster that doubles as a playful shelf buddy. FYI, little ones might squeal with delight at the cute creatures peeking out.
Materials Needed
- Small wooden boxes or thick cardboard boxes
- Cardstock in assorted colors
- Animal silhouettes cut from black construction paper or vinyl
- Glue or double-sided tape
- Markers or paint for letter labels
How to Make It
- Paint the inside of the box or line it with decorative paper.
- Cut a big letter on the front of the box and place the animal silhouette behind it to cast a shadow when lit.
- Label the box with the corresponding letter and a short fact (e.g., A for Alligator: “A is for Adventure!”).
- Lightly decorate the exterior with doodles or patterns.
Pro Tips / Styling Ideas
- Use a small LED tea light behind the silhouette for dramatic effect.
- Create a full classroom alphabet wall by lining up each letter in order.
End Note
These shadow boxes mix literacy with a touch of whimsy, making alphabet practice feel like magical storytelling. They’re a hit on reading corners and hallway displays.
Who would love this?
Early readers, art lovers, and anyone who enjoys a playful, collectible display.
5. Plant Detective Terrariums
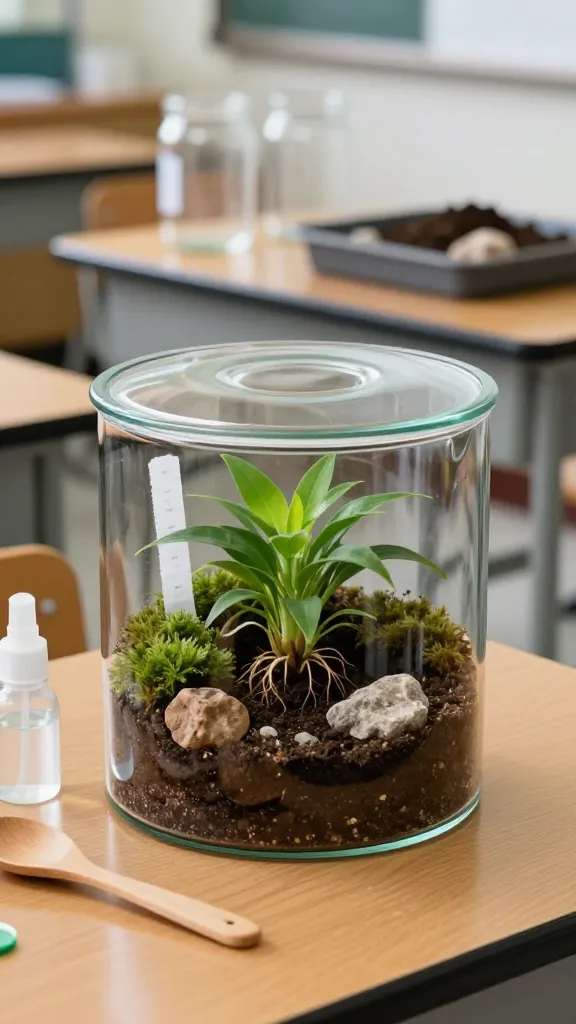
Turn a simple terrarium into a mini biology lab. Students observe plant growth, soil conditions, and humidity in a tiny, clear-world display. It’s soothing to watch, incredibly educational, and totally Instagram-worthy. You’ll hear “I’m observing” echoed around the room as they monitor moisture levels and plant health.
Materials Needed
- Clear plastic or glass containers with lids (recycled jars work great)
- Small rocks or gravel for drainage
- Activated charcoal (optional, for odor control)
- Moist potting soil and small houseplants or seeds
- Miniature figurines or decorative accents (optional)
How to Make It
- Layer rocks, charcoal, and soil inside the container.
- Plant small greenery or sow seeds, then mist lightly.
- Place decorative accents and label the container with the plant’s name and a fun fact.
Pro Tips / Styling Ideas
- Create a “water cycle” mini-poster to accompany each terrarium for quick reference.
- Position in bright but indirect light and remind students to observe daily.
End Note
Plant Detective Terrariums turn biology into a live, low-maintenance science station. They’re great as a classroom centerpiece or individual student stations.
Who would love this?
Nature lovers, curious minds, and budding scientists who enjoy a calm, focused activity.
6. Recycled Robot Rascals
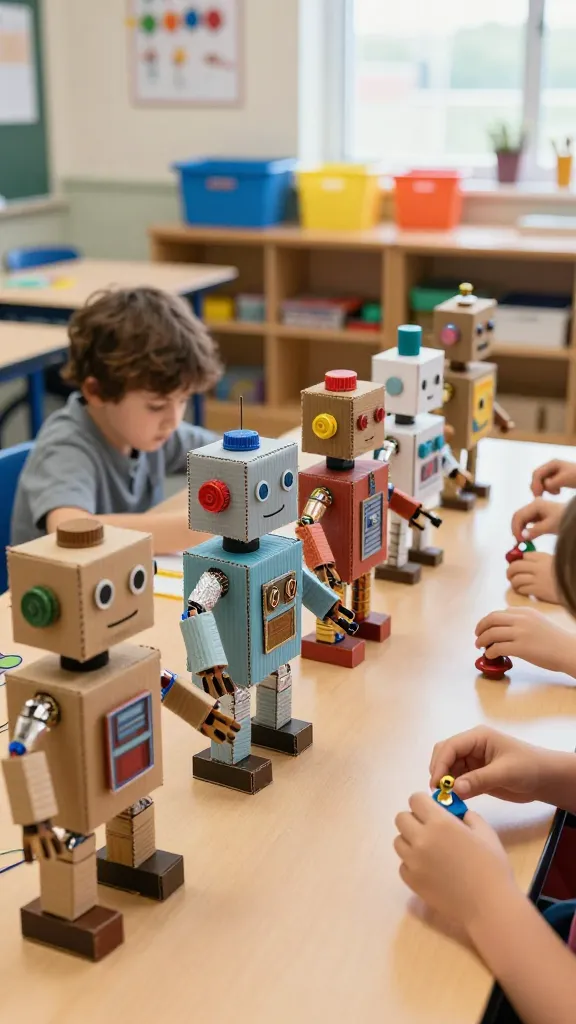
Turn scraps into synth-powered classroom fun. These robots are built from everyday recyclable materials and taught a simple science-note: we reuse to create. The result is a row of quirky little bots with unique personalities. It’s a blast watching students negotiate problem-solving and teamwork while crafting. Seriously, you’ll hear giggles and exclamations as the robots come to life.
Materials Needed
- Cardboard boxes of various sizes
- Caps, bottle tops, foil, yarn, and other small recyclables
- Glue, tape, scissors
- Markers, stickers, and optional googly eyes
How to Make It
- Sketch a simple robot shape on cardboard and cut it out.
- Use recyclables to build arms, legs, and bodies. Attatch with glue or tape.
- Decorate with markers, foil, and stickers. Give each robot a quirky name and a “function” card (e.g., “mop the dust,” “tell jokes”).
Pro Tips / Styling Ideas
- Group robots by color or function for a classroom display grid.
- Create a mini robot gallery with student-written bios on the back of each figure.
End Note
Recycled Robot Rascals celebrate creativity, sustainability, and collaboration. They’re perfect for open-ended projects or as a fun end-of-week craft that tidies up stray materials.
Who would love this?
Inventors, builders, and kids who love a little humor and a lot of personality in their crafts.
Conclusion
These six Educational 3rd Grade Craft Ideas for School are designed to spark curiosity, encourage collaboration, and create vibrant, lasting classroom displays. Each project stands on its own with a unique theme, tactile elements, and a clear link to learning goals. Pick one, or try them all—your students will be buzzing with pride, and you’ll have a treasure trove of ready-to-pin visuals to share.
Ready to dive in? Grab a tableful of supplies, rally your class, and start crafting your way through the curriculum. These projects are fun, approachable, and seriously rewarding when you see the wow on a student’s face. Have fun making learning unforgettable!