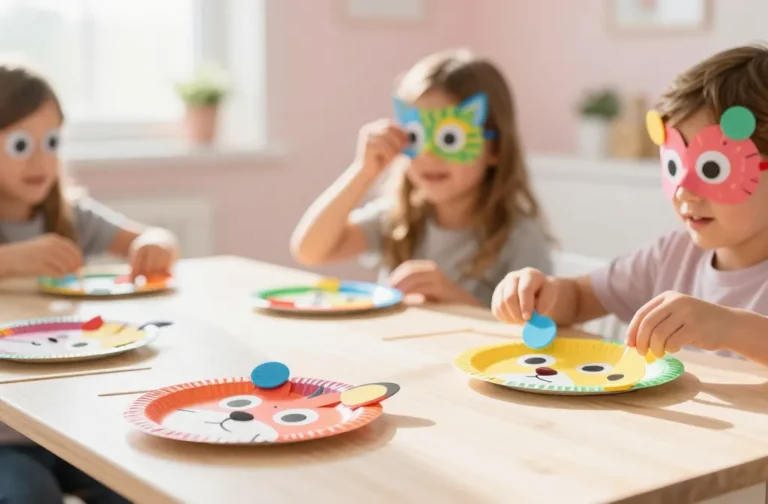
6 Epic Luxury Kids Activities at Home for a Special Day
Ready to turn a regular day into a sparkly, boutique-style adventure for the little ones? These 6 epic ideas are designed to feel luxe without the hefty price tag. Think immersive play, photo-worthy setups, and crafts that double as keepsakes—trust me, your kids will be buzzing with excitement.
Let’s dive into six distinct, fully original projects that scream high-end whimsy while staying approachable. No repeats, no overlaps, just six unique ways to shine on a special day.
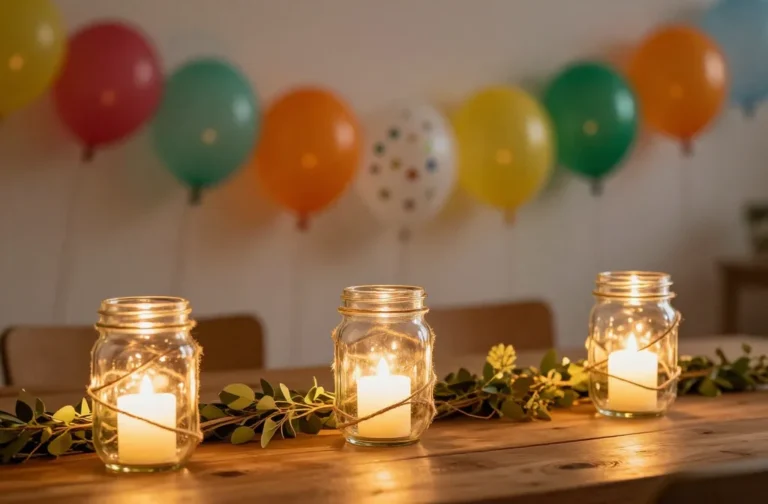
1. Velvet-Glow Treasure Trove Lantern Garden
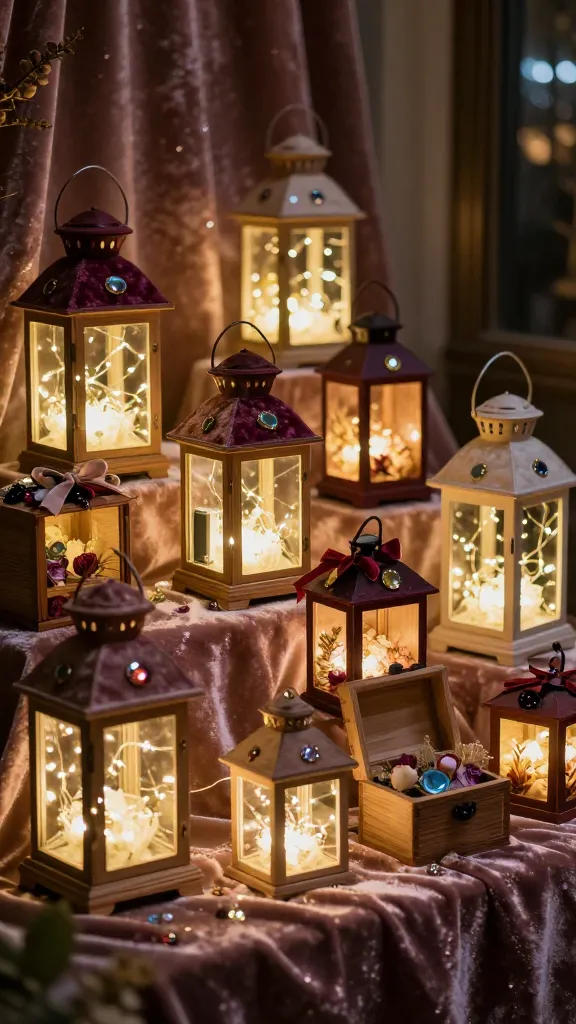
Imagine a mini, moonlit wonderland you can carry from room to room. That’s this Velvet-Glow Treasure Trove lantern garden—soft velvet textures, twinkling lights, and secret compartments for tiny treasures. It feels magical, like a boutique display you’d spot in a dream boutique window.
Materials Needed
- Small wooden lanterns or hollowed mini wooden boxes
- Decorative velvet fabric scraps
- USB fairy lights (battery pack hidden inside)
- Small faux gems, beads, and dried florals
- Decorative ribbon and ribbon clips
- Double-sided tape or craft glue
How to Make It
- Line the interior with a square of velvet, leaving a lip to tuck edges under the lantern top.
- Wrap the exterior with velvet strips for a plush look, securing with glue.
- String fairy lights into the lantern, weaving between velvet folds for a soft glow.
- Fill the base with mini treasures and sprinkle in beads and dried florals for texture.
- Top with a ribbon bow that doubles as a handle for easy portability.
Pro Tips / Styling Ideas
- Place in a dim corner to cast cozy shadows—perfect for a pretend treasure cave.
- Swap in seasonal gems (tiny plastic shells in summer, felt snowflakes in winter).
- Create a mini “keeper list” of treasures to trade or discover on the day.
Who would love it or when to use it: A dreamy, Instagrammable centerpiece for a luxe indoor scavenger hunt or a quiet storytelling nook. Ideal for kids who adore tactile textures and soft lighting. FYI, it’s seriously enchanting in low light.
2. Ocean-Silk AR Treasure Map Adventure
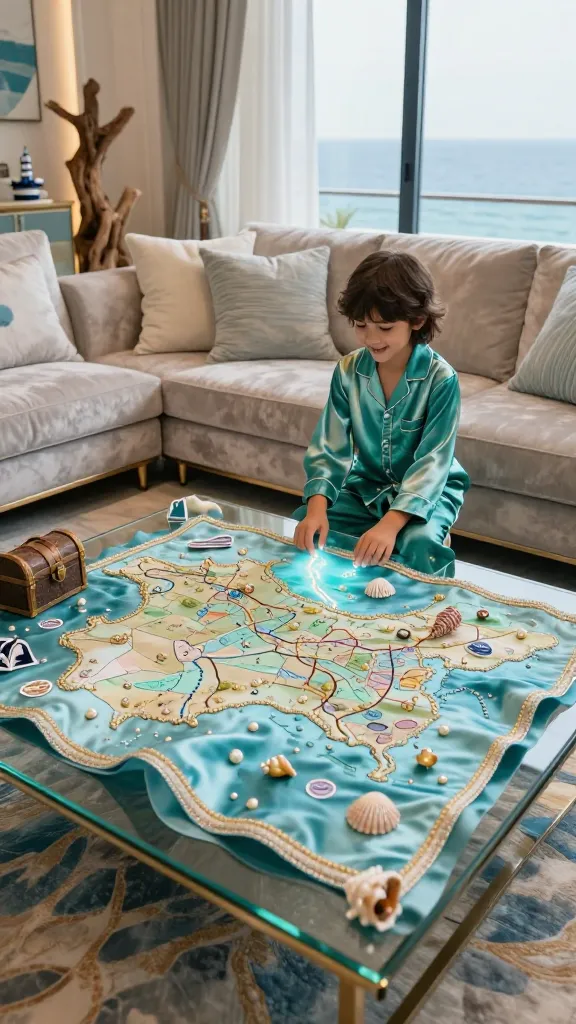
Turn your living room into a high-end nautical quest with an embroidered silk treasure map that comes alive through a simple AR-like scavenger trail—no tech required, just imagination and a splash of glamour. It feels premium, playful, and perfectly suited for a special day.
Materials Needed
- Silk or satin fabric in sea blues and greens
- Fabric markers or embroidery floss for map lines
- Gold or pearlescent accents (stitch-ons or fabric paint)
- Small shells, faux pearls, and mapped stickers
- Cardboard backing to mount map
How to Make It
- Stretch fabric over the cardboard to create a smooth map surface.
- Draw coastline shapes with fabric markers; add embroidered paths and treasure marks in metallic threads.
- Affix shells and pearls along the coastlines as “treasures.”
- Roll or fold the map into a scroll with a silk ribbon to reveal clues as you unroll.
Pro Tips / Styling Ideas
- Hide small rewards at each clue location around the room to guide the journey.
- Decorate as a grand voyage—add a cardboard ship or a backdrop of painted waves.
- Laminate the map lightly or seal edges for durability if you plan a repeat session.
Who would love it or when to use it: Perfect for budding explorers and mini captains. It’s elegant enough for a “mermaid party” vibe and keeps the day feeling special without needing a real trip.
3. Mini Citrus-Crafted Florist Studio Kit

Who said flowers are only for grownups? This Mini Citrus-Crafted Florist Studio turns fruit-scents, citrus colors, and tiny arrangements into a boutique-style craft experience. It’s bright, fresh, and incredibly giftable as a keepsake or a cheerful centerpiece.
Materials Needed
- Mini glass jars or teacups
- Colored tissue paper and citrus slices (dried or faux)
- Floral wire or pipe cleaners
- Silk flowers or faux greenery
- Ribbon, twine, and small scissors
How to Make It
- Layer tissue and citrus slices inside jars for a sunlit glow when light hits.
- Twist floral wires into mini bouquets with greenery and attach a ribbon handle.
- Arrange the bouquets in a simple floral stand or tray for a 3D display.
Pro Tips / Styling Ideas
- Use these as a doily-dotted centerpiece on a dessert table or as party favors.
- Swap in pink grapefruit ribbons for a blush palette or lime for a fresh zing.
- Set up a “bouquet bar” where kids sculpt their own mini arrangements.
Who would love it or when to use it: Great for a sunny, artful afternoon and a bright room vibe. It’s particularly appealing to kids who love color and texture, and it makes a gorgeous gift when wrapped with a ribbon bow.
4. Luxe Marble-Print Shadow Boxes

Shadow boxes get a couture upgrade with marble print papers, metallic accents, and three-dimensional elements. This project creates a gallery-worthy piece kids can curate, swap, and rearrange—like their own mini art installation at home.
Materials Needed
- Wooden shadow boxes or deep frames
- Marble contact paper or DIY marble paint
- Mini trinkets: coins, charms, tiny figurines
- Gold or silver foil sticker sheets
- Adhesive dots or mounting putty
How to Make It
- Line the back panel with marble paper or paint to mimic a marble surface.
- Arrange mini trinkets in a pleasing composition, securing with dots or putty.
- Layer small metallic accents around the items for a luxe frame glow.
Pro Tips / Styling Ideas
- Swap in seasonal tokens (tiny seashells for summer, mini pinecones for fall).
- Group multiple boxes on a wall to create a dynamic gallery wall.
- Add a neon glow outline using a low-watt LED strip for drama.
Who would love it or when to use it: Ideal for a kid’s gallery wall reveal or a keepsake box to store small mementos from the day. It’s seriously chic and photo-ready.
5. Cloud-Soft Plush Pillar Fort
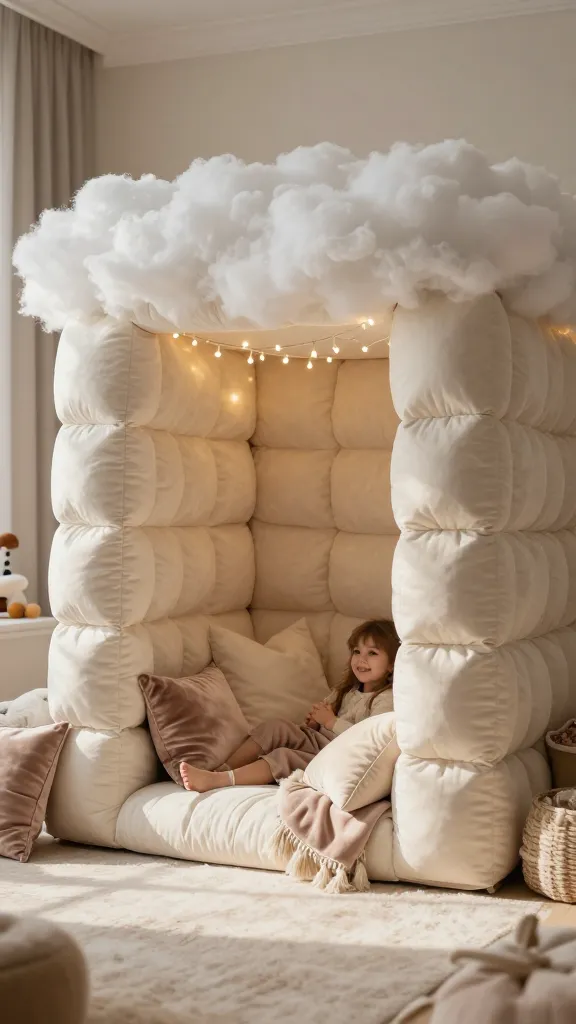
Transform the play space into a luxe, cloud-soft retreat with a plush pillar fort. It’s as cozy as a boutique hotel lobby nook, yet totally DIY and kid-approved. This is comfort and style all wrapped in one Insta-worthy cocoon.
Materials Needed
- Long bolster cushions or rolled-up blankets
- Velvet or satin throw blankets
- Decorative tassels, faux fur throws
- String lights or battery-operated twinkle lights
- Soft floor mat or rug
How to Make It
- Line up cushions to form a square or rectangle fort base.
- Layer velvet throws across the top to create a cushioned ceiling and walls.
- Weave string lights inside for a gentle, magical glow.
- Finish with a plush rug and a few tassel accents at the entrance.
Pro Tips / Styling Ideas
- Create a tiny reading nook with feather-light cushions and a storybook prop corner.
- Place a music-friendly speaker nearby for a curated ambience playlist.
- Swap in light, removable decals to tailor the fort to any theme: fairy, space, or jungle.
Who would love it or when to use it: This is for the kid who loves cozy hideouts, reading corners, and luxe textures. It doubles as a perfect photo backdrop for a birthday or “special day” reveal moment.
6. Gourmet Play-Doodling Studio
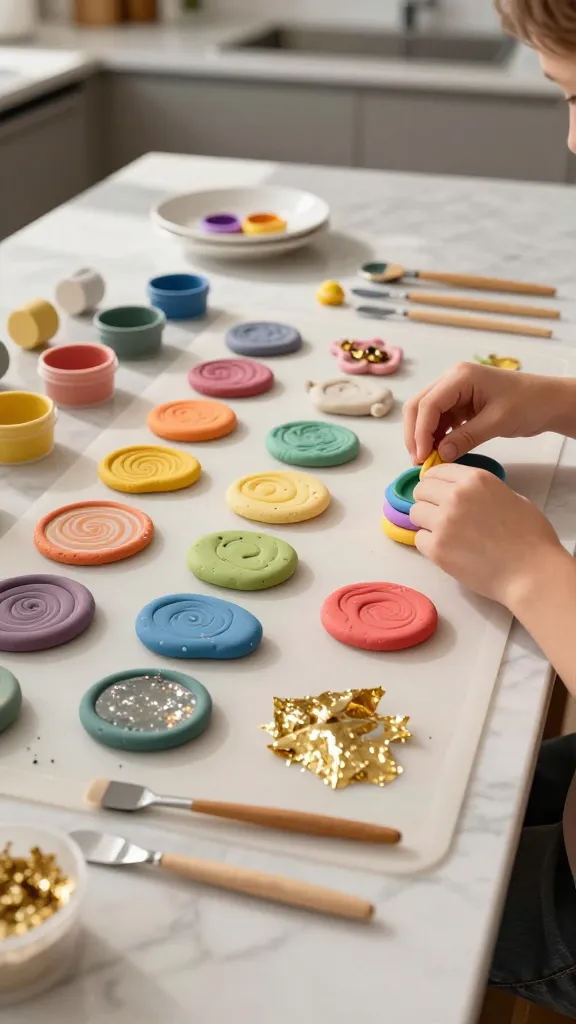
Last, but never least, a high-end twist on play-doh and finger-paint fun: a Gourmet Play-Doodling Studio. With edible-looking colors (safe, food-grade companions if needed) and artisanal textures, this setup feels like a fancy atelier right at home. The result? Art that’s both delicious to look at and delightfully tactile.
Materials Needed
- Air-dry clay in several colors or homemade doughs
- Edible-appearing colorants (food-safe) or gloss paints
- Gold leaf sheets or metallic mica powder
- Silicone mats or textured rollers
- Small rolling pins or smooth spoons
How to Make It
- Roll clay into tiny logs and build mini “desserts” or sculpted shapes with a glossy finish.
- Dust surfaces with a light sheen of mica powder to mimic ganache and glaze.
- Use the silicone mats to imprint textures—like marble, ridges, or lace—for extra sophistication.
Pro Tips / Styling Ideas
- Set up a tiny dessert bar with mini bowls and pretend toppings for display and pretend taste-testing.
- Create a “chef’s table” backdrop with a clean white tablecloth, gold chopsticks, and a small vase of fresh blooms.
- Seal finished pieces with a non-toxic glaze for shine and durability.
Who would love it or when to use it: Perfect for kid-art sessions that feel luxe, or a pretend chef party where guests display their edible-looking sculptures. It’s seriously satisfying to see the gallery-style display of finished works.
Conclusion
These 6 epic luxury kids activities at home prove you don’t need a big budget to create a day that feels special, polished, and super fun. Each project is distinct, highly giftable, and designed to spark imagination with a touch of elegance. Pick one to start, or dive into all six for a full-day creative retreat that’ll have your little ones cherishing the memories and you proudly pinning the photos. Go ahead—make it happen and let the luxe play begin. You’ll love this space-transforming, confidence-boosting, totally delightful day.