5 Cool Craft Ideas for an 8-Year-Old Boy
Ready for a burst of kid-friendly creativity that actually sticks? These five crafts are playful, easy to pull off, and crafted with an 8-year-old’s curiosity in mind. Trust me, they’re the kind of projects that ignite imagination and spark brag-worthy results.
Grab a table, a few supplies, and your best “let’s do this” vibe. We’ve got color, texture, and plenty of wow factor—perfect for a crafty Saturday or a rainy afternoon. FYI, you’ll love how quick and satisfying each one feels.
1. Dino-Detective Sand Tray Ambush

Picture this: a mini excavation site complete with tiny fossil finds and a wear-anywhere play mat. This sand tray doubles as a tactile science station and a heroic detective set, perfect for an 8-year-old’s big imagination. The finished piece looks rugged, colorful, and totally ready for a prehistoric mystery.
Materials
- Play sand or kinetic sand
- Small fossil toys or dinosaur miniatures
- Plastic tray or shallow tub
- Painted stones or shells for fossils
- Mini shovels and brushes
How to Make It
- Pour sand into the tray, smoothing the surface with your palm.
- Hide fossil toys beneath the sand and place a few surface fossils for quick hits.
- Create a mini “dig” area with a cardboard swoop and a tiny map as the backdrop.
- Sprinkle painted stones to resemble fossil discoveries, then set the toys in place.
Pro Tips / Styling Ideas
- Use a silicone mat under the tray for easy cleanup.
- Mask the edges with a brown fabric strip to give it a rugged, dig-site vibe.
- Rotate fossils weekly to keep the adventure fresh.
Who would love it: The curious explorer, the future paleontologist, or any kid who loves a build-and-discover vibe. It’s a tactile play station that doubles as a decor piece on a shelf when not in use.
2. Cardboard Rocket That Actually Works
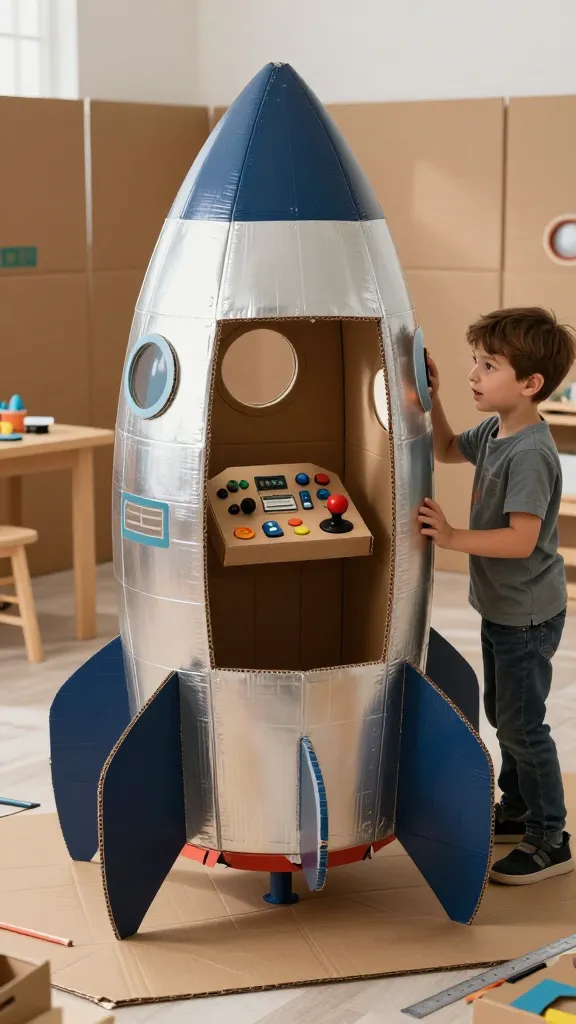
Turn a simple cardboard box into a fully functional rocket ship cockpit with a splash of metallic paint and a dash of imagination. This isn’t just a cute display piece; it’s a mini space station for pretend missions, complete with a control panel you can actually pretend to press. The result feels futuristic and totally publish-worthy for a kid’s room.
Materials
- Large cardboard box (or several smaller ones)
- Acrylic paints in metallic shades
- Foam stickers or craft foam for buttons
- Ruler, pencils, scissors (adult help)
- Battery-powered LED string lights
How to Make It
- Cut a doorway and a couple of windows in the box, then tape the pieces back for sturdiness.
- Paint the outside with metallic blue, silver, and black for a space-age glow.
- Decorate the control panel with foam buttons and painted dials on the front face.
- Line the inside with a soft mat and tuck in the LED lights to glow like a cockpit.
Pro Tips / Styling Ideas
- Spray adhesive can help keep craft foam buttons in place as you press them into place.
- Use a glow-in-the-dark paint for extra wow when lights are off.
- Position the rocket near a wall to cast stellar shadows for photos.
Who would love it: The future astronaut, the sci-fi fan, or anyone who enjoys a hands-on, upcycled project that turns a spare box into a stellar centerpiece.
3. Custom Superhero Shield Wall Art
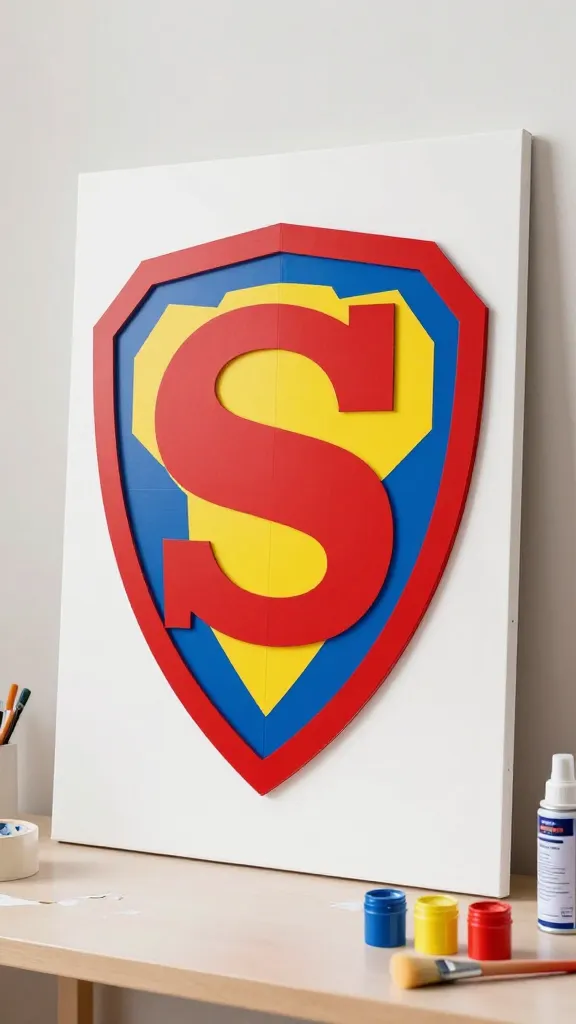
Every kid needs a personal emblem. Create a bold, color-blocked superhero shield you can hang or prop on a desk. It’s punchy, graphic, and instantly photo-friendly. Your kid’s name or initials can live right inside the shield for a truly personalized piece.
Materials
- Sturdy poster board or lightweight plywood
- Acrylic paints in primary colors
- Painter’s tape for sharp lines
- Foam brush set
- Clear sealant spray (optional)
How to Make It
- Sketch a shield silhouette and plan color blocks with painter’s tape for clean edges.
- Paint each color section, letting each layer dry before removing tape.
- Add the child’s initials or a simple emblem in contrasting color at the center.
- Seal with a light spray to preserve the bold look (optional).
Pro Tips / Styling Ideas
- Hang with a low-torque picture hook so it sits flush against the wall.
- Mix metallic and matte paints for a more dynamic shield.
- Pair with a few mini action figures to create a heroic display vignette.
Who would love it: The aspiring hero, the kid who loves bold colors, or anyone who wants a high-impact piece that doubles as room decor.
4. Nature-Mound Shadow Box World
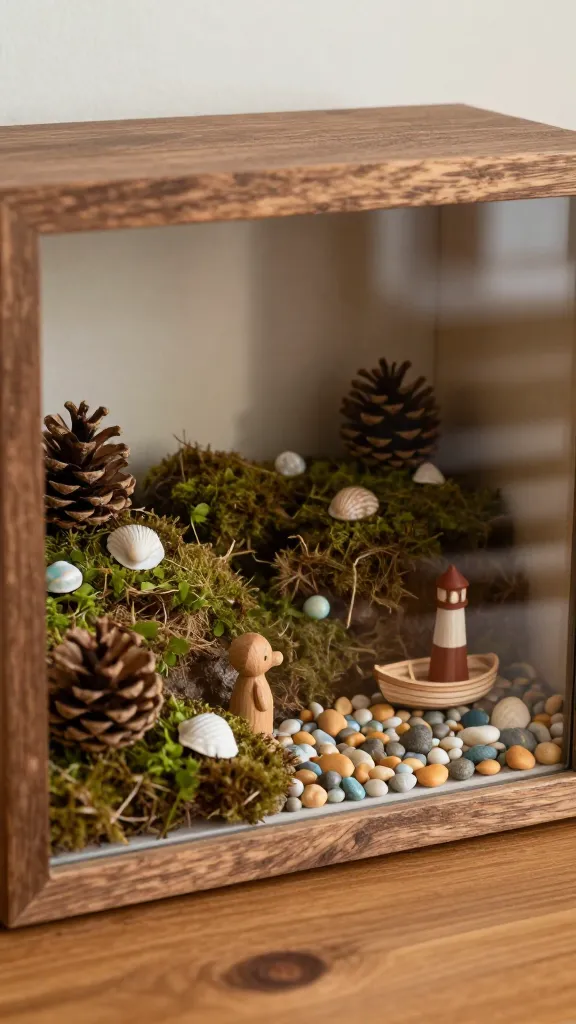
Turn a shallow shadow box into a tiny, land-and-sea micro-scape. Add pine cones, shells, moss, and painted pebbles to craft a little world that tells a story. The finished piece feels cozy, tactile, and perfect for a bedside display or desk nook. It’s also a great gift for grandparents who adore handmade keepsakes.
Materials
- Shallow shadow box (wood or plastic)
- Dried moss, small pebbles, shells
- Wooden figurines or clay animals
- Acrylic paints and brushes
- Hot glue gun or strong craft glue
How to Make It
- Glue a base layer of moss and arrange pebbles to form a tiny landscape.
- Glue shells along a shoreline or create a little river with blue paint or resin.
- Add small figurines or clay animals to bring the scene to life.
Pro Tips / Styling Ideas
- Use a sealant spray to protect delicate pieces and prevent shedding moss.
- Coat the inside of the glass with a light dusting of white paint to brighten the scene behind.
- Switch accents seasonally—think seashells in summer, pine cones in fall.
Who would love it: The nature lover, the soft-spoken crafter who enjoys cozy corners, or anyone who appreciates a retreat-worthy, miniature world on display.
5. Customizable Emoji Desk Organizer
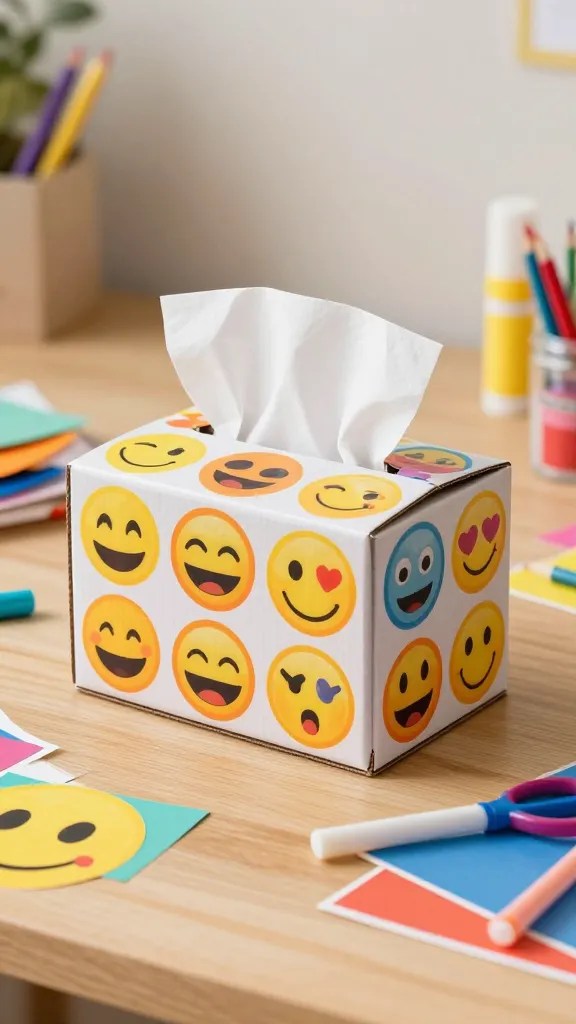
Who says desk gear has to be boring? Create a bright, emoji-inspired desk organizer from everyday supplies you already have. It’s a cheerful, functional piece that doubles as a conversation starter—and it’s surprisingly simple to customize with the kid’s favorite faces, colors, and themes.
Materials
- Cardboard tissue box or small cardboard box with lid
- Washi tape in multiple patterns
- Colored paper and markers
- Glue stick and scissors
- Acrylic paints for bold background colors
- Clear varnish or sealant (optional)
How to Make It
- Paint the outside of the box in a bright color as a base (or cover with washi tape for quick patterning).
- Cut circular shapes from colored paper to create emoji faces; glue to the lid and sides.
- Use markers to add details like eyes, mouths, and blush on each emoji.
- Fill the organizer with pencils, ruler, and scissors to show off its function.
Pro Tips / Styling Ideas
- Create a small “at-a-glance emoji” front panel showing the day’s to-dos for extra desk mojo.
- Mix in a few glitter accents or metallic tape for extra personality.
- Seal with a light varnish if you plan to use it daily and want durability.
Who would love it: The kid who loves making things personal, the desk warrior who needs a cute home for school supplies, or anyone who enjoys bright, feel-good organizers.
Conclusion
Five completely unique, completely doable crafts that celebrate an 8-year-old boy’s curiosity and energy. Each project is designed to be visually striking, simple to finish, and totally Pinterest-worthy, with a playful twist that keeps the process fun from start to finish. So, which one will you try first—or will you dive into all five and turn a weekend into a mini-craft festival?