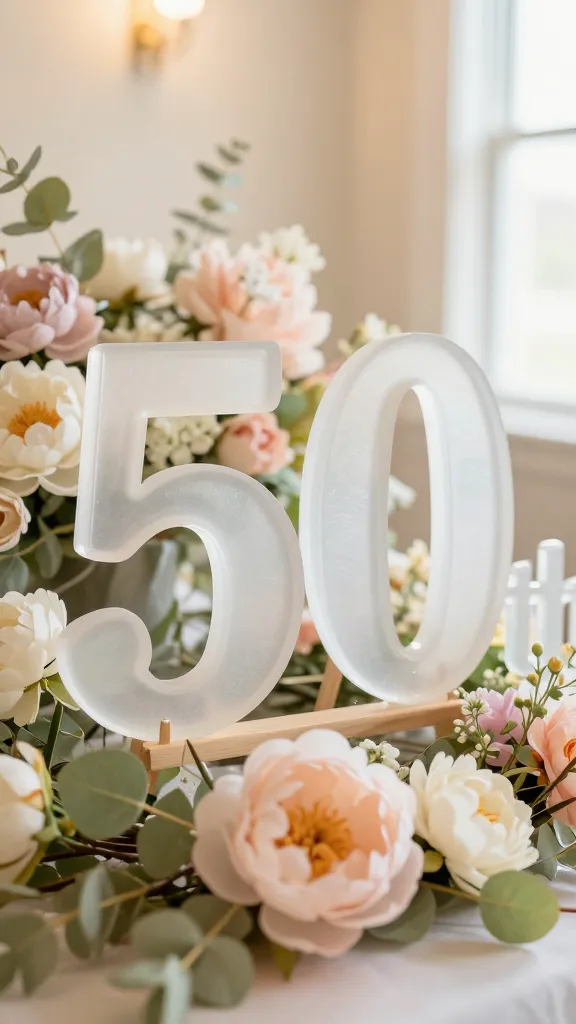
5 Memorable 50th Birthday Craft & Decor Ideas
Ready to turn the big 5-0 into a playful, photo-worthy moment? These five completely unique DIY ideas blend charm, sentiment, and a dash of whimsy—perfect for a milestone you’ll proudly showcase and remember. Trust me, your party will look like a Pinterest board exploded into real life.
1. Golden Time Capsule Photo Garland
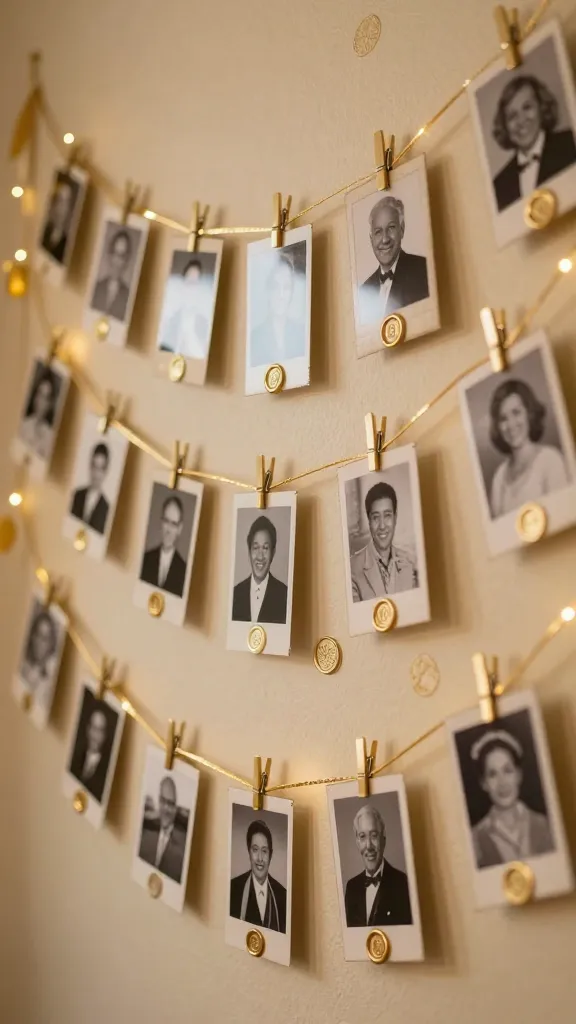
Picture this: a shimmering wall of memories, each photo a small treasure from the past five decades, strung with golden thread and twinkling accents. This project is as much about nostalgia as it is about wow-factor, and it doubles as a collectible keepsake for the guest of honor.
Materials
- Vintage-style photos (framed or cut to 3×5 inches)
- Gold or champagne satin ribbon
- Mini clothespins or gold-toned clothespins
- Assorted wax seals, stencils, or metallic markers
- Hot glue gun and glue sticks
- Small glass jars or acrylic circles for date tags
How to Make It
- Arrange photos in a grid or cascading pattern on a long string of ribbon.
- Clip each photo with a small clothespin, leaving a bit of space between images for air and light.
- Seal dates or memories across the bottom of each photo with gold markers or tiny wax seals for a luxe touch.
- Hang the garland against a wall or across the dessert table backdrop for maximum photo-op impact.
Pro Tips / Styling Ideas
- Vary photo sizes for a dynamic, gallery-like vibe.
- Interleave small gold star confetti or miniature keys for added whimsy.
- Take a fresh batch of guests’ pictures during the party on a camera or phone to add later as a living update to the garland.
Who’ll love it: anyone who adores memory-keeping, scrapbook vibes, and that luxe, celebratory glow. It’s a centerpiece and a conversation starter rolled into one.
2. Bodacious Bottle Cap Montage Wall Art
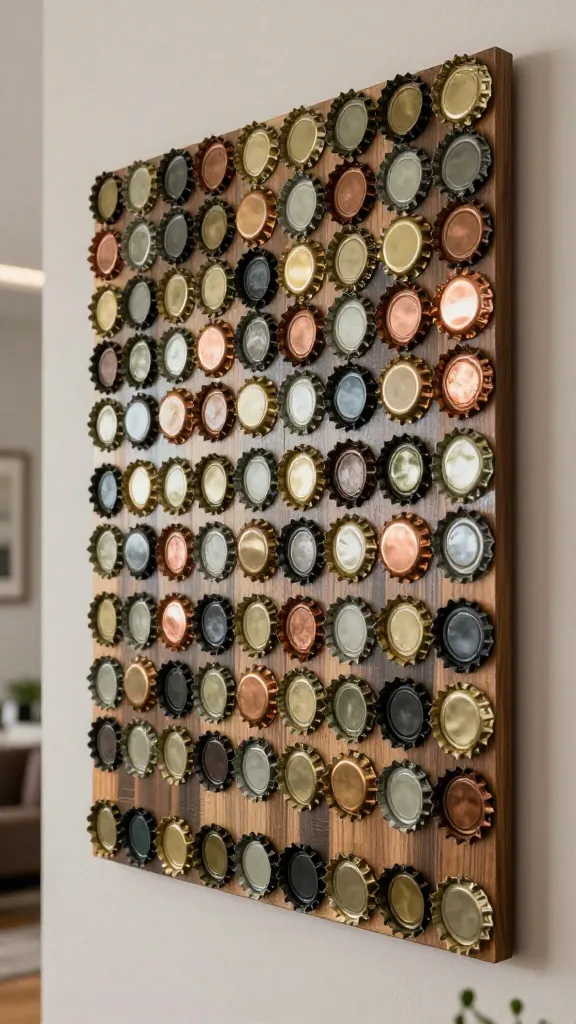
Turn everyday bottle caps into a bold, textural wall piece that screams celebration. This artwork is easy to assemble, endlessly customizable, and makes a striking focal point in a living room or hall entrance. It’s retro-chic with a modern twist, seriously.
Materials
- Assorted bottle caps (gold, bronze, copper, black)
- A sturdy wooden or canvas board
- Strong adhesive or hot glue
- Acrylic paint and brushes (optional for color cohesion)
- Acrylic gloss sealer (optional)
How to Make It
- Lay out a grid or organic cluster on the board to map your design.
- Paint the caps or leave their metallic sheen for a raw, industrial look.
- Glue caps in place, overlapping edges for texture, until the whole board reads as one bold mosaic.
- Seal with a gloss spray if you want extra shine and durability.
Pro Tips / Styling Ideas
- Center a large initial or celebratory word (like “FIFTY”) with contrasting caps or painted letters.
- Incorporate a few small photo inserts by replacing some caps with tiny frames—instant personalized art.
Who’ll love it: retro lovers, texture enthusiasts, and anyone who wants a statement piece that doubles as a memory capsule.
3. Light-Up Time Capsule Cocktail Table

Imagine a chic side table transformed into a glowing time capsule of the guest of honor’s life. LED tea lights, translucent resin, and curated trinkets create a centerpiece that’s both decorative and interactive. It’s functional, festive, and seriously stylish.
Materials
- Wooden or glass-tiber table base
- Clear resin kit or a shallow glass tray
- LED tea lights or fairy lights
- Small mementos (photos, ticket stubs, tiny souvenirs)
- Colored pigments or glitter (optional)
How to Make It
- If using resin, pour a thin layer to embed trinkets, then add lights just beneath the surface for a glowing effect. Allow to cure per instructions.
- Place LED lights around the tray and weave a few along the edges for halo lighting.
- Arrange mementos creatively, then top with a final resin layer or a glass cover to enclose everything.
Pro Tips / Styling Ideas
- Add a subtle color wash in the resin using safe pigments to tie into the party palette.
- Use a remote-control LED strip under the lip of the tray for adjustable ambiance.
Who’ll love it: hosts who want a functional, luminous centerpiece that sparks conversation and sentiment all at once.
4. Fifty Frosted Floral Letter Cutouts
Say it loud and pretty with frosted acrylic letters that spell out a favorite message or the guest of honor’s name. Layered with delicate florals, this airy installation brings elegance and whimsy to any room—perfect for a milestone that deserves a touch of romance and bloom.
Materials
- Frosted acrylic letters or cardboard letters with frosted contact paper
- Assorted faux florals (peonies, eucalyptus, ivy)
- Floral wire and hot glue
- Hanging cord or small easels
How to Make It
- Mount letters on a backing board or stand on small easels for a playful display.
- Attach florals with hot glue, creating a soft, cascading effect around the edges.
- Hang the arrangement on a wall or place on a mantle as a striking focal point.
Pro Tips / Styling Ideas
- Intermingle metallic accents (gold leaves or copper spray) to elevate the frosted look.
- Swap letters to spell a celebratory phrase like “Fifty & Fabulous” or “Cheers to 50.”
Who’ll love it: design lovers who adore typography, romantic florals, and that ethereal, candlelit vibe.
5. DIY Photo Mosaic Door Hanger
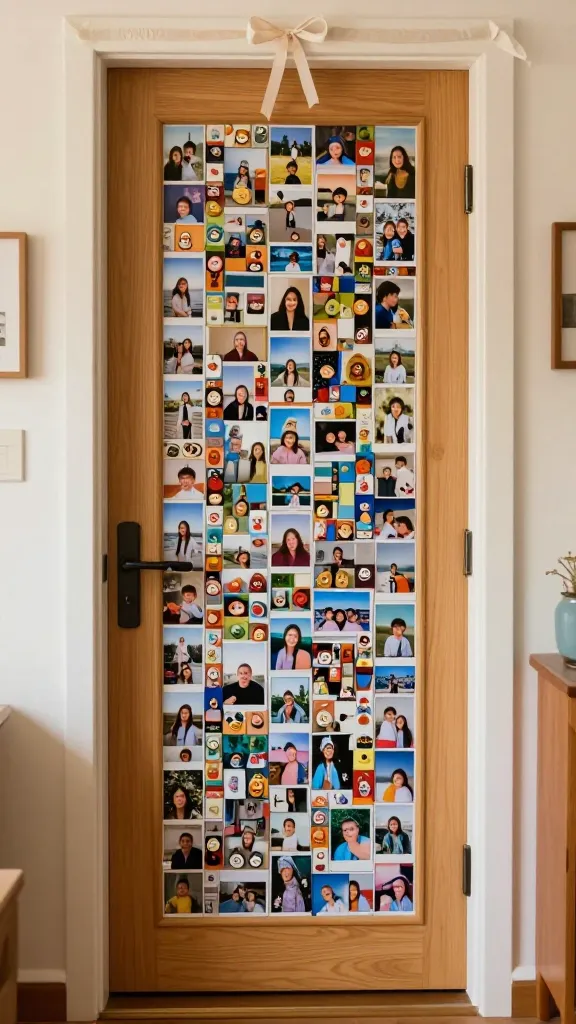
Turn ordinary doors into a gallery-worthy surprise with a mosaic made entirely from photos and tiny keepsakes. This project doubles as a playful welcome sign and a memory-rich backdrop for photos, hugs, and candid smiles. It’s a warm, interactive experience guests will want to replicate at home.
Materials
- Large lightweight board or wooden door panel
- Hundreds of mini photos or printed polaroids
- Craft glue or spray adhesive
- Scissors, a craft knife, and a ruler
- Decorative accents (ribbon, washi tape, tiny charms)
How to Make It
- Organize photos into a cohesive color story or theme before adhering.
- Fill the door with a dense mosaic, leaving small gaps to create texture and lightness.
- Add decorative accents to create pockets of sparkle and storytelling opportunities.
Pro Tips / Styling Ideas
- Cover edges with a thin border of washi tape to keep the mosaic tidy.
- Use a removable adhesive if you plan to reuse the door panel later.
Who’ll love it: memory-keepers, DIY mural fans, and anyone who wants a welcoming, photo-rich entryway piece.
Conclusion
These five ideas turn a 50th birthday into a creative playground—easy to execute, visually stunning, and personally meaningful. Pick one to start, or gather supplies for all five and spread the celebration across the home. You’ll finish with décor that’s proudly yours, plus memories you’ll treasure for decades. Have fun, be bold, and remember: the best part is making it together.