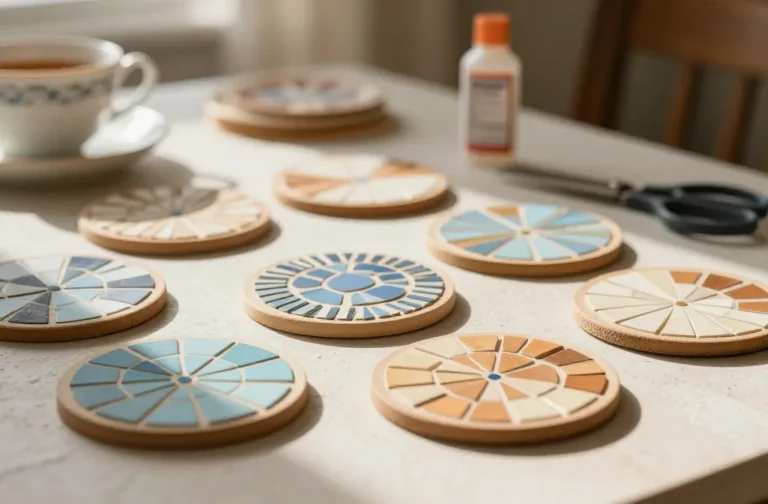
6 Easy Activity & Craft Ideas for 20-Month-Olds
Stuck on toddler activities that aren’t chaotic or fussy? You’re in the right place. These six DIY crafts are simple, sensory-friendly, and built for tiny hands and big giggles. Trust me, your 20-month-old will be begging to do them again and again.
Here’s the scoop: each project is fully distinct, printable-cute, and designed to spark curiosity without a huge mess. Ready to pick a favorite, or go all-in? Let’s dive in and get crafty.
1. Color Splash Sensory Bags: Weightless Watercolor Fun
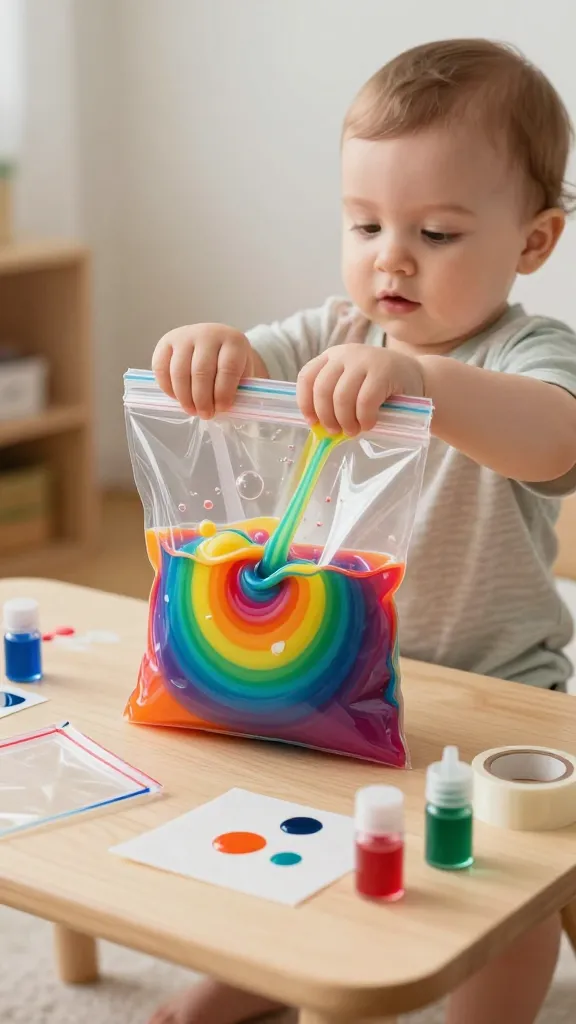
Imagine a liquid rainbow that your toddler can squish and squelch—without any spills. These Color Splash Sensory Bags are a delight for little explorers who love squishy textures and bold colors. The finished bag feels like a portable painting station that’s perfect for calm, screen-free play.
- Materials:
- Clear zip-top bags (quart size works well)
- Food coloring or liquid watercolor
- Water or clear gel food coloring
- Dish soap (optional for bubbles)
- Masking tape
- Optional: stickers or small waterproof trinkets
- How to Make It:
- Fill a bag with a few drops of color and a splash of water or gel. Add a tiny bit of dish soap for bubble pop, if you like.
- Squeeze out the air, seal securely, and reinforce the seal with masking tape around the edges.
- Let your toddler press, pat, and drag colors to blend. Tape the bag onto a smooth surface for easy viewing.
- Pro Tips / Styling Ideas:
- Create multiple bags with different color sets for a mini color wheel activity.
- Place the bag on a light-colored tray to make the colors pop visually.
- Add a few waterproof stickers around the edge to personalize each bag.
End note: This one’s a toddler magnet—great for quiet afternoons, car trips, or a quick sensory break. Your tiny artist will love the squishy, swirly magic, and you’ll love the mess-free moment.
2. DIY Texture Treasure Tray: Tactile Hunt for Tiny Fingers
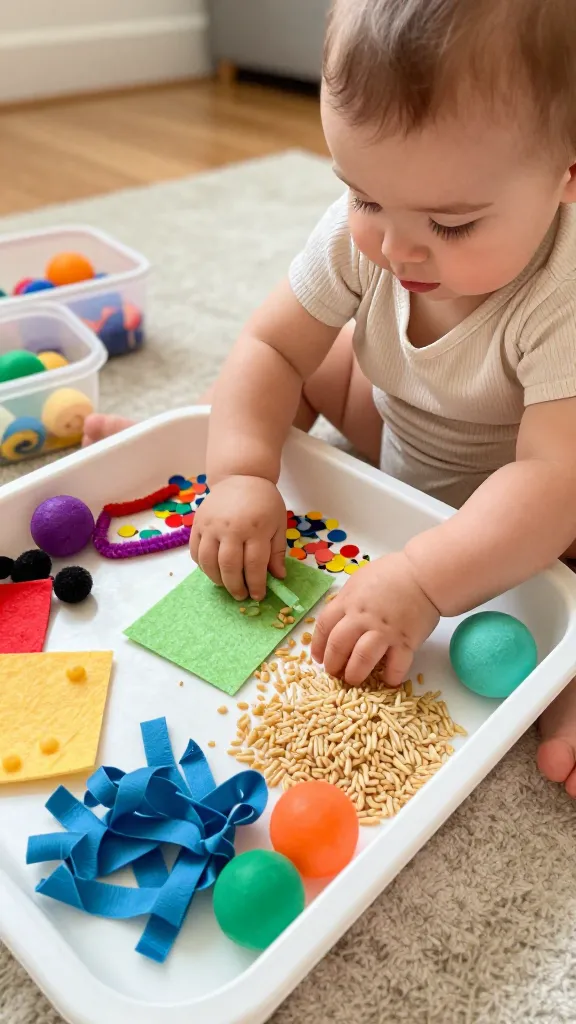
Texture treasure, assembled in a shallow tray—that’s what this project is all about. It’s a mini exploration station where your 20-month-old can discover crinkly, smooth, grainy, and bumpy surfaces. The payoff? A curious kid who’s learning through touch and play.
- Materials:
- Shallow plastic tray or baking sheet
- Felt scraps, fabric swatches, ribbon, and confetti
- Pipe cleaners, foam shapes, squishy balls
- Homemade or store-bought sensory items (like rice or pasta, cooked and cooled)
- Optional: small scoops or cups for transfer play
- How to Make It:
- Spread a base layer (rice, pasta, or beans) for crunch and sound.
- Arrange a few textures in separate zones to invite exploration.
- Add small, safe trinkets to encourage grabbing and independent investigation.
- Pro Tips / Styling Ideas:
- Keep items large enough to avoid choking hazards and supervise closely.
- Switch textures monthly to keep the tray exciting—think autumn leaves, cotton balls, or spiky pom-poms.
- Hide one favorite toy under a layer for a mini “treasure hunt.”
End note: A quick setup that fuels sensory processing while staying calm and organized. Your little detective will love the tactile journey, and you’ll enjoy the peaceful focus it brings.
3. Garden-To-G Loop: Leaf Rubbing Cards for Tiny Artists
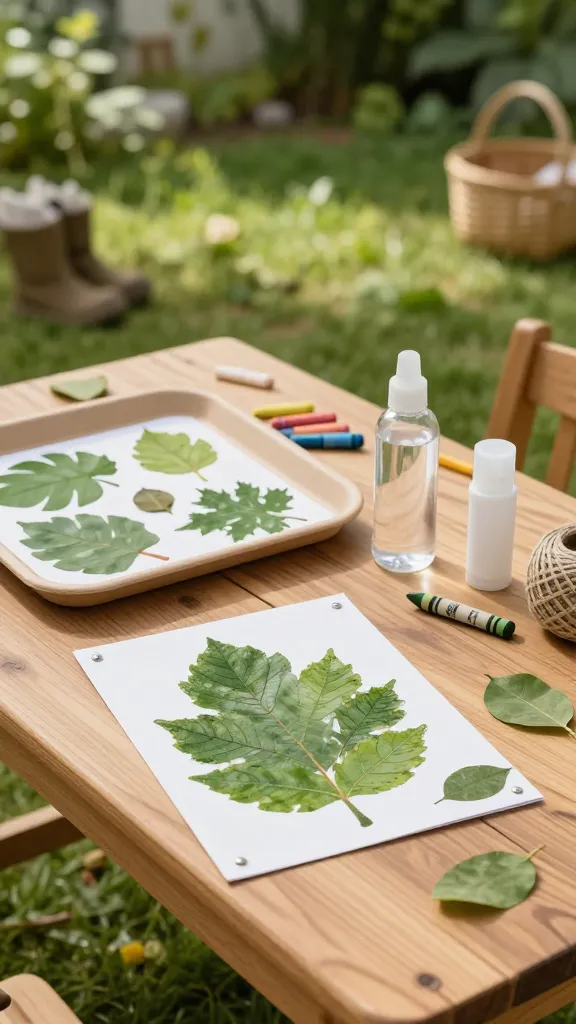
Leaf rubs meet its cuter cousin—these Garden-To-G Loop cards celebrate nature in a safe, edible-friendly way that preschoolers adore. This project is perfect for a nature walk scavenger hunt or a cozy afternoon indoors when rain keeps you indoors. The result is a set of gorgeous, leafy art that doubles as functional decor later on.
- Materials:
- Simple leaf rub forms or thick paper
- Crayons with a flat edge or soft pastels
- Clear glue or tape for mounting
- Optional: twine for a mini wall hanging
- How to Make It:
- Have your child place a leaf under the paper and gently rub a crayon over the top to reveal the leaf’s veins and shape.
- Create multiple rubs on one card or mount them as individual cards in a small album.
- Seal with a light touch of glue if you want durability for a wall display.
- Pro Tips / Styling Ideas:
- Color-match the leaf tones to the season—golden yellows for fall, bright greens for spring.
- Laminate the cards for a durable, keepsake-grade craft.
- Bundle a mini “nature pack” with a card and a leaf scavenger list for future walks.
End note: It’s a leafy, calming activity that doubles as unique wall art. A perfect gift idea for a grandparent’s day or a nature-themed gallery wall at home.
4. Melted Crayon Drip Art: Colorful Creations With A Safe Twist
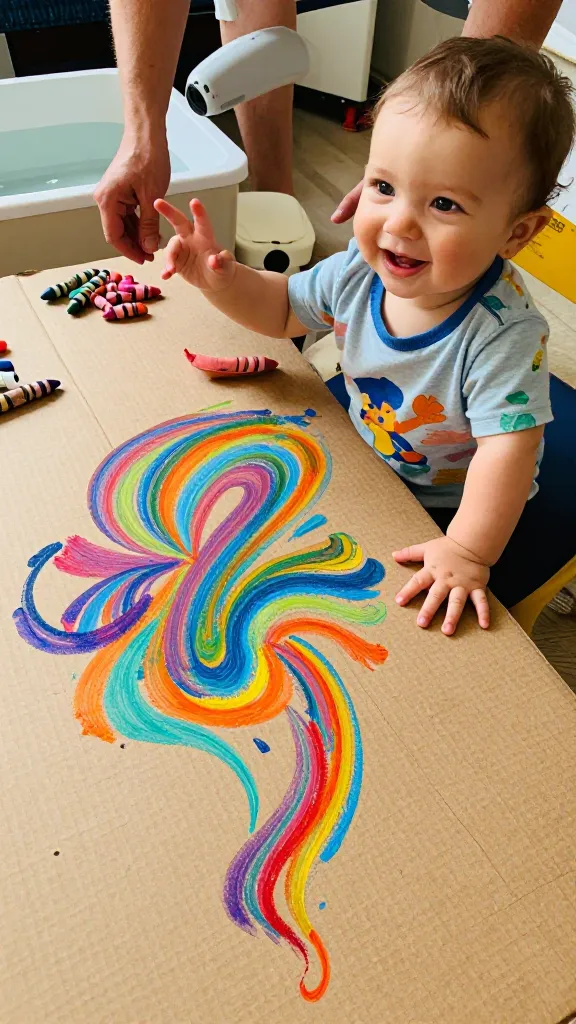
Who said heat has to be scary? This Melted Crayon Drip Art keeps things gentle and toddler-friendly, using warm water and a carefully supervised setup. The result is a vibrant, abstract piece that looks like modern art, but with the magic of tiny hands at work.
- Materials:
- Old crayons, peeled and snapped into pieces
- Rectangular canvas or sturdy cardboard
- Hair dryer or hot water bath for melted color (adult-only)
- Painter’s tape to section off areas
- Optional: washable markers for adding details after cooling
- How to Make It:
- Arrange crayon pieces in color blocks along the top of the canvas.
- Heat from a hair dryer or a warm water bath melts colors into gorgeous drips.
- Let cooled drips settle, then add little doodles with markers if desired.
- Pro Tips / Styling Ideas:
- Keep colors grouped in complementary pairs (blue with orange, purple with yellow) for visual harmony.
- Dress up the canvas with a thin frame or mount for a mini gallery vibe.
- Turn this into a gift-worthy piece for a family member—your toddler’s signature on the back adds charm.
End note: It’s bold, it’s bright, and it’s surprisingly easy. This is one you’ll want to display on a coffee table or tuck into a frame for a yearly “art from this year” wall.
5. Puffy Paint Circle Flowers: Soft, Cheery Blossoms
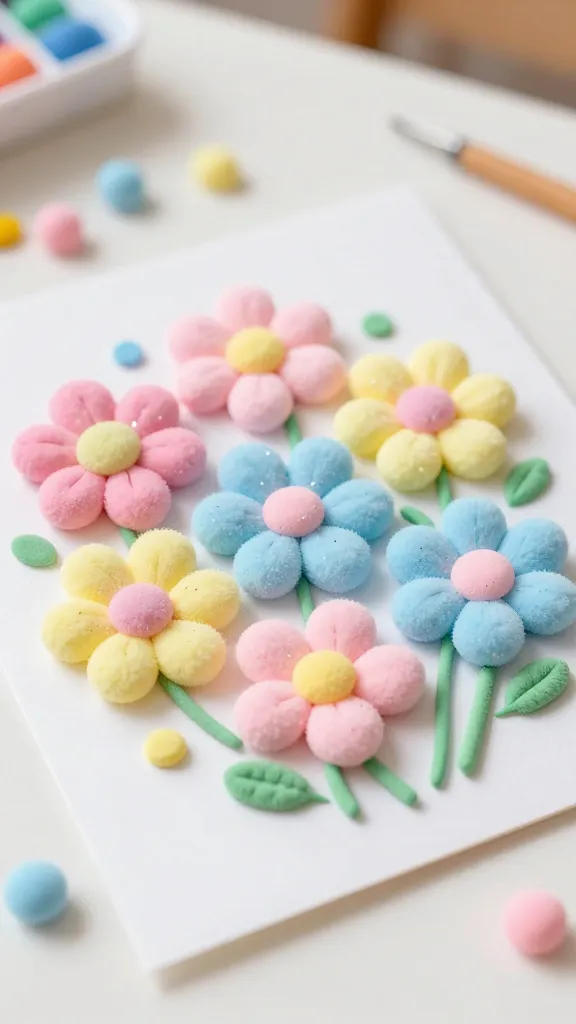
Bright, bouncy, and irresistibly soft to the touch, Puffy Paint Circle Flowers bring a tactile flower garden to life. This project is perfect for finger painting exploration with a gentle, non-gloppy texture that keeps the mess under control while unlocking motor skill power through dotting and stamping.
- Materials:
- Puffy paint or homemade air-dry paint (fluffy texture)
- Cardstock or thick craft paper
- Foam stickers or sponge dabbers
- Green pipe cleaners or thin pipe stems
- Optional: glitter or tiny pom-poms for centers
- How to Make It:
- Create a simple flower circle by dabbing puffy paint in a ring pattern and adding a center dot.
- Use foam stickers or a sponge dabber to stamp petals for variety.
- Attach a tiny pipe cleaner stem after the paint dries a bit.
- Pro Tips / Styling Ideas:
- Let the child choose color combos—this is their garden, after all!
- Turn finished sheets into a mini bouquet by binding with a ribbon.
- Use as gift wrap accents—mini flower cards on presents look adorable.
End note: Soft, squishy, and totally enchanting. It’s a lovable way to introduce color theory in a playful, approachable manner—plus you’ll adore the look of a little patchwork garden on your fridge.
6. Mini Matchbox Theater: Tiny Puppets, Big Stories

Turn a plain matchbox into a theater stage for tiny puppets and short, giggly stories. This craft is compact, wildly imaginative, and perfect for travel or quiet evenings at home. Your 20-month-old will love tipping the lid to reveal a tiny world, while you love the instant storytelling spark.
- Materials:
- Empty matchbox or small cardboard box
- Felt scraps, paper shapes, and glue sticks
- Googly eyes or tiny stickers for faces
- Markers or crayons for facial features
- Optional: fabric scraps for a cozy stage curtain
- How to Make It:
- Decorate the outside of the matchbox to look like a little stage.
- Craft two or three tiny puppets from felt, paper, and glue.
- Place puppets inside and put on a mini show—simple stories or favorite objects as characters.
- Pro Tips / Styling Ideas:
- Create a rotating “cast” by keeping extra puppets in a small bag for future performances.
- Encourage your toddler to narrate, then help them act it out with the puppets.
- Use the theatre as a bedtime storytelling prompt—short, sweet, and soothing.
End note: Tiny stage, big imagination. This one travels well in a bag for car trips or a quick, cozy activity before naptime. Your kiddo will adore the backstage magic, and you’ll love the sweet, silly stories that bloom from it.
Conclusion
All six ideas offer approachable, unique DIY experiences that fit a 20-month-old’s curiosity and budding motor skills. Pick one to start, or rotate through them to keep playtime fresh and fun. These crafts prove that kid-friendly art can be beautiful, low-muss, and seriously satisfying for both little hands and busy parents. You’ll love how easy they are to set up, and your little one will treasure the moment of creative discovery.
Ready to get crafty? Gather a few supplies, pick a project, and dive in. The joy, color, and tiny triumphs await—and FYI, you might just end up with a mini gallery of toddler masterpieces to treasure.