7 Clever DIY Key Holder Crafts for Your Entryway
Ready to give your front door a warm welcome? These 7 completely unique DIY key holder ideas are fun, fast, and totally Pinterest-worthy. You’ll love how a small project can organize chaos, add personality, and spark daily joy—trust me.
Let’s dive in and pick your favorite to start this weekend. Each idea is distinct, so you won’t get stuck choosing between similar options. Seriously, you might want to try them all.
1. Rustic Log-Slice Eco-Chic Key Rack
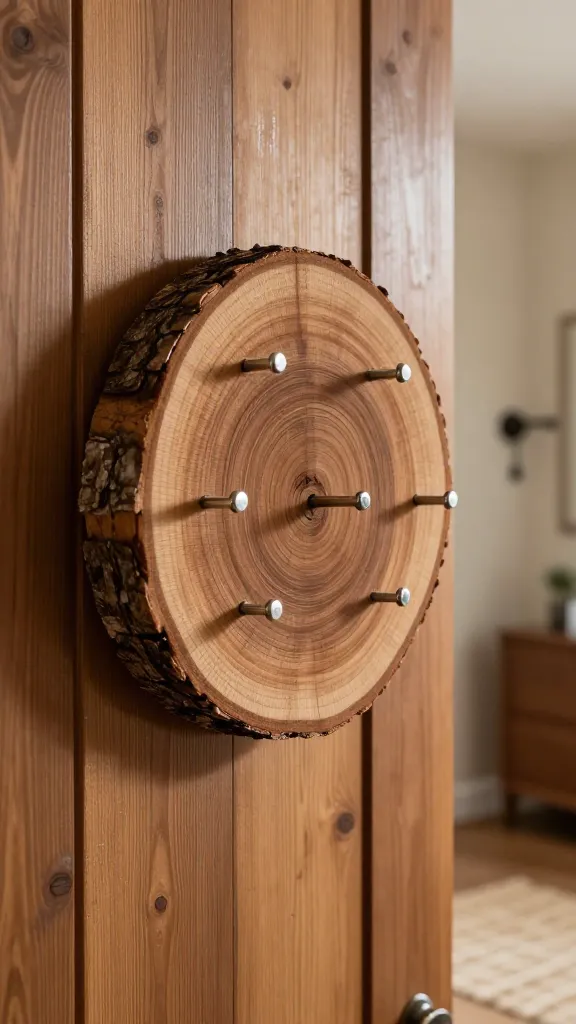
Picture this: a smooth log slice, metallic pegs, and a weathered finish that whispers cabin vibes. This key rack blends nature with modern simplicity, turning your entryway into a cozy, welcome nook. It’s sturdy, rustic, and surprisingly easy to pull off.
Materials
- One smooth log slice (drilled for pegs) or a wooden round
- 8–10 small metal curtain hooks or shelf pins
- Wood stain or paint (optional) and sealant
- Wall hanging hardware
Tools
- Drill with bit for pegs
- Sandpaper
- Paintbrush or cloth for staining
How to Make It
- Sand the log slice until smooth, then wipe clean.
- Mark evenly spaced holes and drill for pegs or hooks.
- Stain or paint the slice; seal once dry.
- Attach wall hardware and screw in hooks.
Pro Tips / Styling Ideas
- Finish with a clear matte seal for a rustic, long-lasting look.
- Pair with a small chippy sign that reads “Keys & Co.”
End note: Anyone who loves natural textures or farmhouse vibes will adore this. Perfect for a neutral-toned entryway or a cabin-inspiration corner.
2. Modern Magnetic Palette Key Organizer
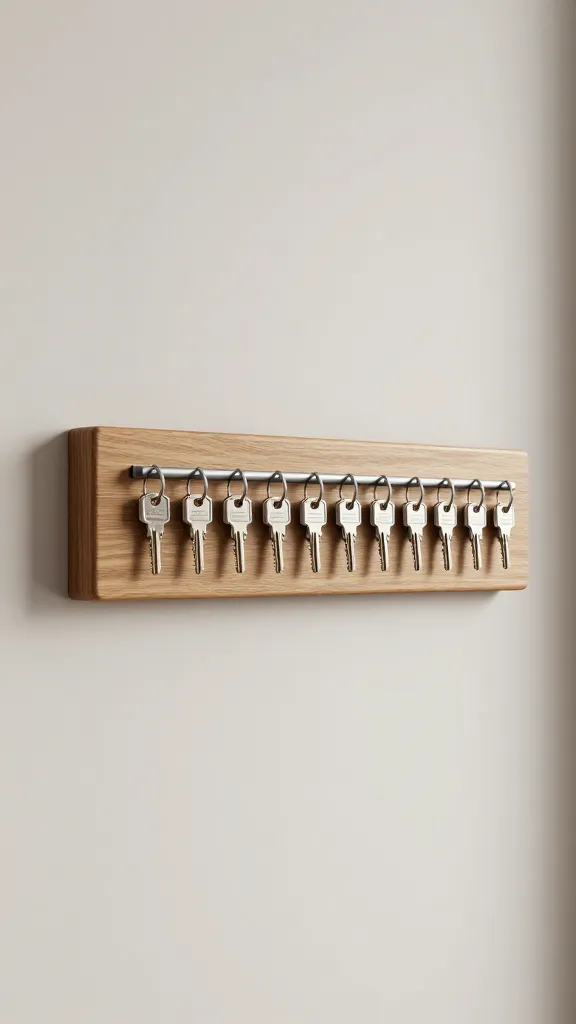
Imagine a sleek, low-profile board that not only holds keys but hides them in plain sight with a touch of magnet magic. This one is minimalist, functional, and seriously chic for small spaces.
Materials
- Thin wooden board or reclaimed pallet board
- Strong magnets or magnetic strips
- Decorative paint or vinyl letters
- Hardware for wall mounting
Tools
- Ruler and pencil
- Adhesive or hot glue
- Level
How to Make It
- Paint the board in a bold, modern color or leave natural.
- Apply magnetic strips in a row, spaced to fit standard keys.
- Add a catchy label or graphic with vinyl for a punchy look.
- Mount securely near the door with level accuracy.
Pro Tips / Styling Ideas
- Try a monochrome palette for a sophisticated vibe.
- Use mini photo magnets for a playful touch.
End note: This is for you if you crave clean lines, urban vibes, and space-saving genius. It doubles as a miniature notice board, too.
3. Upscaled Apron-Hook Gallery Key Wall
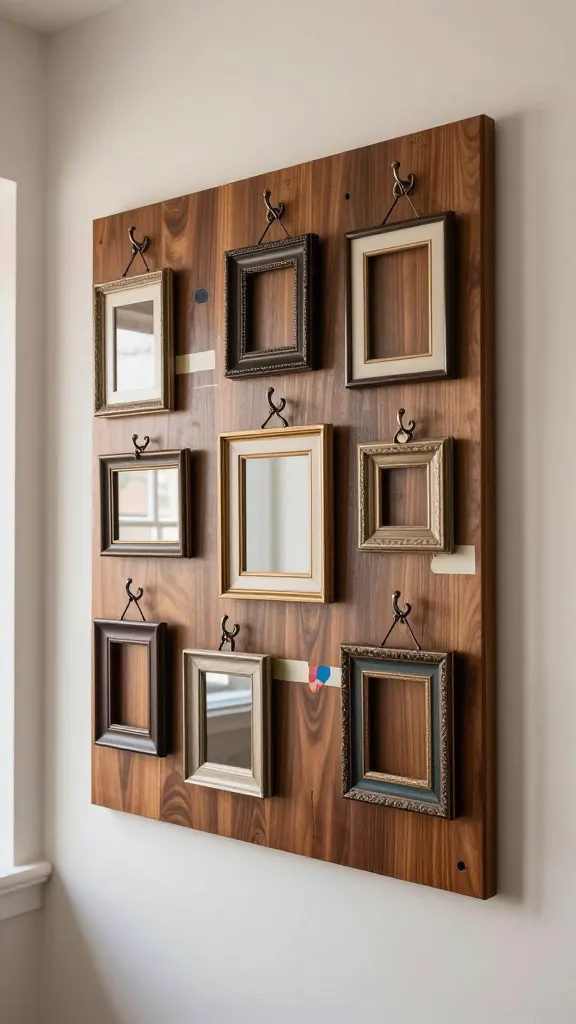
Turn a classic kitchen staple into a gallery-worthy key display. Think vintage apron hooks, a curated mix of small frames, and a splash of color to make your entryway feel like a boutique hotel lounge.
Materials
- Wooden plank or framed board
- Vintage-style apron hooks (or any decorative hooks)
- Small frames or repurposed trinkets
- Acrylic paint or wall decals
Tools
- Screwdriver or drill
- Painter’s tape
How to Make It
- Paint or seal the board with a color that pops against your wall.
- Arrange hooks in a visually pleasing pattern and screw them in.
- Hang small frames or trinkets between hooks for a mini gallery effect.
Pro Tips / Styling Ideas
- Use bright hues or metallic accents to catch the eye.
- Rotate items seasonally—mini prints, postcards, or tiny mirrors.
End note: This one’s for the art lovers and color enthusiasts who want a focal piece that’s practical every day.
4. geometric Pegboard Key Drop
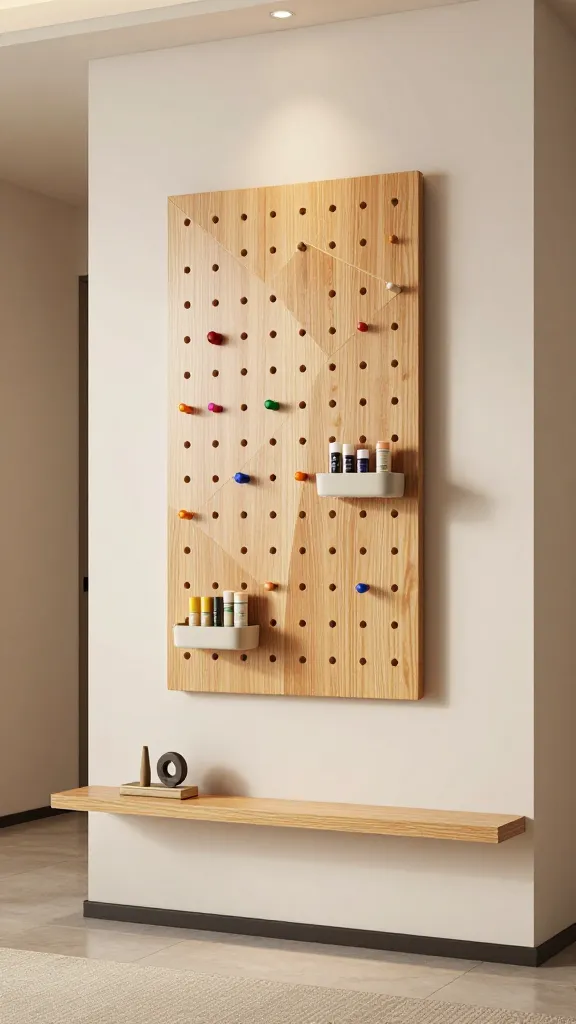
A playful geometric pegboard becomes both a design statement and a practical key hub. The open grid invites you to customize with color, texture, and small containers for spare mission-critical items—like lip balm or allergy pills—so you’re never hunting for keys again.
Materials
- Oak or birch pegboard
- Colored pegs or hooks
- Clear sealant or paint
- Wall mounting kit
Tools
- Measuring tape
- Level
- Hammer or drill
How to Make It
- Mount pegboard at your preferred height.
- Place hooks in a geometric pattern—triangles, lines, or hexagons.
- Add a pop of color with paints or vinyls on selected pegs.
Pro Tips / Styling Ideas
- Use color-coding for family member keys.
- Attach a small chalkboard section for quick notes, like “Lunch money.”
End note: Tech-savvy and artsy folks will love the modular vibe. It grows with you as needs change.
5. Upcycled Bottle-Top Wall Rack
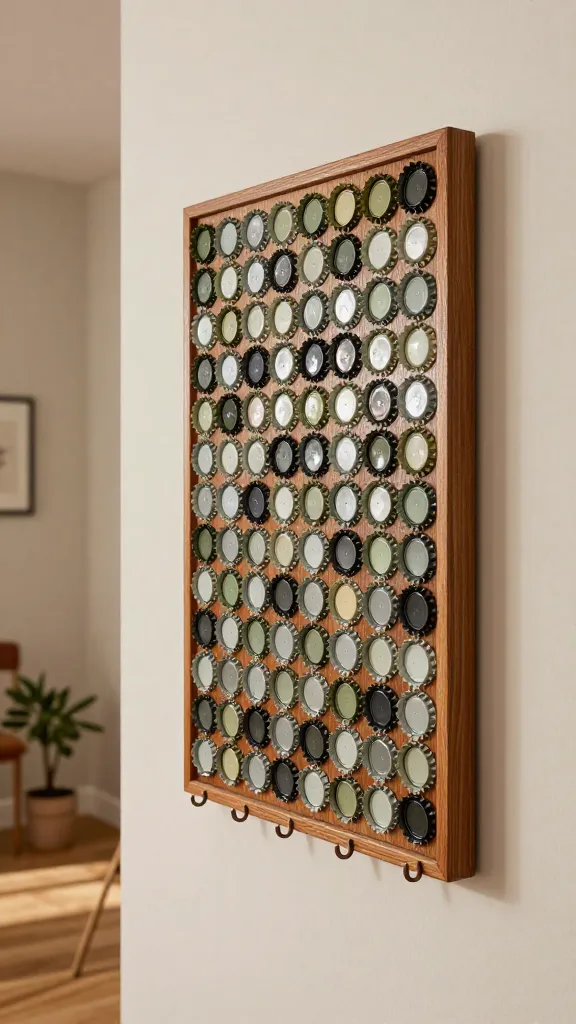
Turn everyday bottle caps into a quirky, conversation-starting key holder. It’s eco-friendly, punchy, and a great weekend project for recyclers and DIYers who love a good upcycle twist.
Materials
- Wood board or framed backing
- Assorted bottle caps (metal or plastic)
- Thin nails or short hooks
- Glue and sealant
Tools
- Hammer
- Pliers
- Drill (optional for screws)
How to Make It
- Arrange bottle caps in a decorative pattern on the board.
- Glue caps in place and seal to prevent rust or chipping.
- Attach small hooks or nails in the gaps for keys.
Pro Tips / Styling Ideas
- Paint the background board a bold color to make the caps pop.
- Use seasonal cap designs—holiday motifs add charm.
End note: A perfect project for a thrift-store haul and a playful, conversation-starting entryway piece.
6. Mini Chalkboard Key Command Center
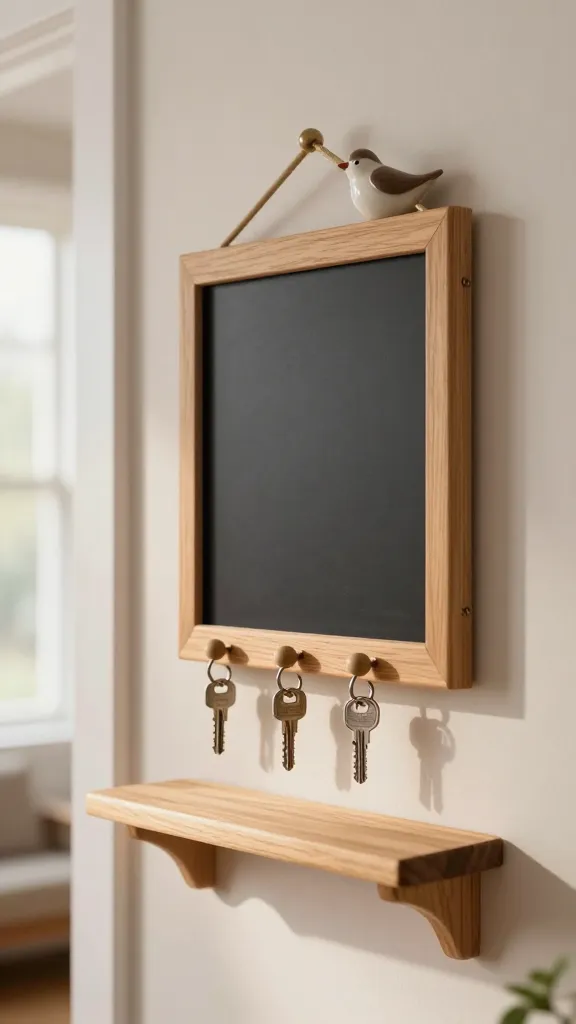
Functional, friendly, and a little whimsical, this mini chalkboard key center keeps everyone organized with a quick cue whenever you head out. It’s tidy, charming, and endlessly reusable.
Materials
- Small wooden frame with backing
- Mini chalkboard surface or paint to create a chalkboard area
- Hooks or tiny knobs
- Hanging hardware
Tools
- Chalk or chalk markers
- Screwdriver or drill
How to Make It
- Coat the back panel with chalkboard paint or insert a mini chalkboard piece.
- Mount hooks below the chalkboard area in a neat row.
- Hang on wall at eye level.
Pro Tips / Styling Ideas
- Label each hook with names or icons for quick cues.
- Seasonal reminders: “Take umbrella” on rainy days, “Mask up” during allergy season.
End note: Great for families, roommates, or anyone who loves a quick note before stepping out the door.
7. Nautical Rope-Wrapped Key Shelf
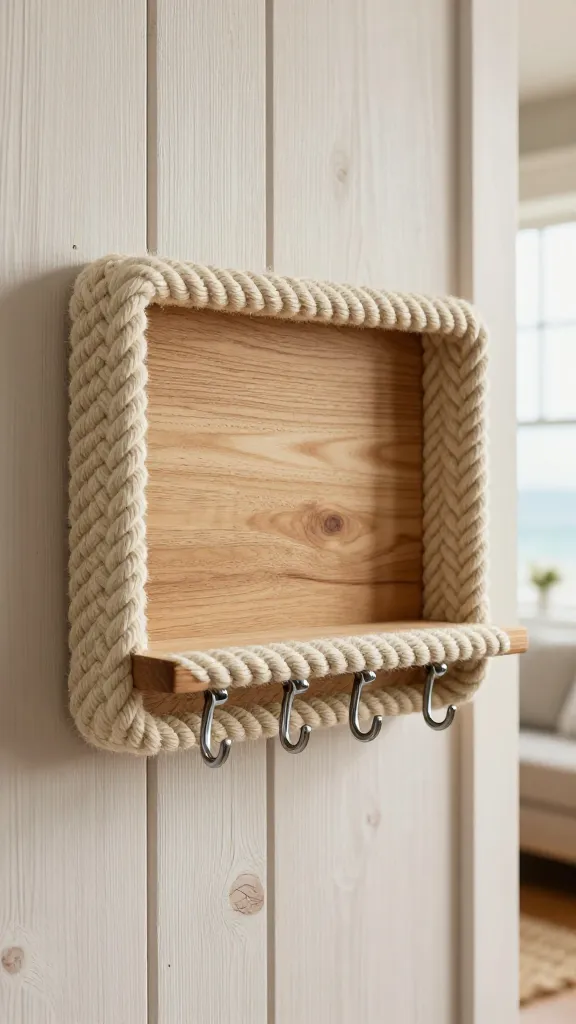
Bring a touch of the coast to your foyer with a rope-wrapped key shelf. It looks timeless, coastal, and incredibly tactile. Plus, the texture makes it a standout piece that begs to be touched and used daily.
Materials
- Small wooden shelf or plaque
- Thick nautical rope
- Small hooks or pegs
- Wood glue and sealant
Tools
- Scissors
- Hot glue gun or strong adhesive
How to Make It
- Wrap rope around the shelf edge, gluing as you go for a tight wrap.
- Attach hooks evenly along the bottom or front edge.
- Seal and hang near the door, ready for daily use.
Pro Tips / Styling Ideas
- Finish with a weathered whitewash for a breezy coastal feel.
- Pair with a small sea-glass vase or driftwood piece for a curated look.
End note: If you love texture and a hint of sea breeze, this one’s your match. It’s durable, charming, and endlessly photogenic.
Conclusion
These seven ideas are more than just places to stash your keys—they’re small upgrades with big impact. Pick the vibe that speaks to you, or mix and match across the season. You’ll probably fall in love with the process as much as the finished piece, and your entryway will thank you every time you walk through the door.
Ready to start? Grab a quick Sunday project, or bookmark this guide and tackle one each weekend. Either way, you’ll end up with a warm, organized, and seriously stylish welcome mat for every guest who visits.