7 Eco-Friendly Recycled Material Crafts for Kids
Ready to turn junk into joy? These 7 eco-friendly recycled material crafts for kids prove that cleanups can spark creativity. Easy, colorful, and totally Pinterest-worthy, they’re perfect for a weekend project or a sunny storytime activity.
1. Ocean-Themed Snack Tray Sentinels From Tin Cans
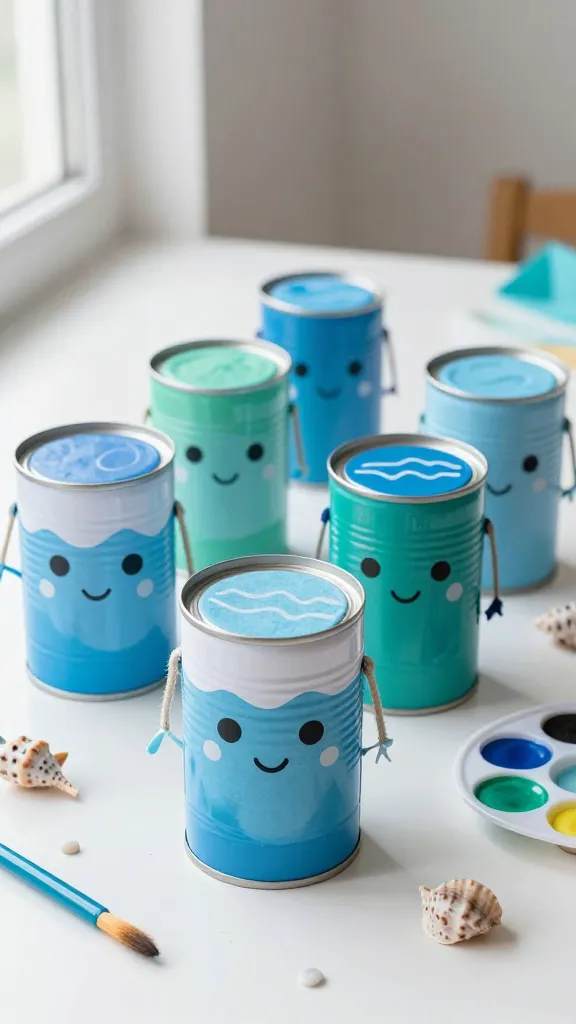
Imagine a little squad of ocean guardians perched on your table, cheering every snack break. That’s this project: sturdy tin can guardians painted with waves and friendly faces. They’re bright, durable, and totally reusable as desk organizers or party decor.
Materials
- Clean, empty tin cans (washed and dried)
- Acrylic paint in blues, greens, white, and black
- Paintbrushes (various sizes)
- Permanent marker or Sharpie
- Ribbon or twine for handles (optional)
- Stickers or recycled felt scraps for eyes and embellishments
How to Make It
- Smooth any sharp edges with sandpaper or a file for safety.
- Base coat the cans in a sea-blue shade and let dry.
- Paint waves, coral, or sea creatures with bright colors. Add faces with markers or felt pieces.
- Optional: tie a ribbon around the lip or add a label for “Ocean Guard.”
Pro Tips / Styling Ideas
- Use them as a snack tray set for a beach-themed party or lunchbox organizers at home.
- Group them on a tray with shells or faux sea-glass for a coastal vignette.
Who will love it / When to use
Young aspiring sea captains and crafty kids who love treasure hunts will adore these. They’re perfect for gift baskets or classroom centers.
2. Recycled Magazine Collage Fidget Bookmarks
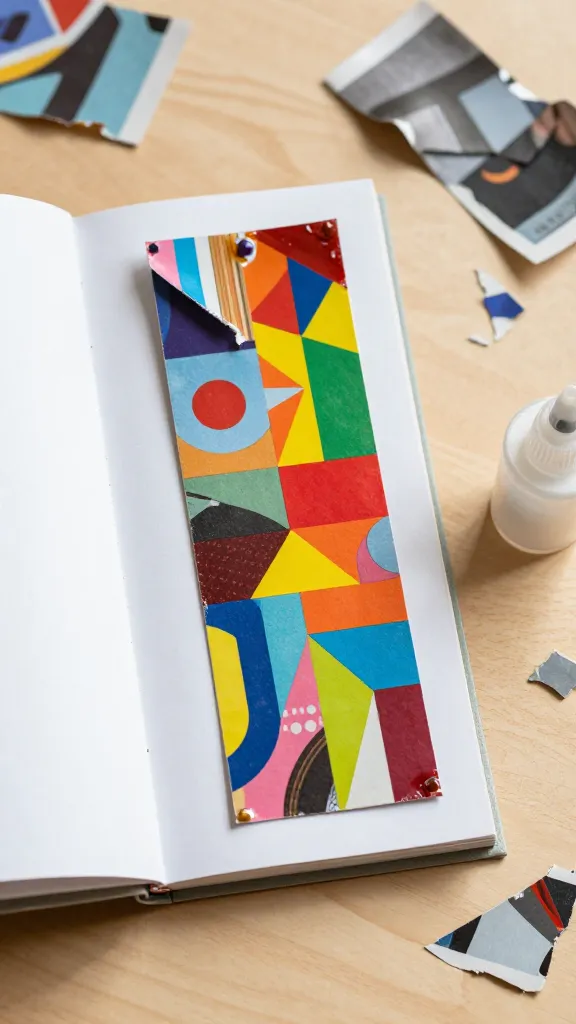
Colorful pages become a tactile treasure with this bookmark project. Each page is a tiny masterpiece—perfect for gifting or brightening a reading corner. Plus, it’s a hello to sustainable art that doesn’t require new supplies.
Materials
- Old magazines or junk mail
- Cardstock or sturdy cardboard scraps
- Glue stick or mod podge
- Scissors
- Clear tape or lamination (optional)
How to Make It
- Cut out bold color shapes, patterns, and words you love from magazines.
- Arrange on cardstock to create a mini collage strip (about 2 inches by 6 inches).
- Glue down and seal with a thin layer of glue or mod podge. Let dry flat.
- Optional: laminate or cover with clear tape for extra durability.
Pro Tips / Styling Ideas
- Make a rainbow set or seasonal themes (spring blooms, autumn leaves, etc.).
- Attach a slim ribbon on top for a quick tassel or bookmark string.
Who will love it / When to use
Little readers, library-lovers, and kids who want tiny art they can take anywhere will flock to these. They’re snack-time bookmarks and gift tags all in one.
3. Upcycled Sock Critters With Cardboard Homes
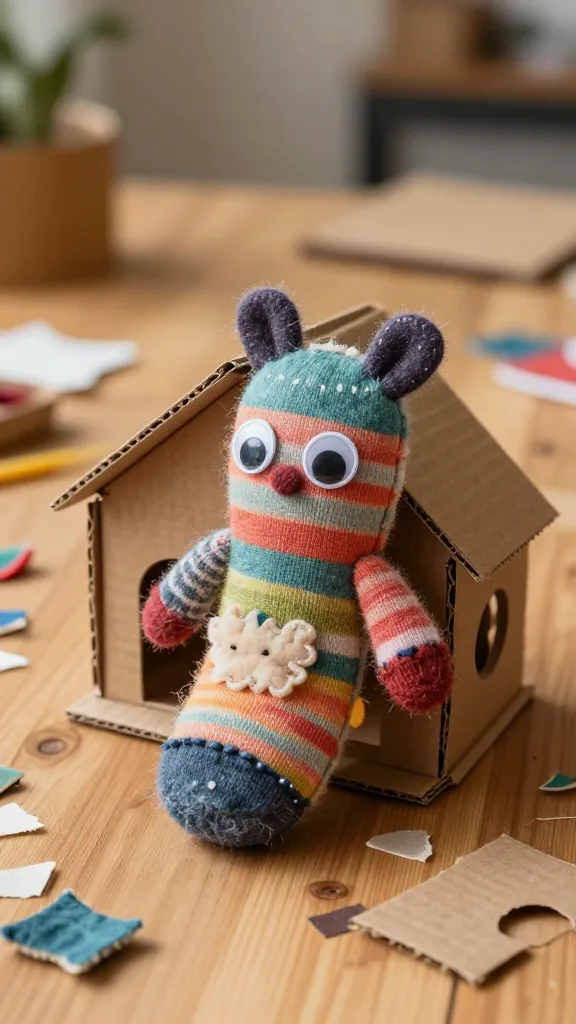
Who needs store-bought plush when you’ve got upcycled socks and a dash of cardboard? These soft, goofy critters turn old socks into cuddly pals, each with a tiny cardboard habitat that’s just as charming as the creature itself.
Materials
- Old socks (one per critter)
- Googly eyes or fabric markers
- Rice, beans, or cotton for stuffing
- Cardboard scraps (for mini houses or habitats)
- Glue or stapler
- Craft felt scraps for details
How to Make It
- Fill the sock with stuffing to desired squishiness; close with a knot near the top.
- Decorate the face with eyes and a mouth, using felt pieces or markers.
- Cut small cardboard doors, windows, or little huts; glue onto the sock base to create a habitat.
Pro Tips / Styling Ideas
- Give each critter a tiny name tag on its cardboard home for a playful storytelling twist.
- Arrange on a shelf or a “zoo” scene in a shoebox diorama.
Who will love it / When to use
Cuddly crafts for pretend play, classroom show-and-tell, or a cozy bedtime buddy. FYI, these are great for teaching kids about reusing fabric scraps.
4. Bottle Cap Stamps for Colorful Cards
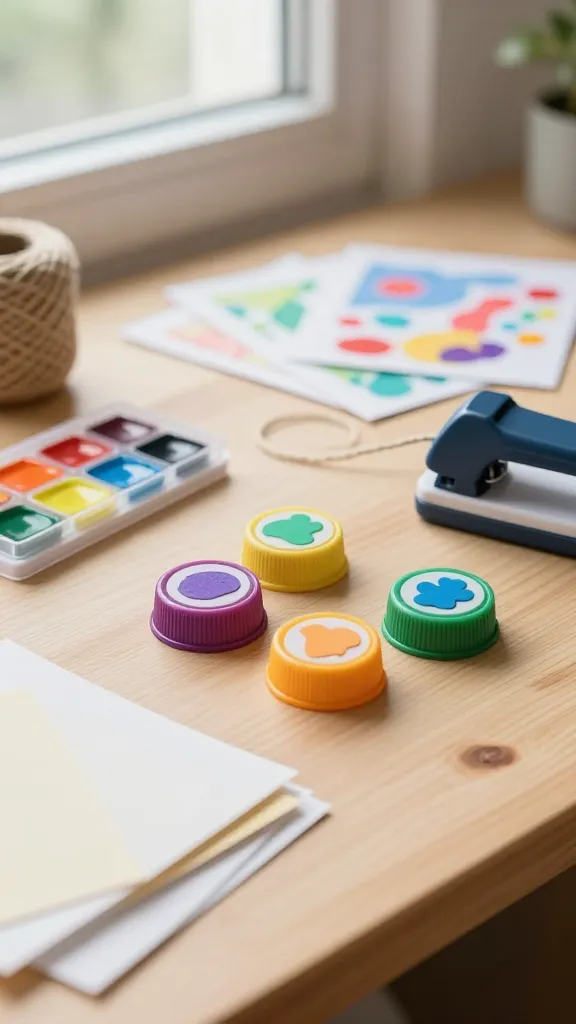
Stamping isn’t just for grown-ups—these bottle cap stamps turn leftover caps into tiny art machines. Create a mini-stamp set for greeting cards, gift wrap, or a simple scrapbook page. The best part? It’s a fast, mess-friendly project that yields big creative payoff.
Materials
- Plastic bottle caps or metal caps
- Foam stickers or glue-on shapes
- Acrylic paint or ink pads
- Cardstock or construction paper
- Hole punch and string for stamps (optional)
How to Make It
- Affix foam shapes to the inside of each cap to create different stamp faces.
- Dip the stamp into paint and press onto paper to make bold, circular patterns.
- Experiment with layered colors by re-stamping before the first layer dries.
Pro Tips / Styling Ideas
- Make a set of seasonal stamps (flowers, suns, leaves) for a quick craft kit gallery.
- Use bright colors to mimic a playful collage look in kids’ cards.
Who will love it / When to use
Perfect for birthday cards, thank-you notes, or DIY gift wrap. It’s a tiny project with a huge impact.
5. Cardboard Cityscape Playboard
Turn a thrift-store box or a cereal board into a tiny cityscape that doubles as a playboard and a wall display. This project blends architecture-inspired shapes with kid-friendly textures, making a statement on a shelf or a coffee table.
Materials
- One large corrugated cardboard box, flattened
- Acrylic paints and brushes
- Scissors or box cutter (adult supervision)
- Newspaper or tissue paper for texture
- Glue or mod podge
- Optional: bottle caps, straws, and fabric scraps for details
How to Make It
- Cut the box into a layered city skyline with varied building heights.
- Paint buildings in bright colors; add windows with a fine brush or markers.
- Glue on texture elements (crumpled newspaper for bricks, fabric for rooftops).
Pro Tips / Styling Ideas
- Place tiny toy cars or figures along the skyline to bring it to life.
- Hang the finished cityscape on a wall or fold it into a portable playboard for travel.
Who will love it / When to use
Young builders and mini-architects will gravitate toward this. It’s a fantastic school project display or a playful room decor piece.
6. Silk-Tissue Tulips in Recycled Jars
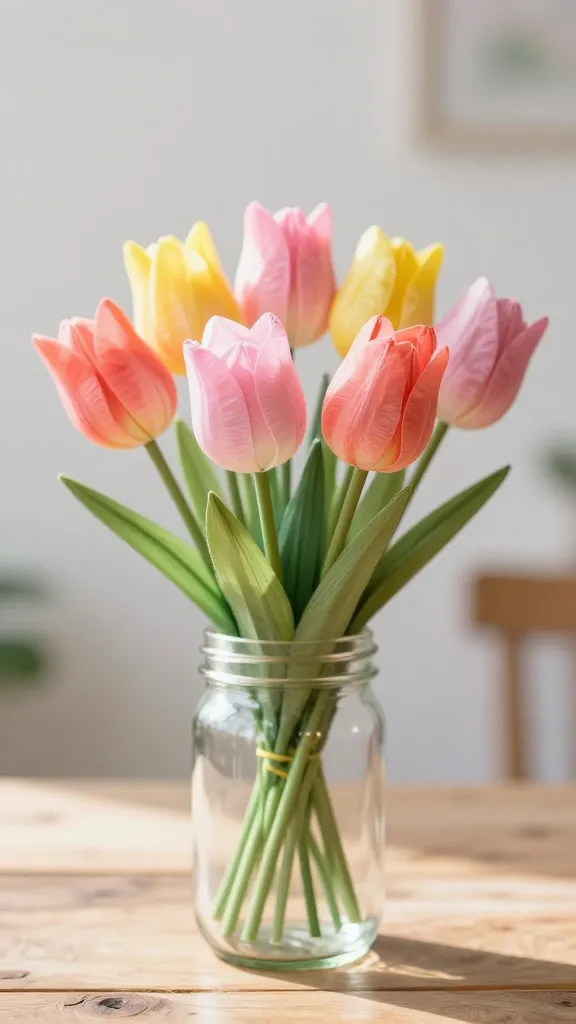
Bright, gentle, and wonderfully springy, these tulips bloom from humble tissue paper and a repurposed jar. They last longer than real flowers and bring a cheerful pop to any shelf or table. You’ll impress kids with how easy and pretty they look.
Materials
- Clean jars (mason or glass jars)
- Colored tissue paper in tulip shades
- Green pipe cleaners or craft stems
- Wire or thin floral tape (optional)
- Scissors and glue or tape
How to Make It
- Layer tissue paper and twist to form blossom petals; secure with a small dab of glue.
- Attach a green pipe cleaner to the base as a stem; twist into a tulip shape.
- Place the stems into the jar with a few drops of glue to anchor if needed.
Pro Tips / Styling Ideas
- Group several jars for a vibrant centerpiece on a table or mantle.
- Mix colors for a playful garden bouquet effect.
Who will love it / When to use
Great for spring decor, a mother’s day gift, or a bright “think pink” craft activity with friends.
7. Recycled Button Mosaic Coasters
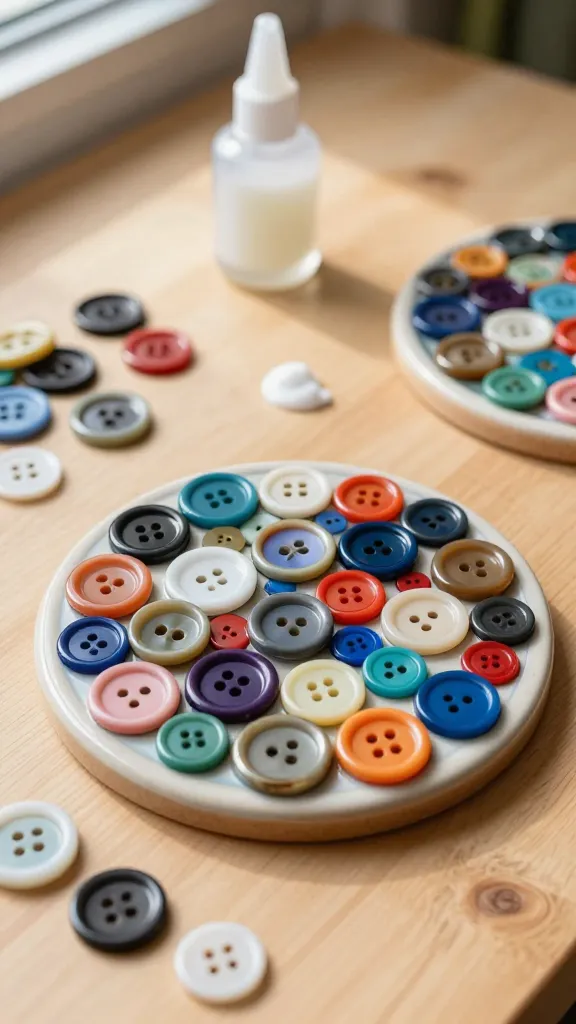
Buttons, buttons, everywhere—but this time they become art you can actually use. Gather old buttons from craft drawers and create a glossy mosaic that protects surfaces and looks adorable in a coffee nook or kids’ craft corner.
Materials
- Old buttons of various sizes and colors
- Flat ceramic or cork coasters
- White craft glue or hot glue (adult supervision for hot glue)
- Gloss sealer or mod podge
- Optional: small felt or cork backing for grip
How to Make It
- Arrange buttons in a pleasing mosaic pattern on each coaster base.
- Glue buttons in place; let dry completely.
- Seal with a coat of glaze or mod podge to protect and add shine.
Pro Tips / Styling Ideas
- Use a color theme (pastels, primary colors) for a cohesive set.
- Pair with matching napkin rings or a button-themed wall display.
Who will love it / When to use
These coasters make fantastic gifts for grandparents, teachers, or anyone who loves a handmade touch at the coffee table.
Conclusion
These seven crafts prove that eco-friendly can be exciting, colorful, and incredibly kid-friendly. Each project reimagines reused materials into something playful and useful, without extra trips to the store. Pick one (or all) and start a sustainable craft streak—trust me, you’ll love the creativity, and your space will thank you.